I know, I know – the idea of adding a little DIY office area at a vacation home seems borderline ridiculous, but back when we were debating what to add to the other side of the pantry, a bunch of people said a little desk area for email or writing or reading quietly would be nice to have in a rental. We definitely considered it, but went with more cabinets for general storage in there (you can see it here). But we kept the idea of adding a little desk nook somewhere else in the back of our mind.
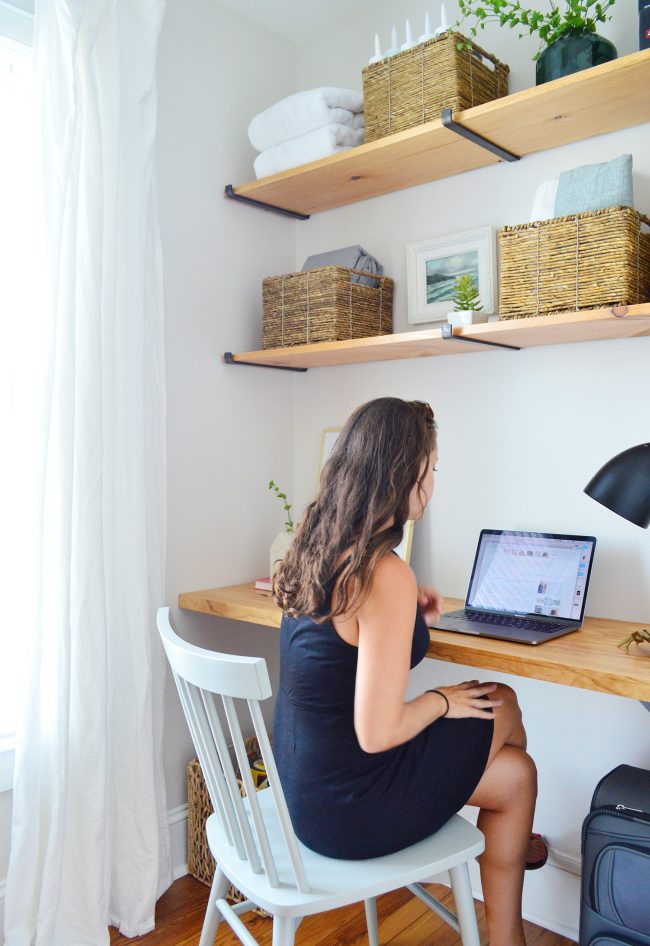
And if you get our email newsletter, you already know that we ended up opting to add a desk and some extra shelving to the small little upstairs front room – which also has room for a Pack & Play. It’s a small room, but man it’s packed with function. So we’re here to share exactly how easy the whole adding-a-desk-and-shelves thing was. Literally anyone can turn some unused wall space into a functional workspace that looks polished and built-in. And it doesn’t have to cost a lot or require a lot of complicated tools or building methods.
The room we’re talking about sits near the top of the stairs at the beach house and since it’s only about the size of a queen mattress itself, it never would have worked as a proper bedroom. I don’t really have any “before” photos of the room, but here’s the view into it when we first bought the house in fall of 2016:
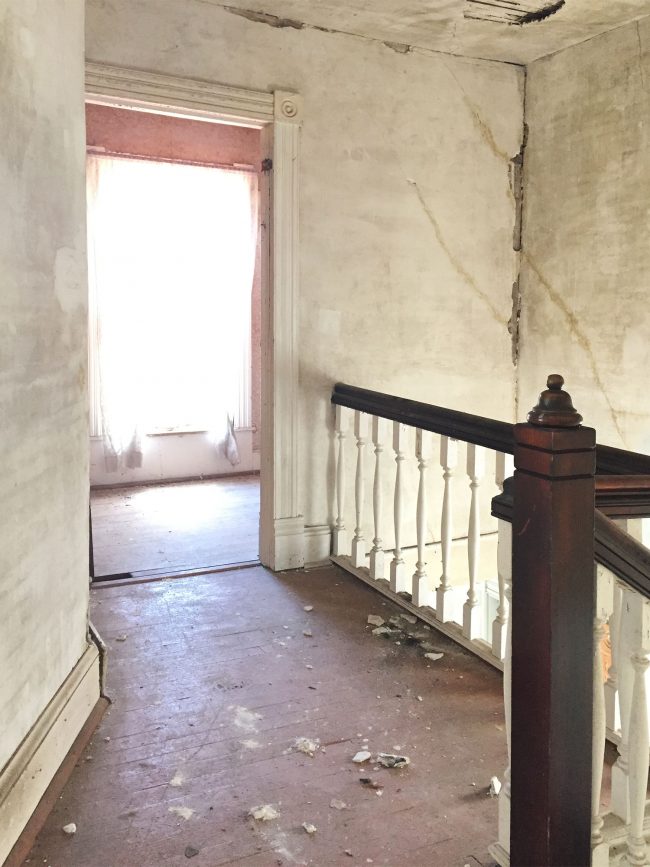
Below is the current view of it. We still can’t get over what a difference the refinished floors made (yes, the floors below are the same floors as the ones above – we just sanded them down and clear sealed them). It also probably helps that the walls and ceiling are no longer crumbling.

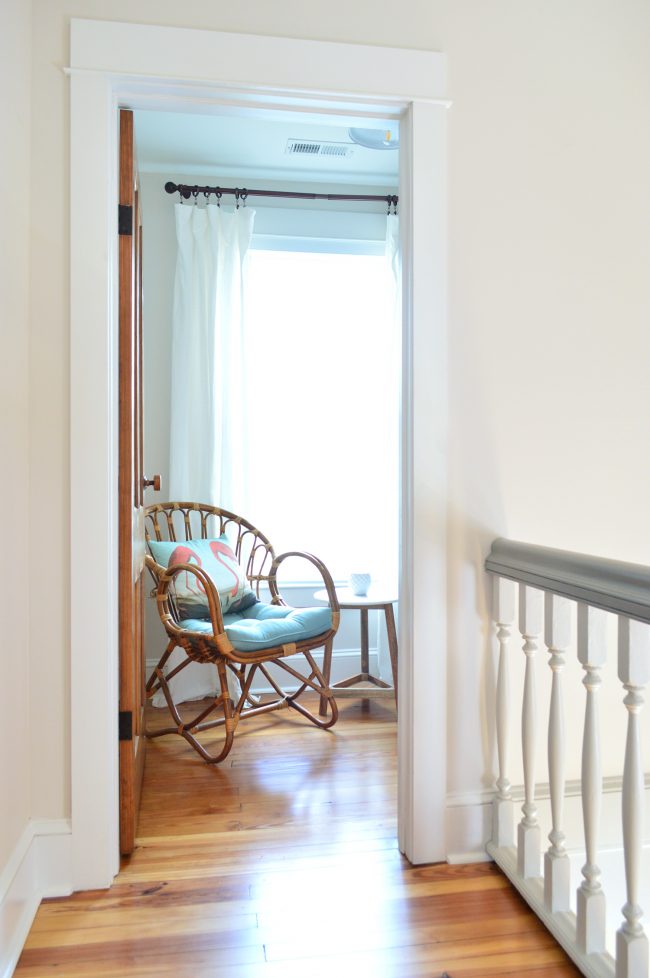
We’ve considered a ton of options for that room, including making it into a little reading/game nook or a spot to stash a Pack & Play for a sleeping baby (Sherry’s original votes) or a super practical storage closet (my vote) but until recently it had sort of just been a holding room for junk. But when Sherry’s brother visited in July, it finally proved that it was the perfect small sleeping space for a baby in a Pack & Play (the room darkening blinds definitely helped, along with having just the right amount of floor space).
We just move the chair and side table into the front bedroom and plop in a Pack & Play. You can read more about that in this past newsletter (and see a picture of it all set up in there).
Putting the Pack & Play in there temporarily also made us realize we would still have PLENTY OF SPACE on the inside wall for storage (again, my vote) AND a little desk so we’d no longer have to plop our laptop in the middle of the dining table. And the best part is that it only cost us $201. Here’s how we did it:
Materials & Budget
- Two 1″ x 18″ x 72″ planks of pine shelving – $40 (these are showing as $25 each online, but ours were $19 in store)
- Two 1″ x 12″ X 72″ common boards – $30
- One 1″ x 2″ x 72″ select pine board – $4
- Two 16″ heavy duty white shelf brackets & screws– $19
- Six decorative 12″ iron shelf brackets – $108
- Wall anchors (if needed)
- Wood stain, conditioner, and sealer – they’d be $24 but we already had ’em from the bunk beds
- TOTAL SPENT: $201 (or $225 to buy everything)
You may notice that the decorative iron brackets were more than half of our budget, so if you’re looking to do this for less – that’s a great place to save money. We chose these for consistency since we have them in our laundry room and love them, but these similar ones would save you about $30. And these slightly smaller ones would save you $45.
Making The Desk
The desk is actually hung on some basic heavy duty white brackets that we picked up in Home Depot. They aren’t intended to be a decorative element (we wanted them to visually disappear) so we mostly just chose them since they’d give us a nice deep desk space while being strong and easy to install. The 16″ depth was perfect for the 18″ shelving boards that we found to use for the desktop (actual width = 17.25″ because wood is never the size it says it is – seriously, a 2 x 4″ board is only 3.5″ wide!).
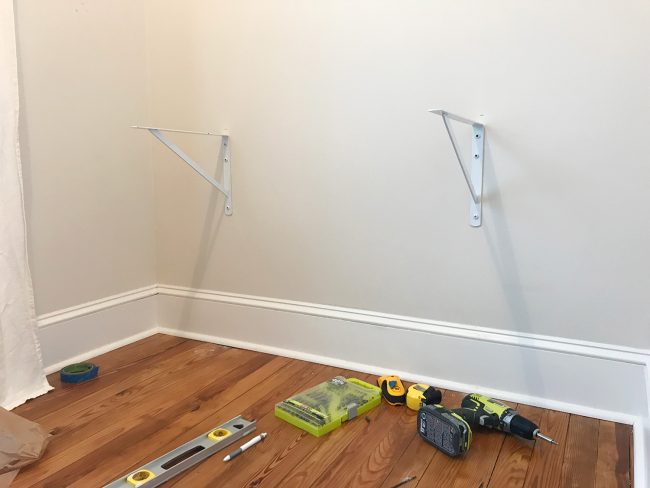
I used my stud finder to make sure I could go directly into the studs for the strongest hold. Because of that, they’re not exactly equidistant from the side walls, but they’re only a few inches off, and in a room this small you’ll never be standing straight on or far back enough to notice. You could use anchors though if bracket placement was more important for your project.
I hung them so the top of the bracket was 29″ from the floor, making the final desktop a hair over 30″ – which is pretty standard for most desks. Then, after cutting each of my boards to the right length, I laid them both on top of the brackets.
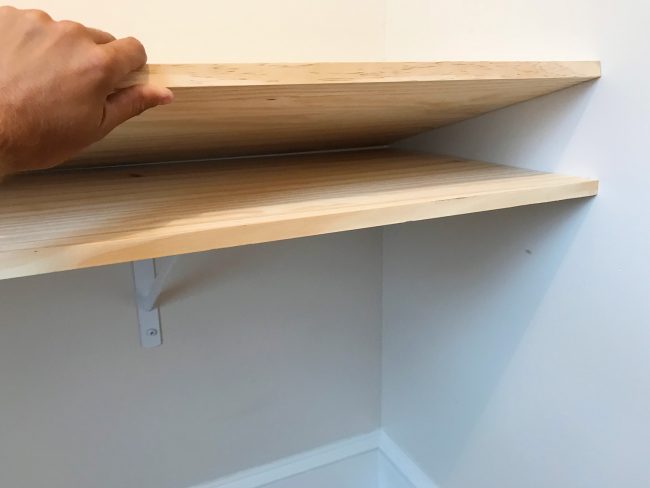
I used two pieces so that the desk would appear thicker than just 3/4″ – which is the actual thickness of each piece of shelving. Once everything was stained (which I’ll get to in a minute) I screwed the boards together from the bottom and then secured them to the brackets. And to cover the seam along the front edge, I nailed in a 1 x 2″ piece of pine that we stained to match.
It blends PERFECTLY with the rest of the top because the shelving already appears to be made of several smaller planks. So it gives the whole desk a really finished look (and makes it a smidge wider too – bonus!). My only tip is to sand the outside edges of this face piece before you stain it. The rounded edge will be much nicer on your wrists and forearms as you type… like I’m doing right now for this post.
Hanging The Shelves
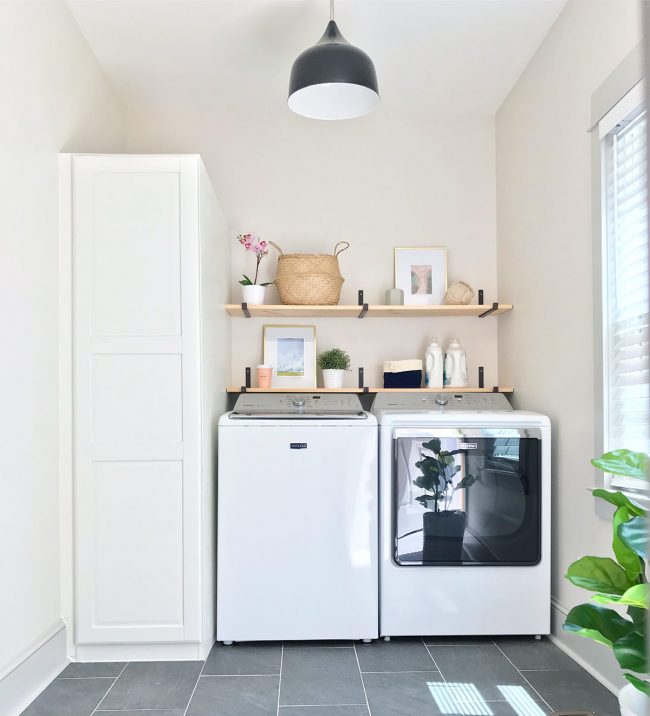
The reason for the shelving above the desk area was to inject that added storage element we wanted. We still have random junk around (extra bed sheets and towels, repair stuff like spackle and caulk, a few faucets we’re storing for the duplex, and instruction manuals/warranties for all the beach house appliances, etc) that we wanted a spot for. So we ordered more of the same iron shelf brackets that you may remember from our laundry room makeover (more on that room update here).
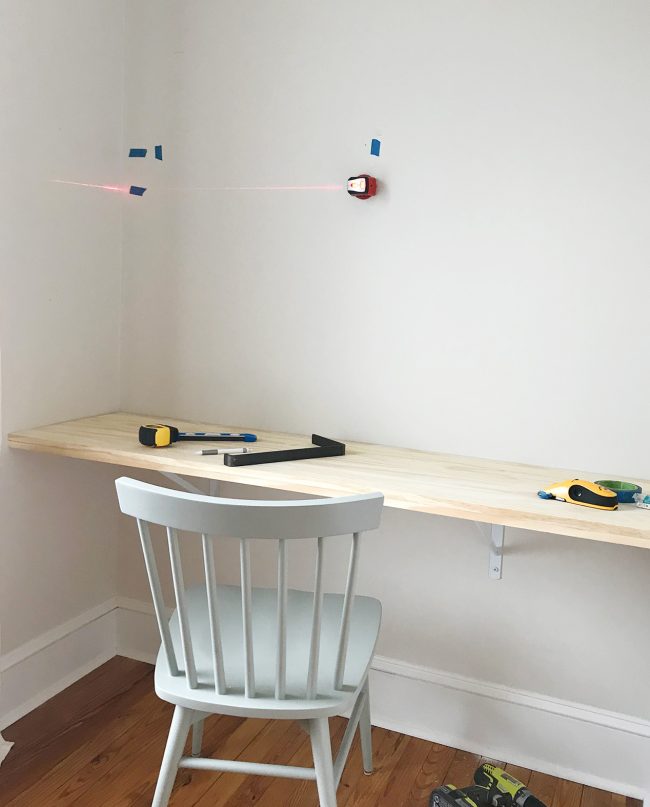
We hung the first shelf 26″ above the desk, which was somewhat arbitrary. It looked good and felt high enough that we wouldn’t knock our faces into it when we stood up. To secure it, I once again located the studs – one in the exact middle of the room (thank goodness!) and two at the outer edge. Then I used my laser level to mark level across the three locations.
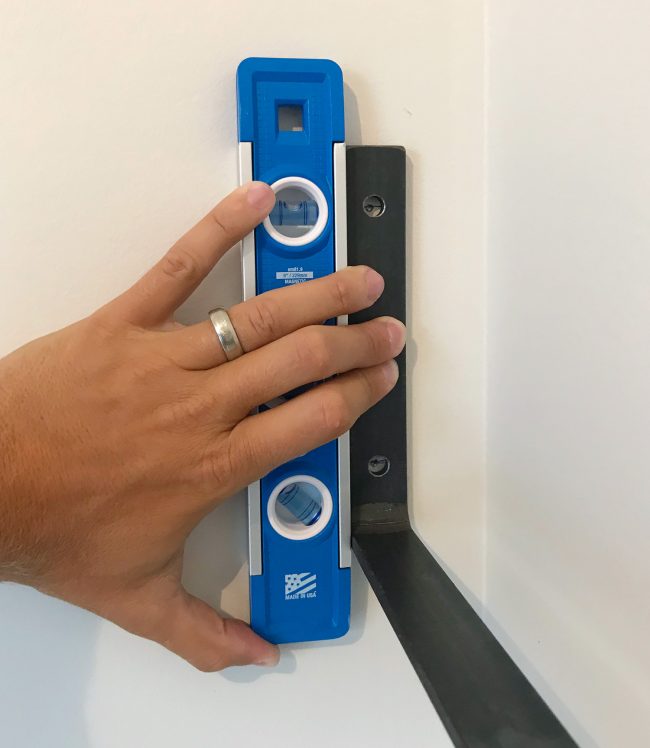
When hanging brackets like these, don’t forget to also level the bracket itself. Even on things like a robe hook in the bathroom, if you don’t take the time to level the spots where your screws enter the wall, you could end up with a twisted looking piece of hardware in the end.
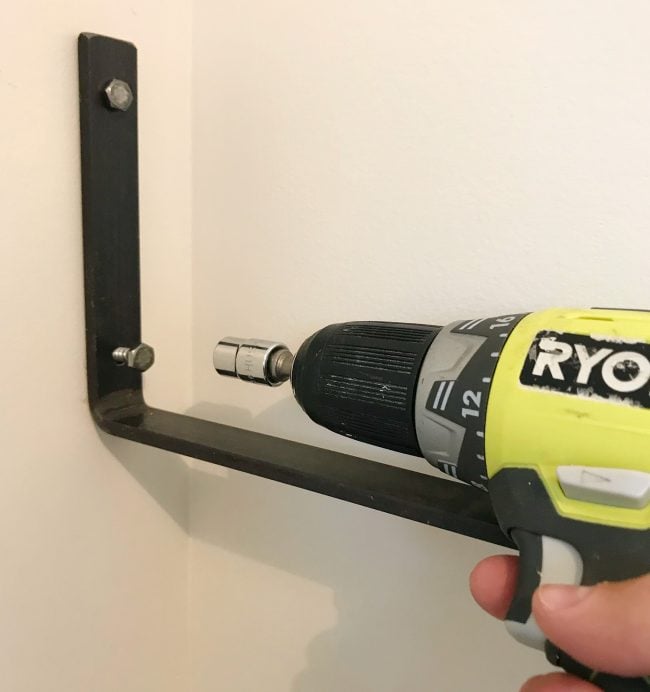
The Etsy seller that we bought the brackets from included the screws, which is super helpful. You’ll need a ratchet or hex screw head to attach them, but they’re super sturdy. Just don’t forget to make pilot holes first, which will help ensure that your screws go into the exact right spot.
Then we repeated the process for the second shelf, which we placed 18″ above the first one. That’s a fairly standard distance for shelves when you plan to put large baskets, boxes, or decorative objects on them. However if you’re just putting things like small paperback books or games, you might want to go with 12-14″ spacing.
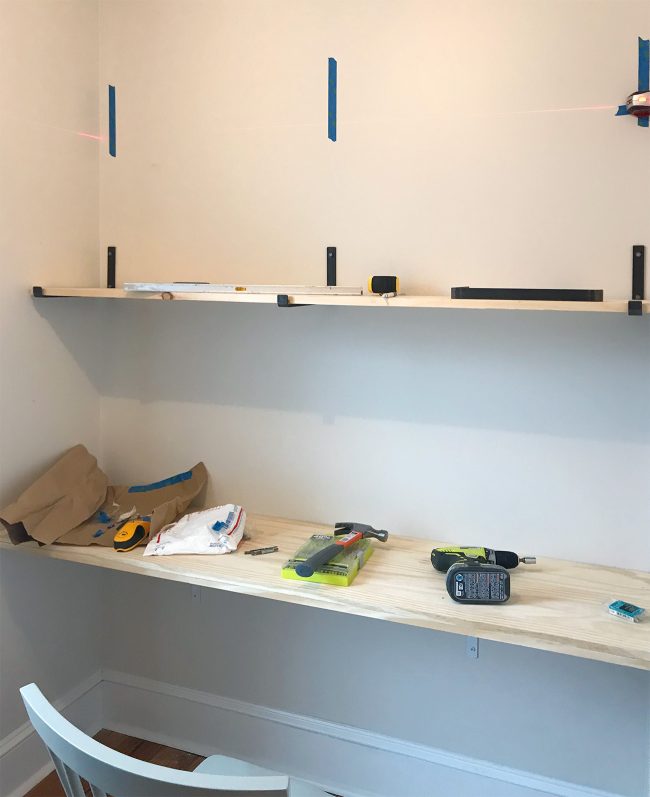
Another thing we love about these brackets is that the wood shelves just rest in them – no permanent attachment or anything. So this is where we were after a couple hours of work (and where some of you saw things in our email newsletter).

Staining The Shelves
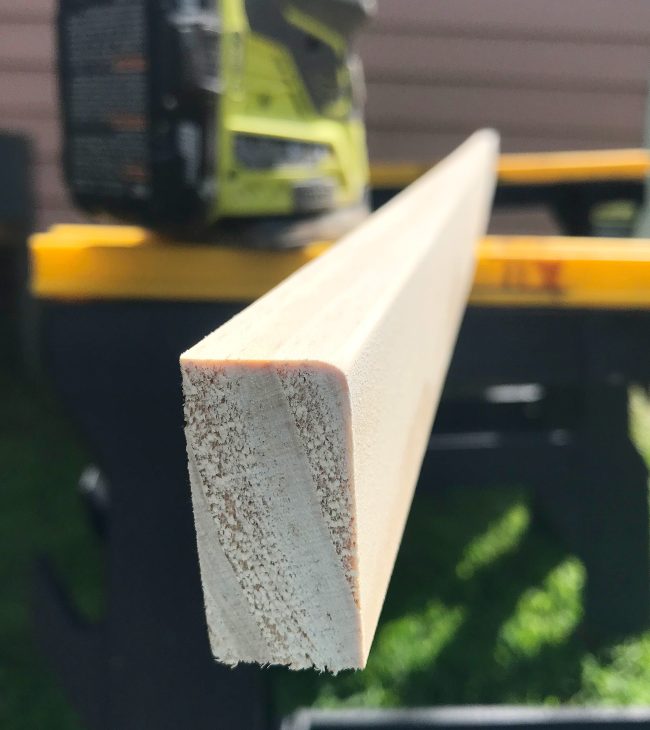
I know we’ve probably talked about staining a billion times, but I want to point out a couple of quick things. One: we highly recommend that you use some sort of pre-stain or wood conditioner before you apply stain. You can get enough for a project like this for around $4, it’s fast and easy to apply, and it helps bring out the wood grain in your stain job while discouraging blotchiness or an uneven finish. You can see the difference between conditioned wood (left) and raw wood in the photo below.
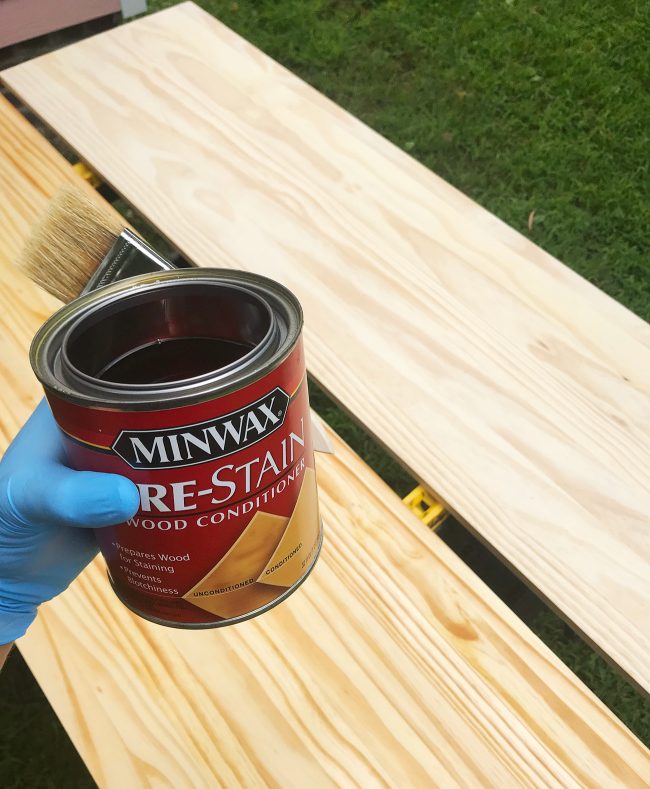
To apply it you just liberally brush it on with a paintbrush or rag, let it soak in for about 10 minutes, and then wipe off any excess with a paper towel or rag. Then you can go right on to staining.
The other thing we did in this project was mimic the color treatment we did to the wood railings in our beach house’s bunk beds. We spent a lot of time during that project testing stain samples to get as close of a match to the pine floor as possible and, since these shelves would also be in a room with the same old pine floors, we wanted them to look similar as well.
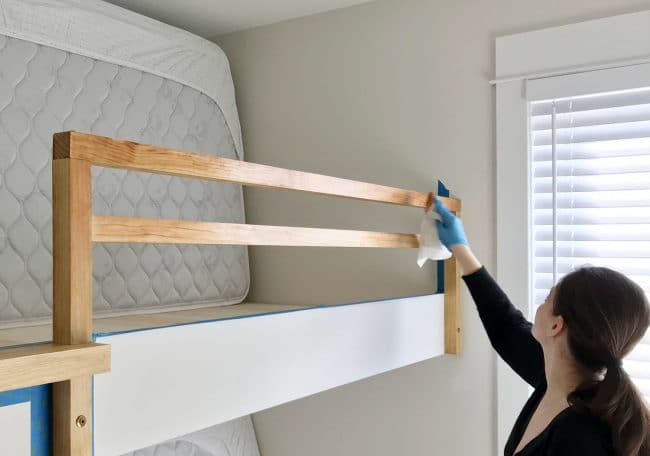
Turns out the magic formula is a base coat of Minwax’s Puritan Pine, followed by a light coat of Minwax’s Colonial Maple. That second coat adds an extra hint of red that mimics the old heart pine floors.
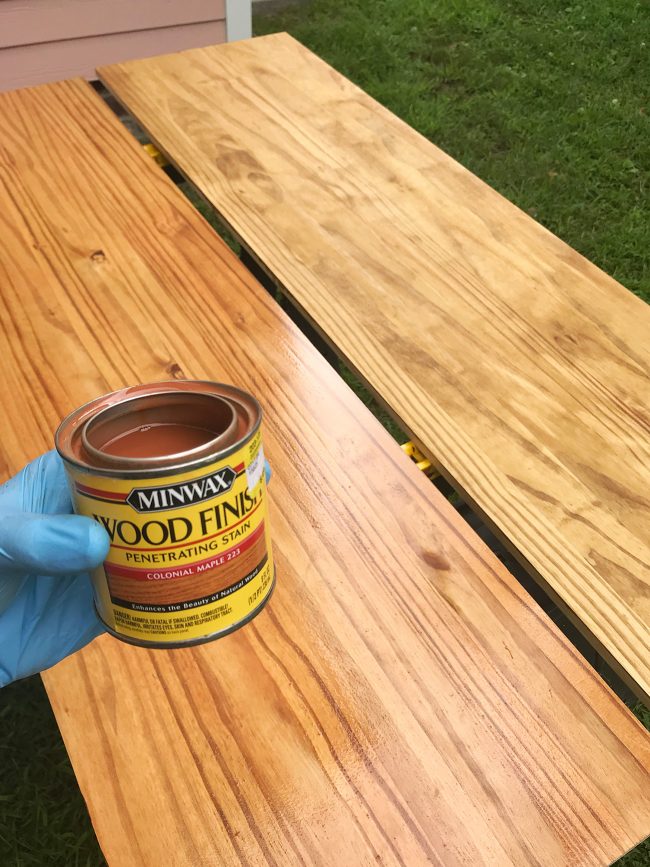
The photo above is from before I wiped off the excess Colonial Maple, but you can see a clear difference that the second stain color makes. Once everything was dry, we also did a few coats of protective sealer on everything before rehanging them on the brackets.
Storage & Finishing Touches
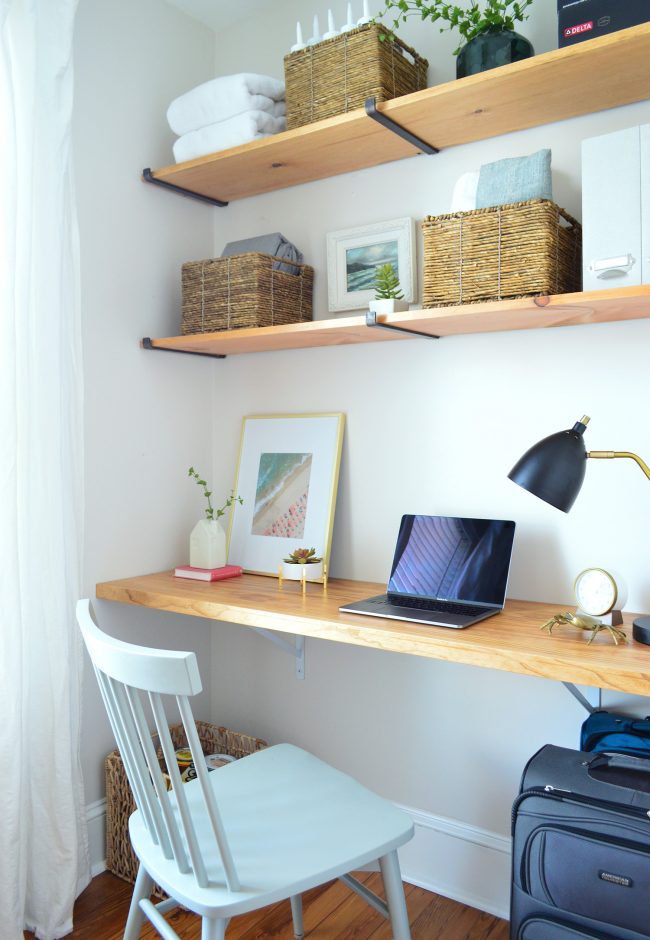
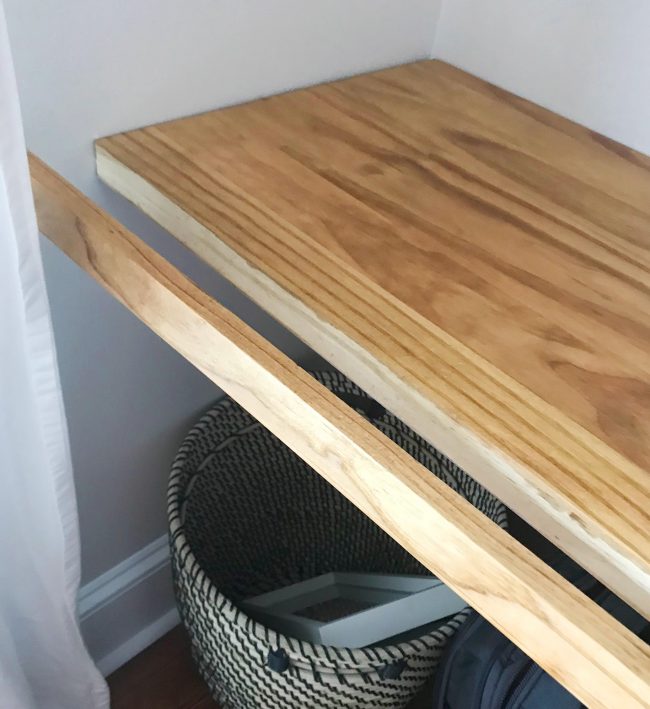
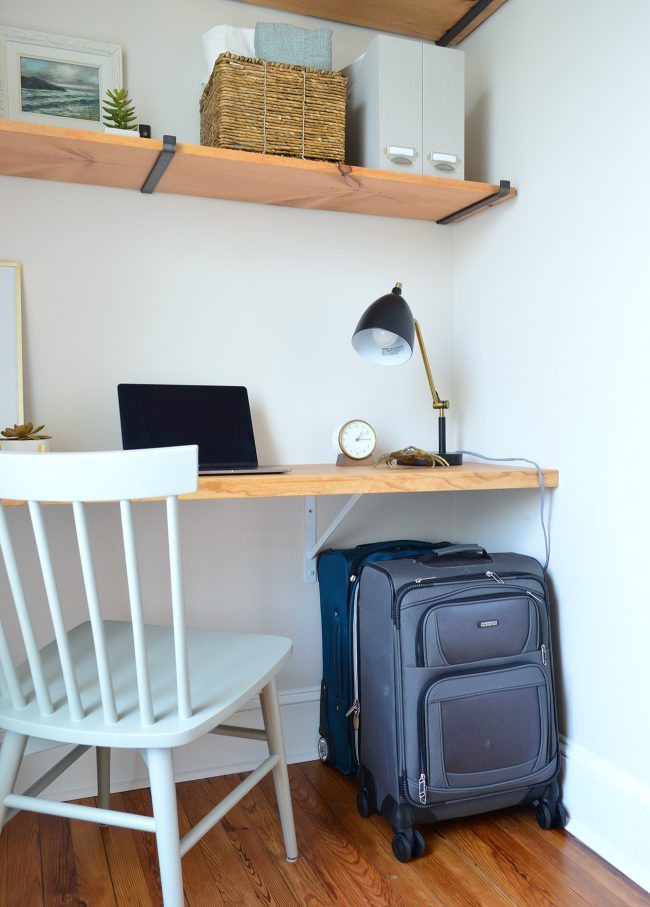
Once everything was done, Sherry was excited to load up the shelves and I was excited to see just how much use we could get out of this small space. As you can see in the photo above, it’s kind of a mix of pretty and practical. For example there’s a perfect nook under the desk to stash our suitcases once we’ve unloaded our clothes into dressers for our stay (which isn’t exactly beautiful but it’s amazingly practical not to have them sitting in the bedrooms getting trampled).
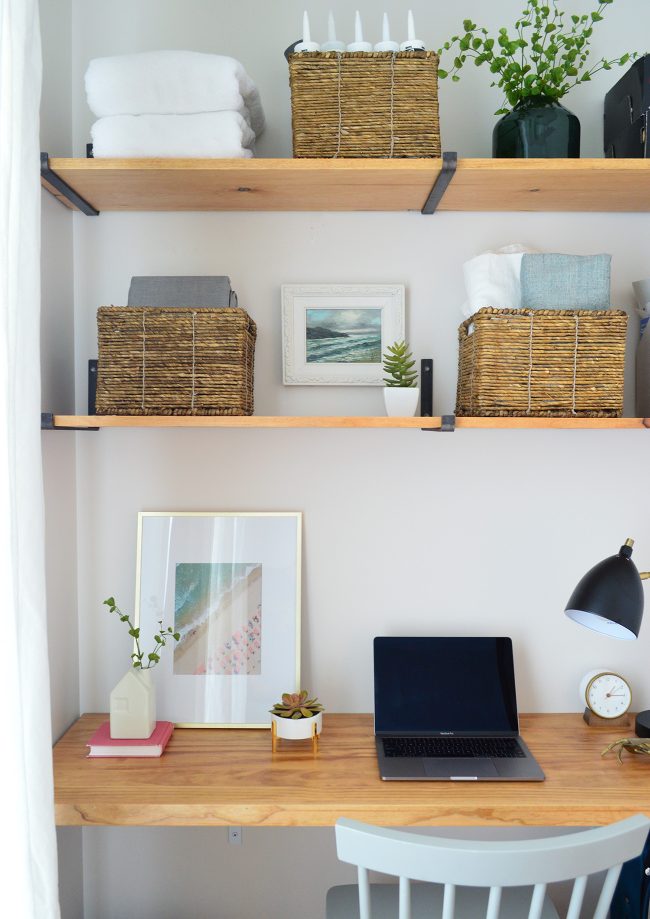
Almost all of the decorative items that you see (that vase with some fake greenery from Michael’s, the gold frame, the faux succulent, that painting Sherry got from craigslist for $7 a while back, the three woven baskets from Target last year) are things we already had on hand, but she did grab a few new items to add a little more organization/function. Namely the clock, the magazine files (which we filled with all of our appliance manuals and warrantee sheets), and the desk lamp.
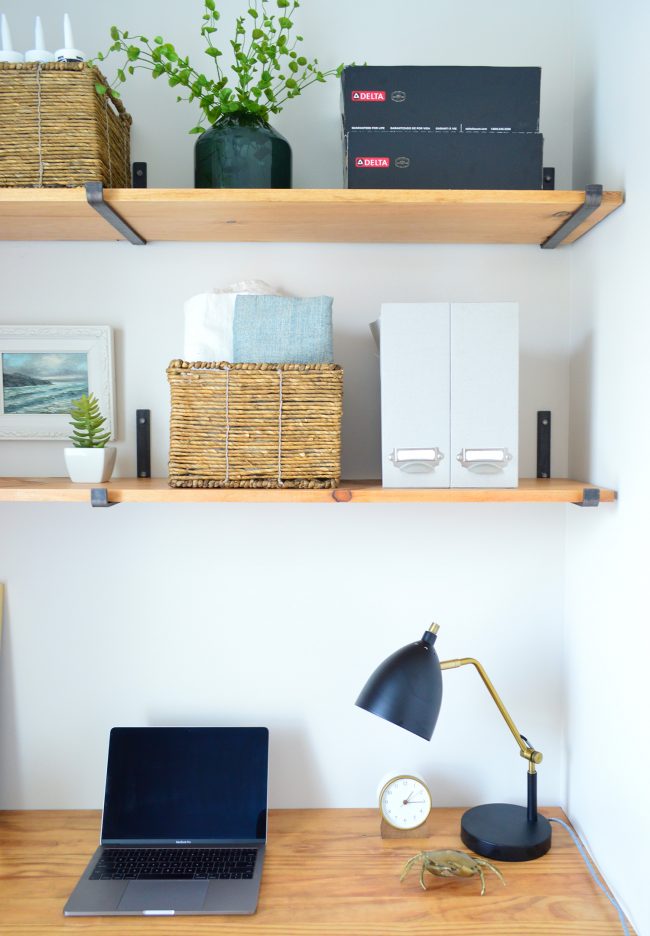
Although our favorite item might be the brass crab that a reader sent us after she spotted it for super cheap in a thrift store and felt like it had to live at the beach house. And now it does! I just have to keep an eye on it because I think the kids might try to steal it and raise it as their own at some point. The claws move and the top flips open for the most minuscule amount of storage (ink well? paperclip holder? ring storage?).
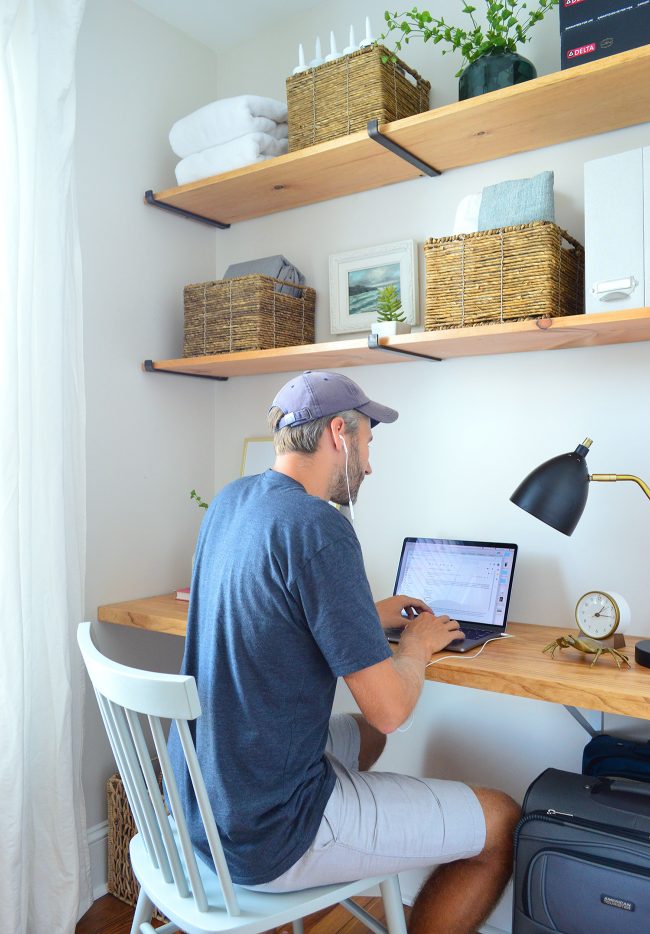
Oh and the desk chair in the photo above is one that we used to have at our beach house dining table before we got the benches – so we had that on hand too (it’s this one in “gray”). And the armchair below is an old thrift store find that Sherry purchased years ago with a new blue cushion for added comfort.
All in all, we’re super pumped about having pulled this little functional nook out of nowhere in just a few hours of work. And despite having some varying opinions and debates about this room’s use for MONTHS, we’re both glad that we landed on the perfect mix of our preferences. I get storage. Sherry gets a chair to read in AND a Pack & Play stash spot. And we both get a bonus little office area to sit down and type up posts like this one.
Although Burger may secretly be the most excited about it. I’m sure he’ll tell you all about it when he wakes up from his nap.
P.S. If you want to get access to project ideas, behind the scenes happenings, and other DIY stuff that’s going on in our world BEFORE it hits the blog, just sign up for our free email newsletter. And thanks to everyone who has already subscribed – Sherry loves writing them up and hitting send.
*This post contains affiliate links*
The post Making A Built-In Office Nook For $201 appeared first on Young House Love.
Making A Built-In Office Nook For $201 published first on www.younghouselove.com
No comments:
Post a Comment