Thursday, February 28, 2019

IKEA corner table in beautiful beech: A DIY

Here’s how I made a large IKEA corner table from their work tops and legs.

In total, we spent $325, which was far cheaper than buying a custom made L-shaped desk to fit the space.

IKEA items used:
  • 2 x GERTON table top
  • 5 x OLOV adjustable legs
Other Materials:
  • Screws
  • Metal brackets
  • 4 x 6 ft. long 1×4″ wood planks
  • Cable grommets
  • Keyboard tray (optional)
Tools required:
  • Circular saw
  • Guide for the circular saw
  • Drill
  • Tape measure

How to make an IKEA corner table

The first thing I did was decide how big I wanted the desk. I used the 29.5 x 61″ table top from IKEA whole, and cut the 2nd piece for the “L” with the circular saw with a guide to create a straight cut.

I made that piece 18 x 34″ so that it would fit where we were going to use the desk.

There are metal braces on the bottom of the table tops. Remove them before cutting, and make sure that you cut the table top so that the finished side of the desk will point outward, otherwise you’ll have the hole for the metal bracket channel facing out.


Related: Upsize LINNMON table tops into a large corner desk


I brought the pieces into the office where the desk was going to reside and started assembling.

Joining the two separate desks into one corner table

DIY IKEA corner table from table tops

First, I used one metal brackets to brace the 2 pieces together, and then used the 1 x 4″ wood to trim around it and added more metal brackets for extra stability.

DIY IKEA corner table from table tops

Since we have baseboard heat, and I wanted the desk to sit flush against the wall, I offset the rear facing 1×4 so that the legs could be bolted to it far enough away to clear the baseboard heater.

DIY IKEA corner table from table tops

Once I secured the 1 x 4 wood around the the table tops (with 2 pieces in the center of the 29.5 x 61 piece for the keyboard tray to mount to), we flipped the desk over onto 2 saw horses. I screwed the legs into the desk and then removed the saw horses.

After that I stained the desk and installed a couple cable grommets for power and monitor wires.

DIY IKEA corner table from table tops

My only advice would be to measure twice, cut once.

In my books, the IKEA corner table project went well and I ended up with the desk I wanted. And it fits the room to a tee.

I even ended up using a scrap piece to make a small laptop tray for another room which is secured to the wall with fold away shelf brackets.

~ by Peter

The post IKEA corner table in beautiful beech: A DIY appeared first on IKEA Hackers.


IKEA corner table in beautiful beech: A DIY published first on www.ikeahackers.net

Wednesday, February 27, 2019

The Easiest House Plants & The Best Faux Plants I’ve Found

Hackers Help: Need help adding drawers to BRIMNES cabinet

I have been attempting to find a way to use a 75cm (29 1/2″) KOMPLEMENT drawer in our BRIMNES cabinet. For use as a kitchen pantry.

Brimnes cabinet

The shelves that fit the BRIMNES cabinet are 30″ wide.

We assembled two KOMPLEMENT drawers a couple of days ago. Attached the railings, and the drawers are about 1 inch too short in width to fit properly.

KOMPLEMENT drawer | IKEA.com

Wondering if anyone has tried this sort of hack with the BRIMNES?

Sincerely disappointed that my hack didn’t work …

But hopeful that someone at IKEAhackers has a solution to allow the addition of sliding drawers.

Thank you in advance,

~ by Anne Stephens

***

Hi Anne

Sorry to hear it wasn’t a perfect fit.

As the variance is not very large, I believe you can shim the drawer slides with wood. What I mean is add thin pieces of wood on both sides of the cabinet to reduce the size of the opening.

If you can get an exact 1/2″ thick wood shim, that would be great. If not, sand it down to the right thickness.

Attach the wood to the sides of the cabinet, where you want the drawers to sit. Use a spirit level to get it straight. Then, fasten the drawer slides on to the newly added pieces of wood.

Hope it works out.

Anyone else has a brilliant idea for Anne? Let us know in the comments below.

Happy hacking,

Jules


You may also like these IKEA BRIMNES hacks

#1 Upgrade the BRIMNES wardrobe with ALEX drawers

Drawers for BRIMNES wardrobe

Add more functional storage in the BRIMNES wardrobe with the ALEX drawer unit. Just like how Stephen did. See the BRIMNES wardrobe with drawers.

#2 How to add leather pulls to IKEA BRIMNES cabinet

leather pulls IKEA BRIMNESMy latest project was adding leather handles to the BRIMNES 3 drawer chest in our bedroom. The total cost of it was in our case 0€ (we had all the materials at home). It took approximately 1 hour. Read more of the leather pulls for BRIMNES chest.

#3 Easy makeover for IKEA BRIMNES bed

BRIMNES headboard makeover

Scrapwood wallpaper design by Dutch designer Piet Hein Eek turns a very plain BRIMNES to a real beauty. See the BRIMNES headboard makeover.


Join us on IKEAhackers Community Facebook Group

This is where we share our IKEA hacks, news, style and spaces. Also we get to help one another with our IKEA “problems”. Let’s do this! And have fun. View Group.


The post Hackers Help: Need help adding drawers to BRIMNES cabinet appeared first on IKEA Hackers.


Hackers Help: Need help adding drawers to BRIMNES cabinet published first on www.ikeahackers.net

Tuesday, February 26, 2019

Box shelves: Make them really quick and easily

I hacked the IVAR shelving system, because I wanted to have stackable box shelves which are more flexible and easier to moving around. They also save space.

The hack wasn’t very hard to do and it took me just half a day, approximately 4 hours.

NOTE: Obviously, this hack is not suitable for homes with small children who may attempt to climb the shelves. The shelves will certainly fall as the individual units are not fastened to each other or to the wall.

IKEA items used:
  • 2 IKEA IVAR side units (the tall one)
  • 10 IVAR shelves

IKEA IVAR system

Other materials and tools:

Hack instructions for DIY box shelves

The general idea is to built independent ‘stackable box shelves’ you can later pile up anyhow you want.

The first thing to do is to saw the IVAR side units. Measure the lengths you want your box shelves to be. Make a mark on the side unit with a pencil and then, saw it.

You’ll need 2 sawn side units of the same length to make one box shelf. After sawing the side units set them aside for now.

I chose to paint the side units on one side. Feel free to paint to suit your home decor.

box shelves IKEA IVAR hack

Now, you can work on the shelves. Drill a hole at all 4 corners of each IVAR shelf. The hole should align to the top of the sawn side units.

After that, place the shelf panel on top of the sawn side unit and screw the shelf in. Repeat on the bottom to complete the box shelf.

(You may want to drill pilot holes on the tops of the sawn side unit, which will make it easier to screw in the shelves.)

And tadah!

You now have five stackable box shelves you can put on top of each other as you wish.

As the units are not fastened to each other or the wall, be careful how you stack the units and the items you place on them to maintain balance.

Recommended to place heavier items at the bottom unit.

box shelves IKEA IVAR hack

What I really like about the hack is the whole system of stackable box shelves stays flexible. I can easily disassemble and reconstruct it.

If I don’t like the look anymore, it’s possible to change the configuration of the box shelves. It also fits really well with my high walls.

~ by Kolja


You may also like these IVAR storage hacks

#1 Floor to ceiling built-in bookcase

full height built-in bookcase

I would like to share my hack of IKEA IVAR shelving system into a built-in bookcase. It all started with the wish to have a bookcase that could store all the books we still had in the moving boxes. Read more on the IVAR built-in bookcase.

#2 IVAR goes chinoiserie

Ivar storage chinoiserie cabinet

I recently made an IVAR cabinet go chinoiserie. What I used was the 20″ deep IVAR cabinet, two 20″x49″ IVAR side units, and an extra 20″ deep shelf (in addition to the two that come in the cabinet.) Read more about the IVAR chinoiserie cabinet.

#3 Massive IVAR workstation and storage

IVAR workstation

I was searching for the right height standing workstation for months until I came across the IVAR system from IKEA. It’s completely modular so you can set the desk height and cabinet configuration however you’d like. Read more about the massive IVAR workstation and storage.


The post Box shelves: Make them really quick and easily appeared first on IKEA Hackers.


Box shelves: Make them really quick and easily published first on www.ikeahackers.net

Monday, February 25, 2019

Terrarium lamp: An easy hack for your miniature garden

I’ve just finished an IKEA hack to transform my terrarium into a terrarium lamp.

My terrariums needed light, specially during winter. So I decided to create a terrarium with lamp attached.

IKEA items used:
  • TVÄRS Lamp
  • IKEA 365+ Jar with Lid
TVARS lamp | IKEA.com

TVÄRS Lamp | IKEA.com

Cost: 2.50€ (Tvärs) + 2€ (Light Bulb) + 2€ (Glass cover 365+)

Other materials and tools:

Hack instructions for terrarium lamp:

First, cut the 3 legs of the TVÄRS Lamp with scissors.

Unmount the cable going to the light bulb and pass the cable at the upper section of the system, so you can glue the lamp on the jar lid.

terrarium lamp-2

Lastly, glue the lamp into the glass jar lid with an adhesive suitable for glass.

And your terrarium lamp is finished!

terrarium lamp-1

The hardest part about this hack was trying to figure out how to fix the lamp without the light bulbs being too close to the plants.

~ by Foret De Verre (See more of my terrariums here.)


You may also like these terrarium hacks

#1 Easy DIY Star Wars Terrarium

terrarium in a lantern

For my daughter’s woodland themed room I took the MORKT Lantern and used silicone and a plastic ring to seal up the bottom.

I then planted succulents and placed an AT-AT Walker for a terrarium from a galaxy far far away. Read more about the Star Wars Terrarium.

#2 Wall terrarium in magnetic containers

airplant in spice containerHoping to bring a little green to your office? Or kitchen? These vertical terrariums absolutely fits the bill. They don’t take any room, and are extremely easy to maintain. And because they are magnetic, you can just fix them on your noticeboard or fridge. Read more on the wall terrarium.

#3 Hanging succulent garden

succulent wall planterI have a tiny patio which receives very little light, but I still wanted a home for plants. The patio wall managed to get a little light, so I lined the 2 bath caddies with felt, filled ’em with dirt and stuffed them full up succulent cutting to make a cheap-o hanging garden. Read more of the succulent wall planter.


The post Terrarium lamp: An easy hack for your miniature garden appeared first on IKEA Hackers.


Terrarium lamp: An easy hack for your miniature garden published first on www.ikeahackers.net

Bluestone Basement Laundry: The Big Reveal!

Saturday, February 23, 2019

The best 14 IKEA BILLY hacks for every room in your home

We made a list of the best IKEA BILLY hacks to celebrate the world’s most beloved bookcase.

It’s been around for an incredible 40 years and have undergone new colours and accessories, doors and add-ons. For this birthday, BILLY gets three new skins — yellow, dark red and beige. But structurally, it has remained the same hardworking bookcase, first envisioned by the late Gillis Lundgren.

In 1978, Gillis sketched out the design on the back of a napkin. And he named it BILLY,  after a colleague who expressed his desire for a ‘proper’ bookcase.

Both Gillis and Billy would be happy to know every year, about 4.5 million new BILLY bookcases join the 60-odd million already in homes and offices all around the world.

I think Mr Lundgren would also be very pleased to see how far we, people who tinker with IKEA, have evolved his iconic bookcase. Now not just for books, we’ve have IKEA BILLY hacks for shoes to toys to wine and so much more.

And it’s so versatile, you can practically use the IKEA BILLY anywhere in your home.

Let’s celebrate this illustrious bookcase with the best 14 IKEA BILLY hacks.

#1 In the kitchen: BILLY island

diy kitchen island

Courtney’s farmhouse styled kitchen island with open shelving. She made in out of 3 BILLY bookcases, a butcher block countertop and beadboard. See more of the DIY kitchen island.

#2 At the Entryway: Mudroom furniture from BILLY bookcases

mudroom furniture

Jessica recently took an under-utilized closet, added some IKEA pieces (BESTÅ and BILLY) for storage and made them into beautiful mudroom furniture for her home.

#3 Craft room: This is sew good

sewing cabinet craft pod

Liz hacks a sewing cabinet / craft pod with 2 BILLY bookcases. Open to craft. Close to hide the clutter. Perfect. See the sewing machine cabinet and craft pod.

#4 In the Library: BILLY hides a secret door

Billy bookcase secret door

Meg’s solution to turn an awkward space into a whiskey and tea library includes creating a secret door that leads to their home office/guest room. See the secret door BILLY bookcase hack.

#5 Upstairs landing space: Daybed reading nook

daybed reading nook

Jessica shares her IKEA hack — a daybed reading nook — made from 4 BILLY bookcases. It’s amazing how it turned out.

#6 Dining room: Tall Wall-Like BILLY bookshelves

tall cabinet

Roel needed to add some extra storage space in the living room. They came up with the idea to make a tall cabinet at the head of the table, with a more “wall like” appearance. See their tall cabinet hack.

#7 Bedroom: IKEA BILLY hack hides a murphy bed

queen murphy bed ikea hack

MSILBERBERG lives in Manhattan where space is a premium. They were fortunate to have a playroom that also doubled up as a guest room. Their idea was to hide a queen Murphy bed behind their IKEA BILLY bookcases.

#8 Anywhere: Cat shelves in one compact BILLY

cat shelvesCave Lion fashions a fantastic set of cat shelves in a BILLY bookcase. It looks pretty easy to do too. And it looks a lot of fun! See the cat shelves.

#9 Basement: DIY home bar

DIY home bar

A gorgeous bar from tall and short BILLY bookcases. The tall ones form the storage cabinets for the bottles. The bar counter are 2 shorter BILLY bookcases and a walnut kitchen counter also ordered from IKEA. Read more on this DIY home bar.

#10 Playroom: Dollhouse bookcase

dollhouse bookcase

By adding a roof, chimney, wooden details, paint, fences, walls and even windows, the BILLY Bookcase becomes a chic beach house, or a fab urban row-house. Use as a bookcase, shelf, or dollhouse… you get to decide! See the dollhouse bookcase.

#11 Living room: BILLY is for built-ins

built-in bookshelves

Jeff had a really long wall that needed something to separate the games area from the media area. What better way than to introduce more storage and some built-in bookshelves.

#12 Home office: Hide a workspace in a BILLY

secret bureau

Here’s a desk that hides away completely in a BILLY bookcase. A great idea when you don’t have space for a big workspace. See the secret bookshelf desk.

#13 Living room: Full BILLY wall

full BILLY wall

When you need to fill an entire wall with shelves, BILLY’s your man or bookcase. See the full BILLY wall.

#14 Hallway: Make it float

floating bookshelves

The BILLY bookcases take on a new lightness when hung on the wall. Also, furniture off the floor is the way to go for me. Makes cleaning so much easier, eh. See the floating bookshelves. Here’s another version if you prefer a wood wrap-around.

Hope you like these IKEA BILLY hacks. Which is your favourite? Tell us in your comments.

The post The best 14 IKEA BILLY hacks for every room in your home appeared first on IKEA Hackers.


The best 14 IKEA BILLY hacks for every room in your home published first on www.ikeahackers.net

Friday, February 22, 2019

Hackers Help: Can I wall mount IKEA kitchen base cabinets?

I’m wanting to create a row of units 1600mm wide in a hallway using IKEA kitchen base cabinets (the METOD) with a worktop for a display area and wall units above.

But …

I would like to have wall units as deep as the base units since I’d like to frame the whole piece with full height end panels.

Does anyone know if it is possible to hang the METOD base units on the wall? And would any additional support be required to make them secure?

Many thanks,

~ Gillian

***

Hi Gillian

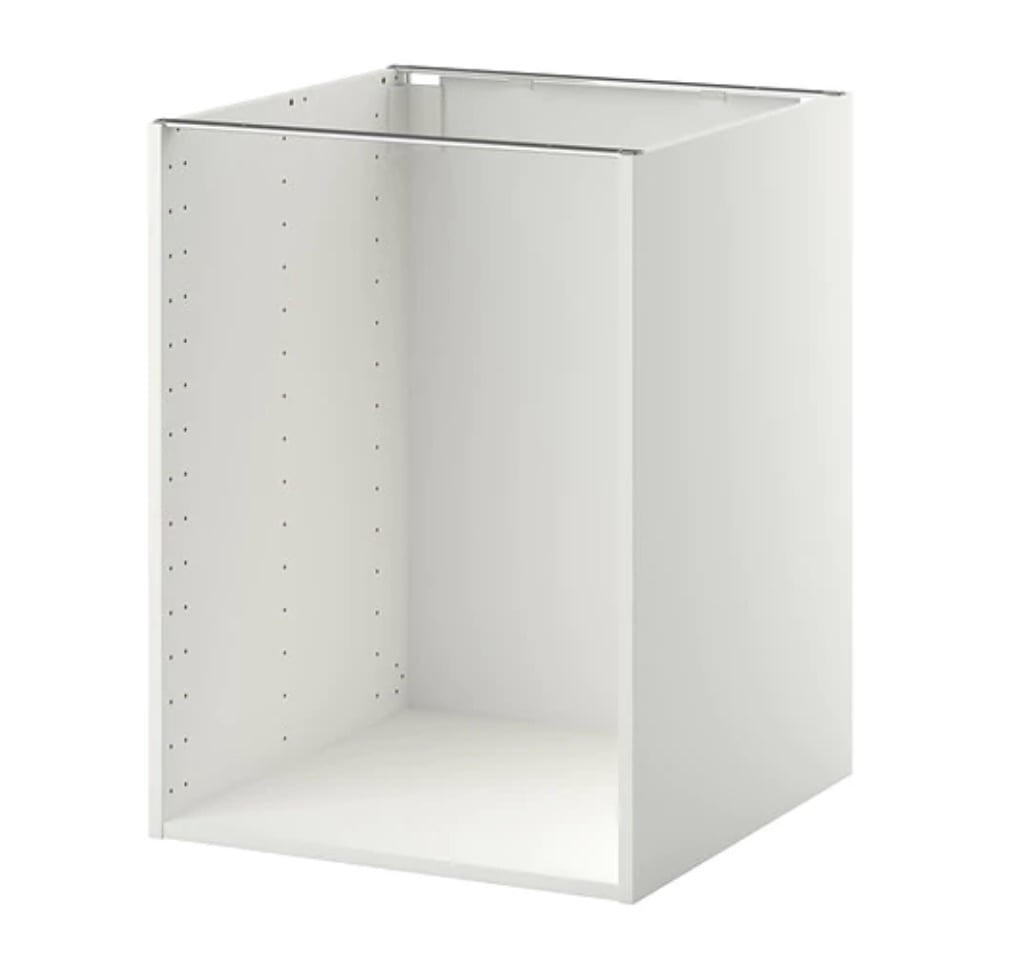
There is one major difference between the IKEA kitchen base cabinets and wall cabinets, besides the depth. IKEA kitchen base cabinets do not come with a top panel.

There are ways to go around this, definitely. (Like flipping the base cabinets, with the cavity facing down and adding a countertop to the new bottom. Which potentially can look really amazing if paired well with your worktop.)

But will it be worth the effort to reinforce everything and make new holes for mounting? Only you can decide. Besides, adding a countertop will add weight to the frames, which is another consideration. 

IKEA kitchen wall cabinet

METOD wall cabinet | IKEA.com

IKEA kitchen base cabinet

METOD base cabinet | IKEA.com

IKEA kitchen wall cabinets are hung on a rail system. And how much weight it can bear will depend on many factors — eg. the use of correct fixtures for your type of wall, the distance of wall studs, how well your installer fixes it … etc.   

Can I wall mount IKEA kitchen base cabinets?

So I would not recommend installing IKEA kitchen base cabinets up on the wall.

Wall cabinets as deep as IKEA kitchen base cabinets

However, to achieve the kind of look you want, you can use the IKEA METOD Top Cabinet or Freezer Top Cabinet. They come in a depth of 60 cm, same as base cabinets.

You can see a photo of it in my IKEA kitchen makeover. I used 2 Fridge Top cabinets stacked above my fridge. But the remaining wall cabinets to the left are regular wall cabinets. 

IKEA kitchen fridge top cabinet

Fridge/Freezer top cabinet | IKEA.com

IKEA kitchen top cabinet

METOD Top cabinet | IKEA.com

I hope your plan still works with these two types of cabinets.

Plan B – if the IKEA kitchen base cabinets do not work out

Or change your plan to the BESTÅ system. I found a photo of a pretty amazing set-up using BESTÅ. Just cover up the sides with the panels, if you want the ends closed.

Source: chasseursdastuces.com

Let us know how it goes.

And whatever you decide, be sure to discuss your kitchen plan with the Kitchen Specialist at IKEA. They’ll be able to give you solid advice.

And if you’re not going the DIY route, ask around and get a good IKEA kitchen installer. They can make wonders happen.

Good luck and happy hacking

Jules 

The post Hackers Help: Can I wall mount IKEA kitchen base cabinets? appeared first on IKEA Hackers.


Hackers Help: Can I wall mount IKEA kitchen base cabinets? published first on www.ikeahackers.net

Thursday, February 21, 2019

Karin Larsson’s famous lily lamp inspired this

Visitors to Sundborn, the farmhouse decorated by artists Carl and Karin Larsson in the Arts-and-Crafts style, often admire the beautiful flower-shaped pendant lamps in the dining room.

Sundborn home of Carl and Karin Larsson

Source: The Hyttnäs in Sundborn, home of Carl and Karin Larsson at https://ift.tt/2rQ7CII

Until I went in search of one for my own home, I didn’t even know they had a name: It is Näckroslamp, meaning ‘water lily lamp.’

Karin Larsson made many of the house’s unique furnishings herself. I wondered, could I make a näckros lamp?

Yes!

IKEA items used:
Other materials and tools:
  • Power drill with 1.5-inch hole bit
  • Card Stock
  • Glue gun
  • Paper pint food container (optional)
Following in the footsteps of Karin Larsson

1. First, I purchased two HEMMA pendant lamps. Using a hole bit matched to the size of the fixture, I drilled a hole in the base of the SKURAR just large enough to rest the pot upside-down on the shoulders of the fixture.

Karin Larsson's famous lily lamp inspired this hack

2. Then I assembled the lamp pieces, which was easy.

Karin Larsson's famous lily lamp inspired this hack

3. It took several tries, but finally I managed an acceptable free-hand drawing of the water lily petal shape. After that, I cut out a template in cardboard.

Karin Larsson's famous lily lamp inspired this hack

4. For the shade, my paper choices were a bright white card stock, and a red card stock with a satiny finish. I found them in the scrapbooking section of our local craft supply store. Four red petals and four white are enough to make one lamp.

Karin Larsson's famous lily lamp inspired this hack

5. Next, using a glue gun, I attached one red petal and one white at the narrowest part, spreading the two shapes apart slightly for effect.

Karin Larsson's famous lily lamp inspired this hack

Being afraid there was not enough room on the SKURAR to glue all four petals neatly, I decided to add an extra step, cutting a rough hole in the bottom of a pint cardboard paper food container.

6. Then, again with the glue gun, the petals are affixed to the cardboard cover.

Karin Larsson's famous lily lamp inspired this hack

7. Slipping the HEMMA cord through the opening in the lampshade, the näckroslamp is ready to hang!

Karin Larsson's famous lily lamp inspired this hack

8. This pair are hung from hooks placed in the ceiling. Very pretty in a bedroom.

Karin Larsson's famous lily lamp inspired this hack

~ by Emily

The post Karin Larsson’s famous lily lamp inspired this appeared first on IKEA Hackers.


Karin Larsson’s famous lily lamp inspired this published first on www.ikeahackers.net