You guys may have seen some of our progress on the duplex’s exterior on social media, but let’s get into some of the nitty gritty (and answer a ton of questions that have come in about it) here on the ol’ blog. We wanna talk shutters, steps, metal awnings, and what the heck is happening with all of that diamond door drama (among other things).
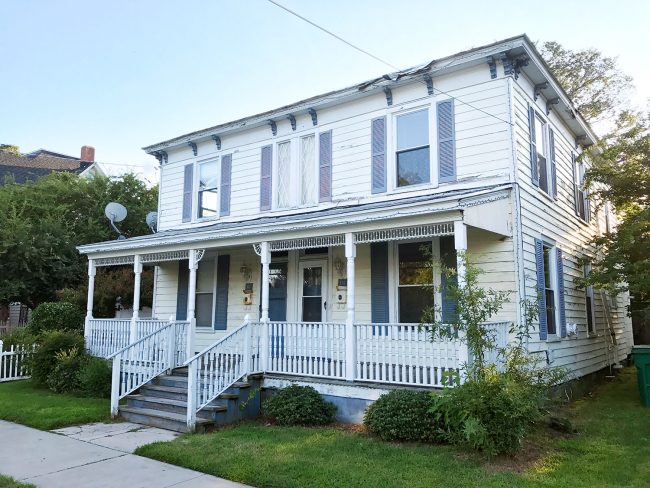
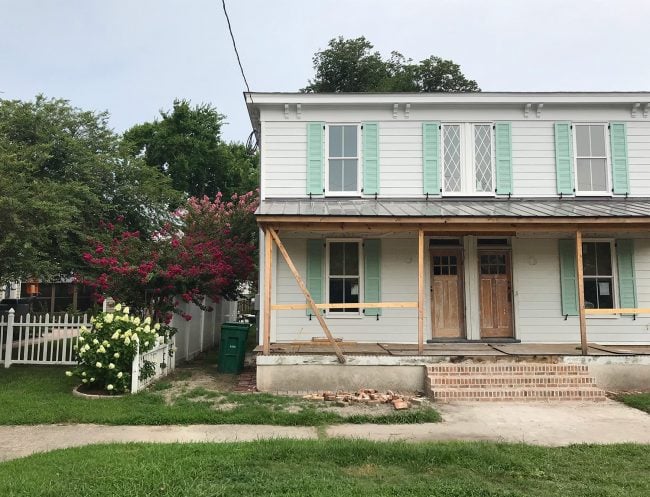
As a refresher, this is what the house looked like before.

Due to the historic mandates in town, we’re required to keep all of the basic elements of the house the same – original front doors, exact window locations, the roofline itself (ahem), and the corbels along the roofline…
… although the historic review board allowed us to space the corbels differently so they’d go all the way around the house, and saved us from having to remake a ton that had rotted beyond repair. And yes, the duplex came with not one, not two, but three satellite dishes. Our cup runneth over.
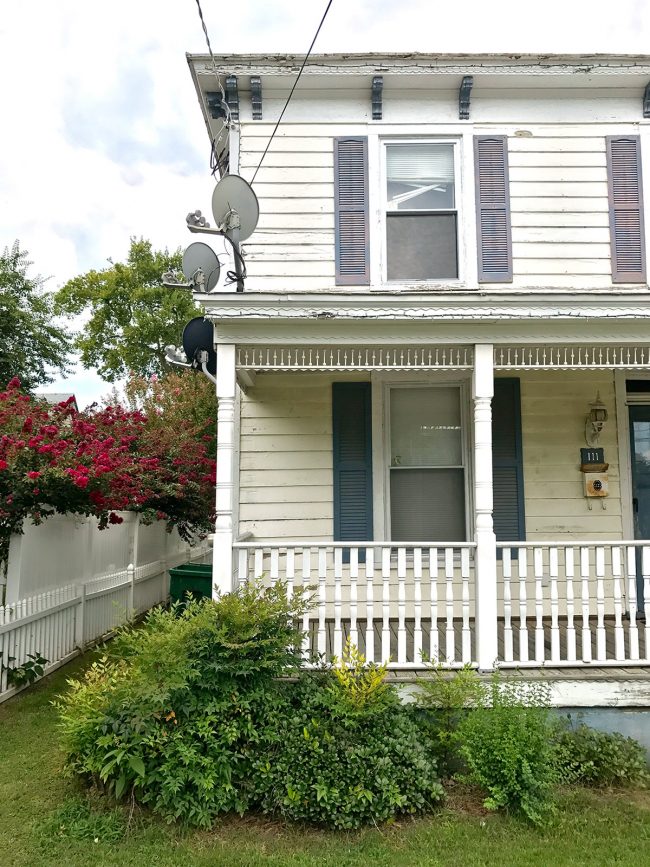
And yes that’s regular old silver duct tape up by the roof on the right side. And the diamond windows were covered with DRYWALL and hidden in the walls on each side of the house instead of being exposed and letting the light flood in. In short: we had some work to do on the whole curb appeal thing.
A lot of the exterior elements of the 100+ year old house (like the rotting siding, degraded roofing, collapsing porch, etc) needed to be replaced with new materials that will hold up better over time, like HardiePlank cement board siding. We even reconstructed some corbels from composite, not wood (to replace some that were too far gone).

The entire idea of the Historic Review Board, who approves nearly every exterior house update, is to make sure that people can make these houses more durable and long-lasting so this sweet town doesn’t look like it’s slowly falling apart (almost every house is 100+ years old). BUT everyone renovating has to adhere to the same look/style/shape of the original house so this cool old downtown area still feels as historic and “original” as possible.
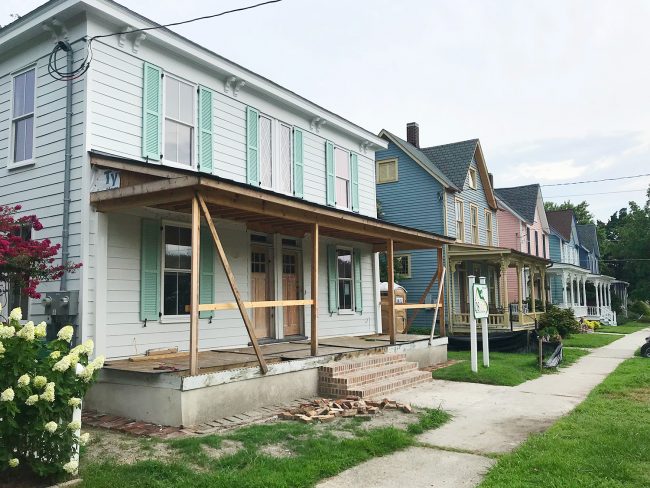
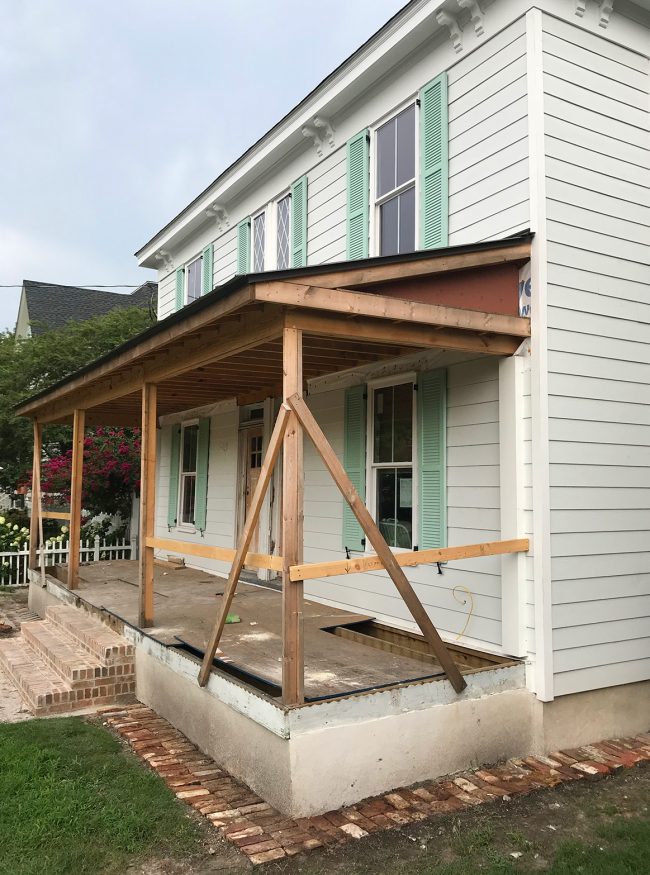
Since you saw the outside stripped bare back in April, the exterior is nearly complete – except for the new porch floor and columns… which are coming soon. But the roofing, siding, windows, and shutters are all done – and we could not be more thrilled with how it’s coming together. Sherry is beginning to question why she ever doubted this house’s potential in the first place! I’ve even heard her whisper that she might end up liking the exterior of the duplex more than the pink house, which I never thought I’d hear.
Hunting Down Operable Shutters
The shutters ended up being a bigger ordeal than we expected. New historic mandates require that the shutters appear to be operable, meaning vinyl shutters that you can pick up for about $60 a pair and screw right into the siding weren’t an option. The requirement is based on them wanting an authentic look and not based on function. Nobody actually closes their shutters there for storms – and many houses, including our pink house, don’t even have them at all! Most houses that do have them are those non-operable vinyl shutters that were hung before the mandate (like the periwinkle blue ones that used to be on the duplex).

The quotes we got for custom operable shutters from a few companies had our jaws on the floor. They were about $1,000 PER PAIR (!!!!) Meaning the whole front would set us back FIVE GRAND. I’ll wait while you deep breathe into a paper bag like I did for about five minutes after each phone call.
For a while we felt stuck with that fee (it’s a historic mandate! we have no choice!) and just as we were bracing ourselves to pull the trigger, Sherry found these pre-primed composite shutters on Wayfair for $250/pair. We’d have to hunt down hardware and paint them ourselves (more on that in a moment) but that price was muuuuuuch easier to swallow. In fact, our total for ten of them to do the entire front of the house was just a little over the price for ONE SET of shutters from those companies we called! Hallelujah.

They come in a variety of sizes and one was nearly perfect for what we needed (we got the 68.5″ tall by 15″ wide ones). They were a smidge narrower than what we’d need for the shutters to fully close (just about two inches), but we reminded ourselves that the mandate is just that they need to APPEAR operable (remember this isn’t about function, it’s about maintaining a more historic look – virtually none of these houses have working shutters that anyone closes ever).
This house is three blocks away from the beach and Cape Charles is on the bay on the interior side of a peninsula (not facing the ocean along the East Coast where storms can be more intense). Long story short: it’s a lot more insulated than you might think. We get worse storms in Richmond, where we also don’t have operable shutters… ha!
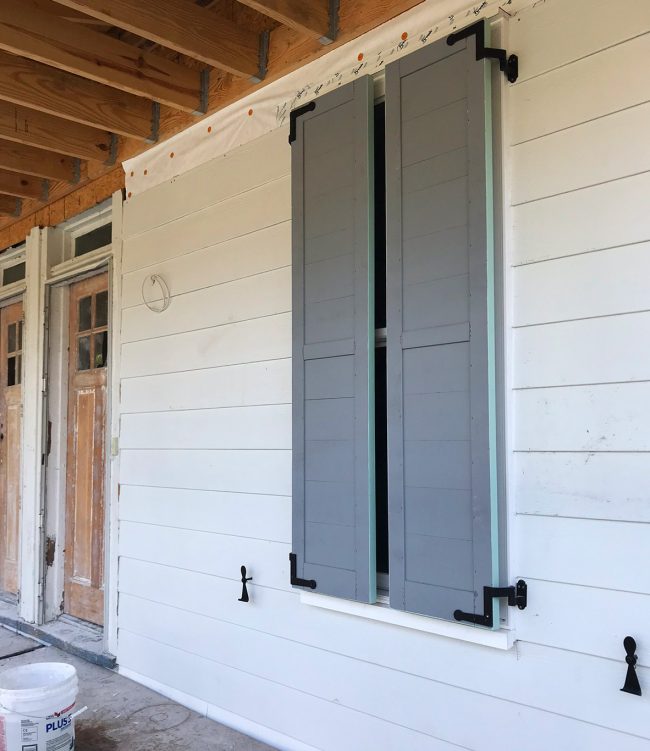
Below you can see what they look like closed (still have to paint the backs of these!). Thankfully there’s not really a scenario when you’ll see them like this other than this photo, but a bunch of you were asking for this pic, so here you go. Obviously if you’re looking for shutters you can use to board up your house in a storm it goes without saying that you’d need them to be the exact width of your window, and you might be stuck with those pricier custom shutters, I’m afraid.
With our shutters found, the only missing element was the hardware, of which there seemed to be ENDLESS OPTIONS. And it can make your ears ring and your head spin when you’re trying to figure out which way things should hinge without grinding against the house, and how deep the swing should be so it doesn’t bump against the window.
These little hardware additions can also drive up the cost of your shutters, so we kept it fairly simple and hunted down these hinges and these shutter dogs (which are the decorative hooks that hold the shutters open). The grand total was another $380, so all in we spent about $1650 on these ten operable-looking shutters (not including installation, which is just part of our construction contract with Sean). And since we painted them, that saved us some cash too. Not bad compared to the $5000+ we would have spent on custom ones. Budget crisis averted.

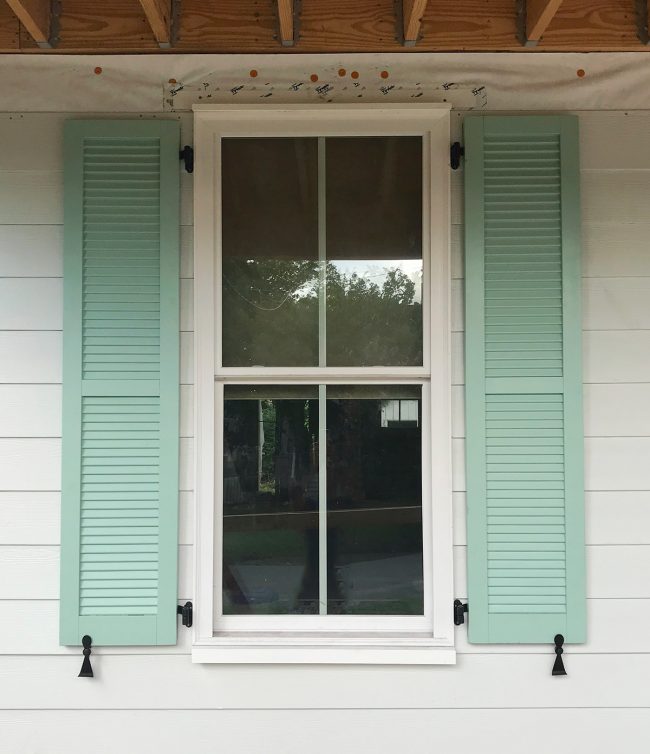
The only small installation hiccup was that operable shutters typically screw right into historic wood windows, not vinyl ones like ours (a previous owner had already replaced the original wood windows on this house). We couldn’t drill the hinges into the vinyl frame because it would ruin the warranty and the efficiency of them – so we had to place them outside of the window, which thankfully ended up looking nice too.

Choosing A Shutter Paint Color
Sherry has long had her mind set on mint shutters on a white house (you probably remember that from our duplex style inspiration post). But we wanted to take our time finding the right mint. Since there were no mint coffee cups around (if you don’t get that joke, here ya go), we turned to another source of inspiration – this historic Pure Oil gas station right at the entrance of town.

The lighting in that shot above isn’t doing it any justice, but we’ve ALWAYS been charmed by this little building and its cheery color scheme. So we popped by a few months ago with a paint deck in hand to find some similar colors. We didn’t want to go quite as dark as their door, but we also know that colors tend to read lighter on exteriors (and they tend to look darker inside). So we used some removable paint decals to test five colors on various parts of the house. Clockwise from the top right: Pale Patina, Rice Terrace, Mist on the Moors, Salt Marshes, Aloe (all by Sherwin Williams)
Since people often ask us why we tend to go with Sherwin Williams for exterior painting stuff – well, most exterior painters will only use Sherwin Williams (that was true for the trim and siding on our house in Richmond, as well as for when we painted the entire pink house) so we figure if it’s good enough for the pros to pretty much use exclusively outside, it’s not a bad idea for us to follow suit (it has a nice warranty, good customer service, and has held up great for the last five years on our house’s siding and trim in Richmond).
As we were trying to choose from those five colors in the photo above, one of our favorites – Pale Patina – showed up in a surprising place: under the rotting stairs we were standing on! Once upon a time those stair risers were that exact color. How crazy is that?! We took it as a sign. The house was basically nodding its head in agreement on Pale Patina. Kinda like how we discovered in retrospect that the pink house’s kitchen had pink wainscoting.

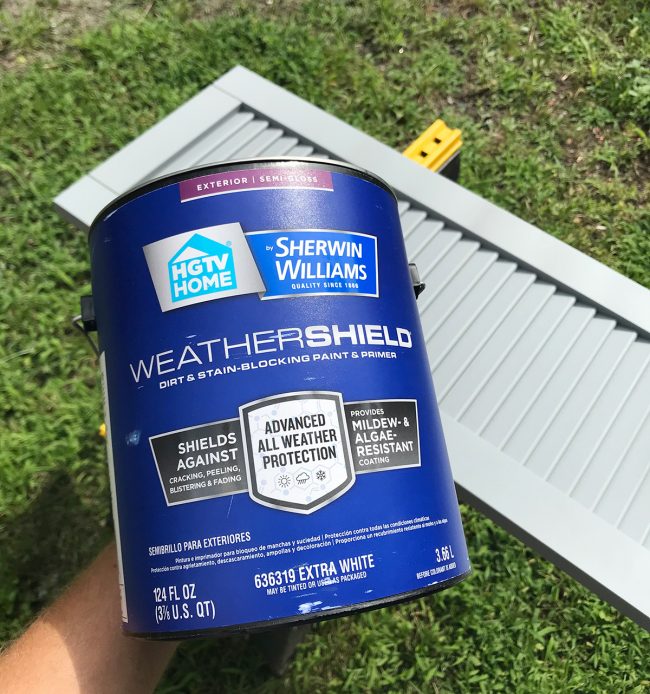
The shutters were composite (no rotting!) and came pre-primed (uh, no priming!) so we picked up a gallon of this Weathershield exterior paint and over the course of several days, we put two coats of paint on all ten shutters. It took us a few days of intermittent painting because we didn’t have room to spread out and paint them all at once (no garage!) so we couldn’t do more than three or four at a time.
But just in the nick of time (literally, the night before Sean’s guys were scheduled to install them) we finished and set them out on our porch to go over to the duplex. The funny thing we realized is that Pale Patina is eerily similar to the color we painted the ceiling at the pink house (SW Breaktime). Is it me or is the pink house flirting with the duplex?

What About The Front Doors?
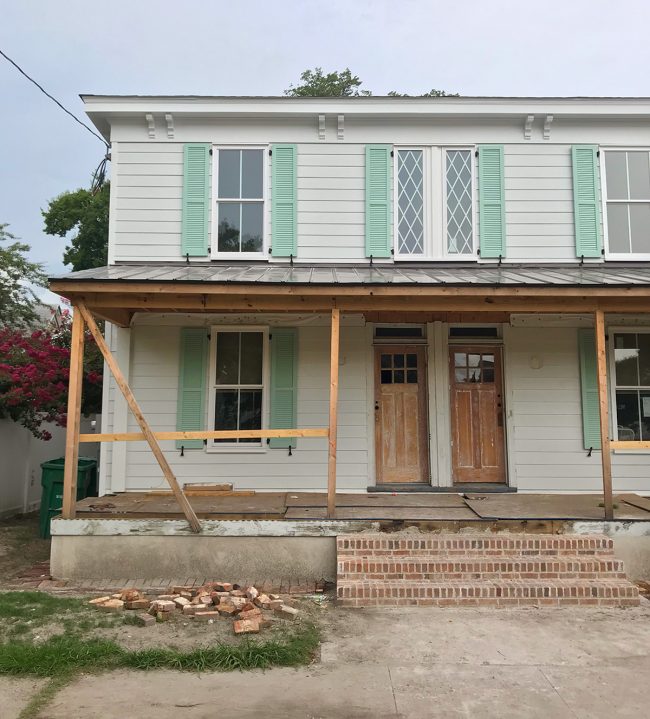
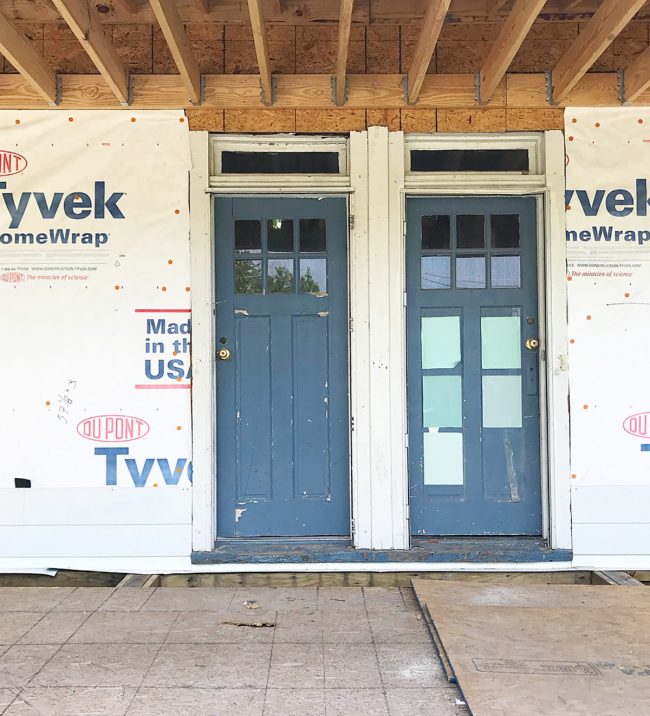
You may have watched the saga of Sherry hunting down a pair of diamond doors on social media (there’s more on that in podcast Episode #100 and Episode #109 if you missed it) and many have asked why they aren’t going on the front of the house. Historically speaking we have to keep the original front doors, so the diamond doors have always been planned for the BACK of the house.
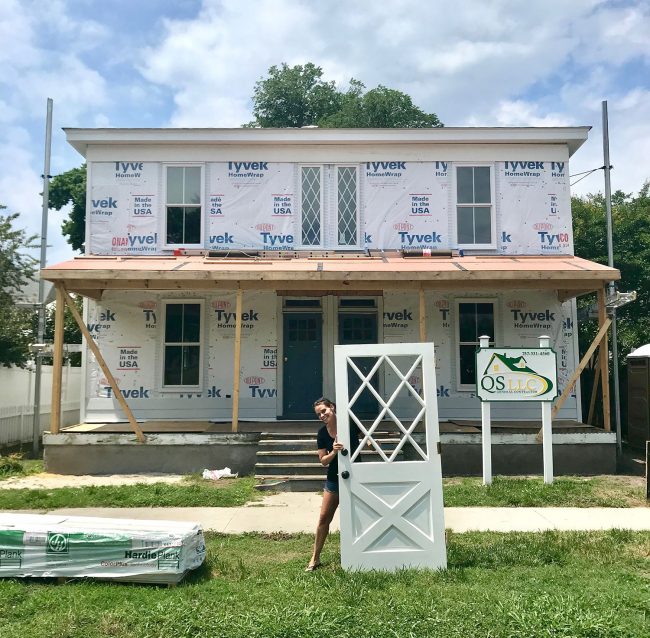
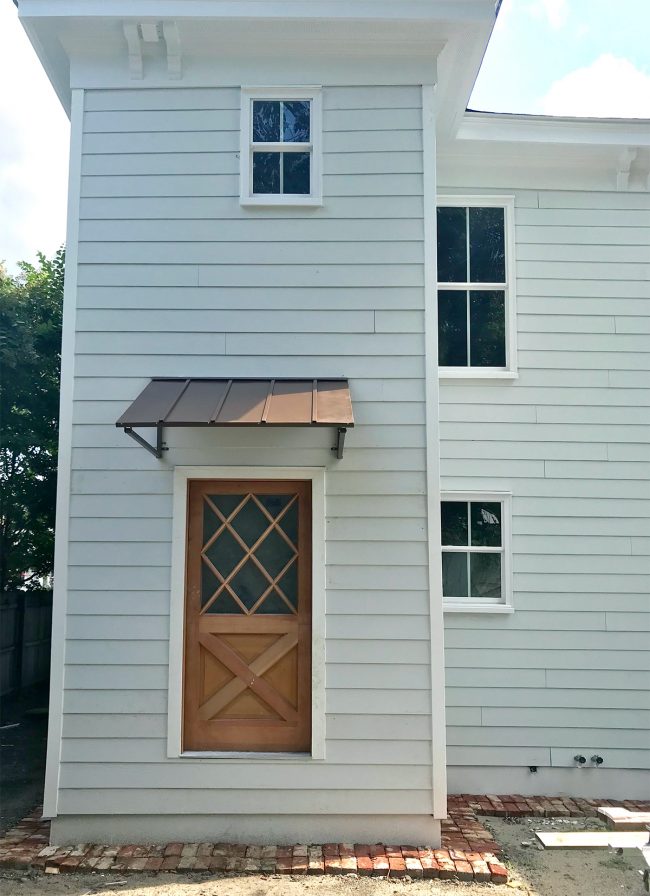
We probably created confusion with photos like the one above, but those same front doors will remain. The good news is that we love the idea of the diamond doors out back because it’ll inject a similar diamond-paned look (inspired by the front’s diamond windows) around back too. So each side will have something-diamond going on for balance. Below you can see them hung, just not painted yet.
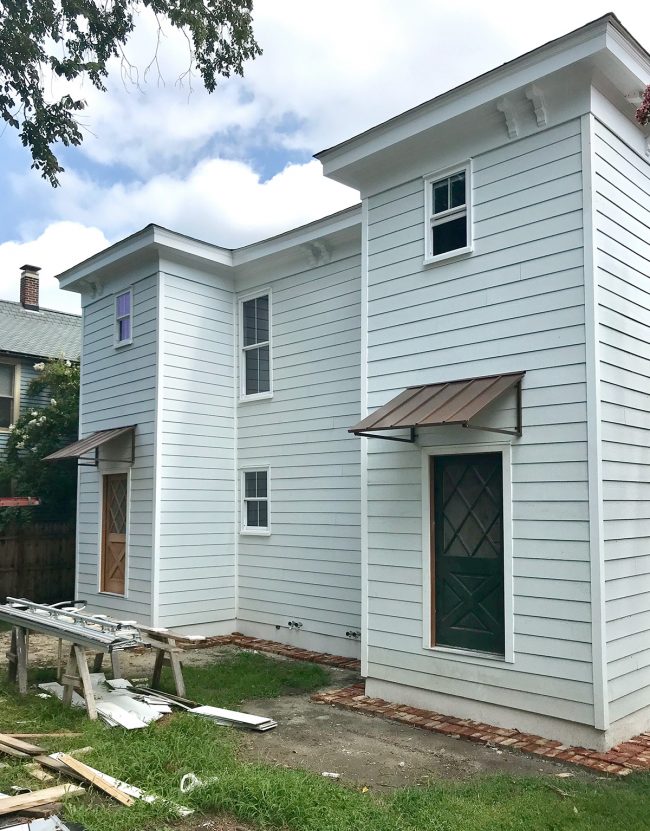
I know it may seem sad that they’re relegated to the back yard, but we’re actually crazy excited about the transformation of that side of the house (the before is below). Everything from carrying the corbels around back to adding the metal awnings (ours are the 44″ x 36″ ones in the bronze color) and bumping out the second floor on both sides (thereby earning two additional bathrooms!) has made a HUGE difference. This is a before shot for ya:
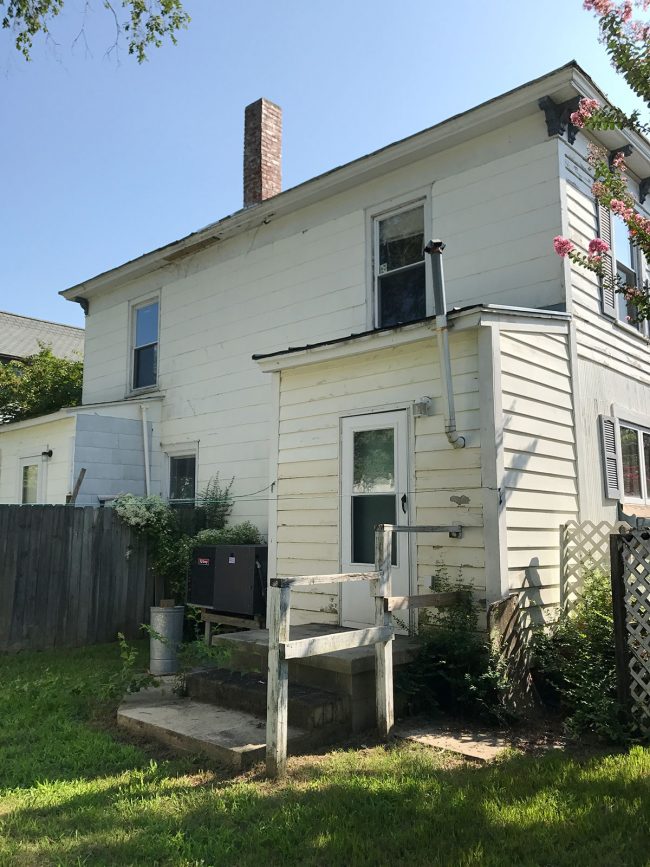
Crazy, right?! All of those changes had to go through the architecture review board (adding windows, bumping up the top, etc) but thankfully they all passed. WHEW.
Circling back to those metal awnings, we actually got a quote to have them built and it was around $1500-2K each… and then Sherry found these online and they’re so much more affordable – literally around a quarter of the price for each one! It meant we could definitely pull the trigger and get them – plus they tie into the same dark bronze color that’s on the tin roof out front.
We got some questions about choosing the height for our metal awnings (a few folks asked why we didn’t go lower). We actually originally held them up lower and almost screwed them in until I realized that from inside the house, they blocked the view and some light! So glad we caught that and raised them. Now the view out the door is unimpeded and as much light as possible shines into the mudroom. Note to self: always check the view from inside before hanging anything that can interfere with the view or the light shining in!
The spacing might seem a little random now, but once the lanterns are hung and the steps are added, there will be more elements around the awnings with similar spacing, and we think they’ll feel a lot more balanced. Along with adding porch lanterns and stairs, we’ll also be building outdoor showers and a privacy fence that can be opened to merge both areas if one family rents both sides, and a lot of other things we have planned (along with – of course – some string lights) we think the backyard might be the coolest spot in the house. Sherry keep saying it’s gonna be “lit.” I give you permission to eyeroll that one.
But let’s go back to the front doors for a second. As you saw above, we tested out our mint paint swatches with some decals that we placed on the duplex’s front doors (which were painted a deep blue color and covered by janky storm doors). The original plan was to paint them the same mint color as the shutters, but after we got them stripped, we kinda fell in love with the raw wood look. Note: For anyone looking to strip old painted doors, first test for lead, and if they’re free of it you can use a product like CitreStrip and a spackle knife to scrape, scrape, scrape.
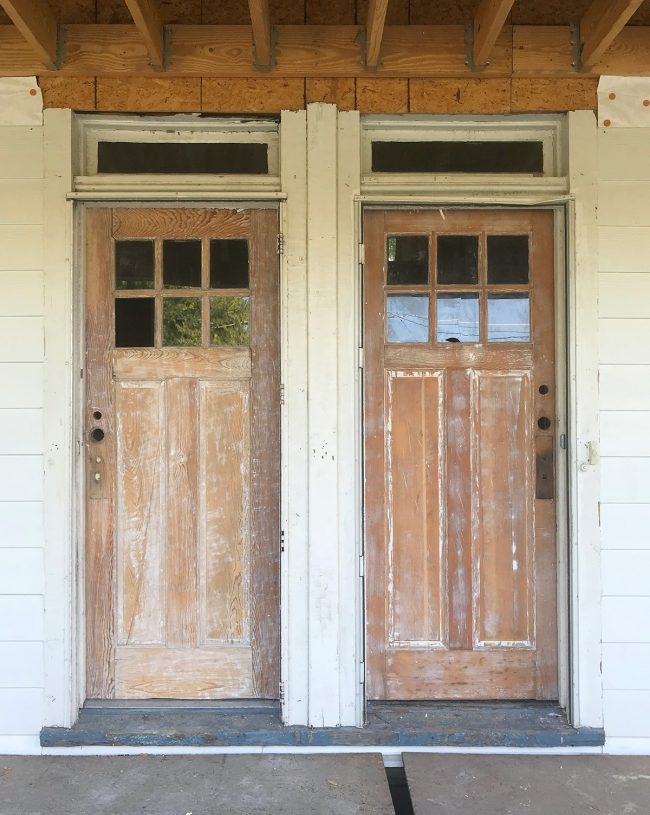
The problem with keeping them wood, which I keep reminding Sherry, is that they’re still in rough shape. Not only is there a persistent haze of white paint (which is arguably kinda cool – and could most likely be sanded off) but more concerning is the doorknob, um, situation. The holes are in weird / high / completely different spots – and it’s gonna be tough to conceal any patching we do if we keep them wood (patching is much easier to hide with paint).

But Sherry is pretty adamant about keeping their wood tone and patching the holes and finding doorknobs with nice long backplates to conceal the patch-jobs. Then we’ll sand and seal them for a richer wood tone. They do look great with the warmth of the brick steps, and Sherry plans to add more wood accents (like wood benches on either side of the porch), so I can’t argue with keeping them wood – as long as we can get it looking good and feeling secure. Feel free to cross your fingers for us.
And Lastly, The Steps
You’ve probably never met a person more excited about brick steps than Sherry Petersik. We knew we had to replace the old wood steps, and while wood or composite is the most obvious answer, we really LOVE the brick steps at the pink house (and, incidentally, we also really like the awesome local mason who installed them). So brick steps at the duplex just felt like the right call.
Not only did they recently complete our super wide 10′ steps (with the same mitered corner detail we love from the pink house), we also had our mason redo the entire concrete pad beneath them because it was cracked and degrading.

We didn’t get any great photos of their process of installing them (it was raining on and off so they erected a tent around them part of the time) and we probably won’t get great photos of them until all of the other construction dust is cleaned up. But we love how wide and gracious they feel.
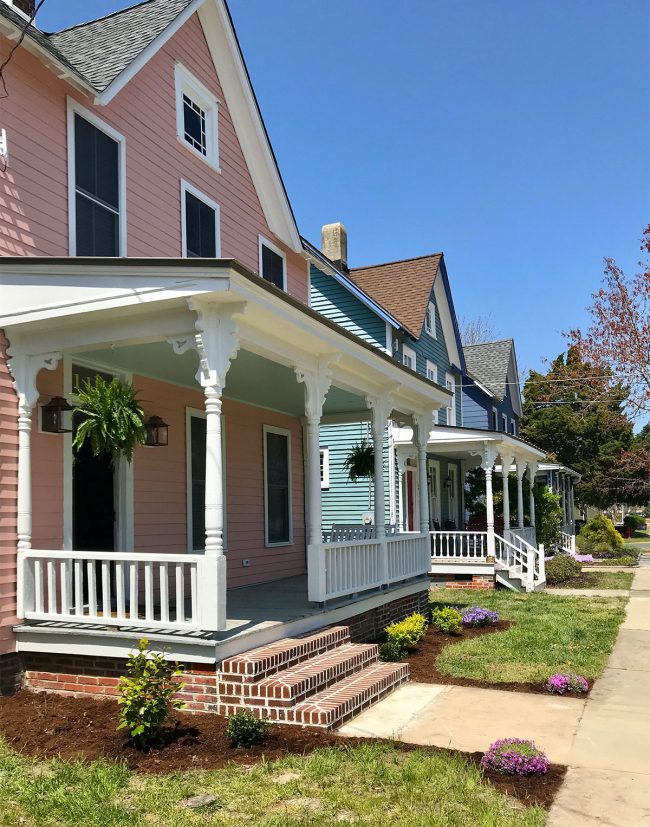
As for a porch railing and stair railing, those will be added later once the porch comes together more. It’ll be historic looking (white with vertical pickets) and we found this house as inspiration which also has wide brick steps, so that might help you picture it.
The last thing I’ll mention is the brick border along the perimeter of the house. We realized that splashing from the rain was quickly dirtying the foundation (see above), which was essentially skim-coated in a white plaster-like material. So at the mason’s suggestion, we had him install this border as sort of an upgraded version of pea gravel or rock that lots of houses have to keep that splash-back to a minimum (still haven’t hosed off the skim coated area – but once we do it should stay a lot cleaner now).
The brick border won’t be as noticeable once everything is landscaped, but we like being able to incorporate that brick texture since the rest of the street has brick foundations and our little duplex missed out on that.
So I think that gets you pretty much up to speed on the state of the exterior. The interior is actually done being drywalled (!!!) so next up is some primer and paint inside, followed by interior trim and doors – plus they’re going to start working on rebuilding the porch. That’s A WHOLE LOTTA PROGRESS that we should get to share with you guys over the next month or so, so stay tuned. Also, the day the Port-O-Potty finally leaves will be a day we dance on those wide brick steps like no one is watching.
P.S. Wanna read all about rebuilding this duplex from day one? There’s a whole category full of duplex posts for you to peruse and click into if they sound interesting. We also have a detailed podcast about how we could afford to buy the duplex in the middle of renovating our pink house (we include how much the beach house and the duplex cost us, etc).
*This post contains affiliate links*
The post Why Are Shutters So Hard? And Other Duplex Exterior Questions Answered appeared first on Young House Love.
Why Are Shutters So Hard? And Other Duplex Exterior Questions Answered published first on www.younghouselove.com
No comments:
Post a Comment