Last week we gave you all of the details on the outside of our duplex renovation, but today we’re turning our attention to a big development on the inside: DRYWALL!
We’d nearly forgotten how big of a step this is in a renovation, but all of the feels quickly came flooding back (just like when we hit the drywall stage at the pink house last summer). Rooms suddenly feel like rooms again! Your floor plan starts to feel real. And the vision for its finished state comes much more into focus.
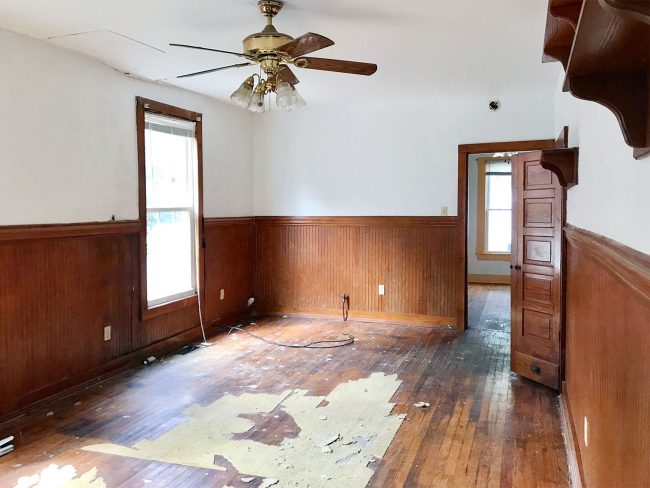
Speaking of vision, Sherry shot a video tour that goes room by room to explain what goes where (everything from where we’re planning to put beds and couches to cabinets and appliances). But before I drop that on you, let’s take a little walk down memory lane. This is the living room on the left side (the right side is a mirror image) when we bought the duplex last September.
The first step was to demo everything out to get a look at what we were dealing with which, not surprisingly, included lots of rotted framing that needed to be reinforced and a fair amount of water damage (and some pretty nasty mold). You know, all that fun stuff. You can read more about that phase of the project here.

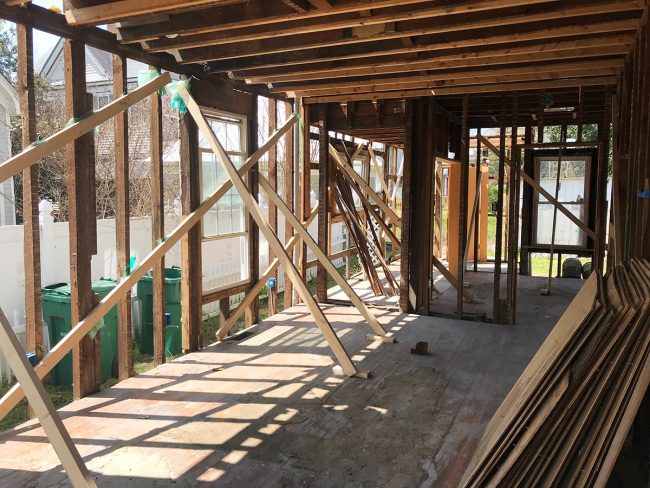
Next came exterior demo. Since we were doing all new siding and roofing to reinforce everything, add more insulation, and keep this house from leaking (and thereby amassing more water damage), the living room looked like this at its sparsest. Gives a whole new meaning to open concept…
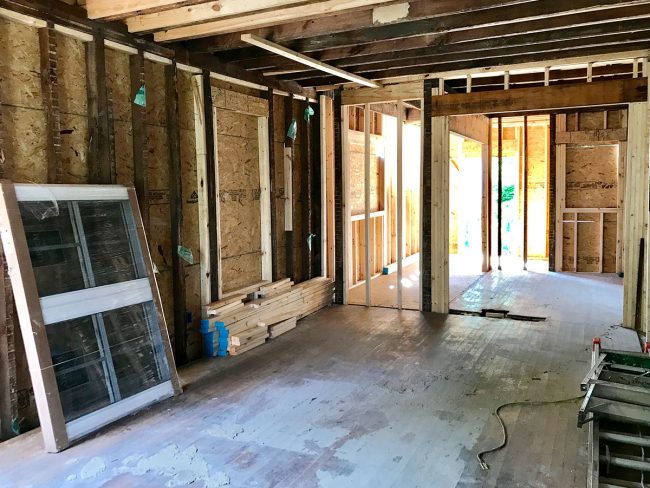
Most of the last few months have involved rebuilding/reframing/refitting the inside with new plumbing, electrical, and HVAC. You know, the things that have to go IN the walls before you close them up. Glamorous things you never see but have to pay many many dollars to have.
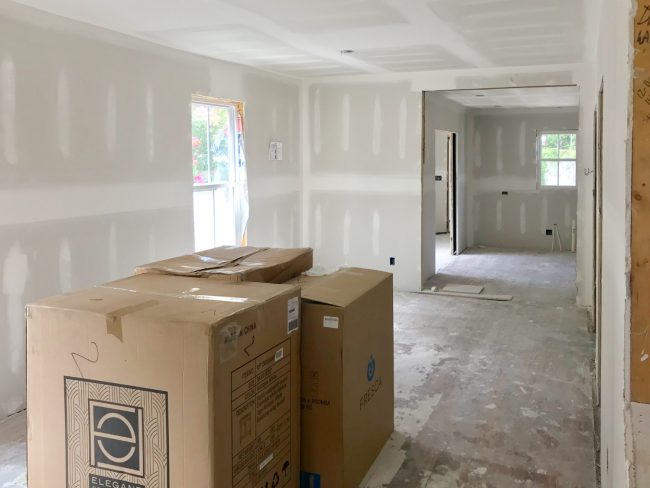
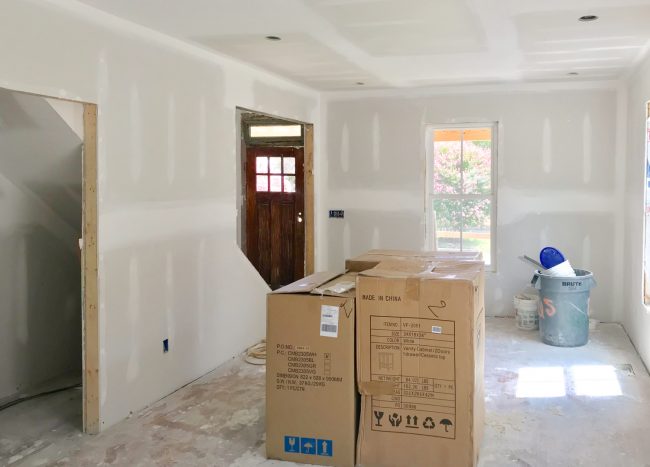
So you can see why it feels so momentous to have walls again. And don’t mind the boxes in the middle of the room below. Those are our three bathroom vanities for that side that got delivered early (we got this one, this one, and this one).
But to really see how it’s all coming together, check out the video below (or watch it here on YouTube). Sherry goes room-by-room on one side of the duplex to show you some of the changes, explains what’s next on the list, and outlines some potentially controversial furniture placement. Sorry for the vertical orientation. She was in Instagram Story mode and forgot how the rest of the Internet works.
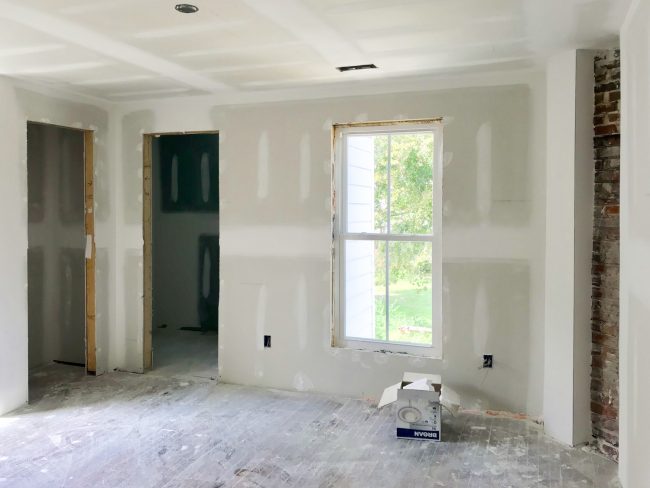
For those who can’t watch the video quite yet, I’ll give you some highlights via a few more photos. The view below is looking into what will be the kitchen. I’m standing near those big boxes you saw before, which is the living room half of the main room. The other half will have a dining table in it with a powder room off to the right (which is where this sink vanity will go) and the kitchen beyond.
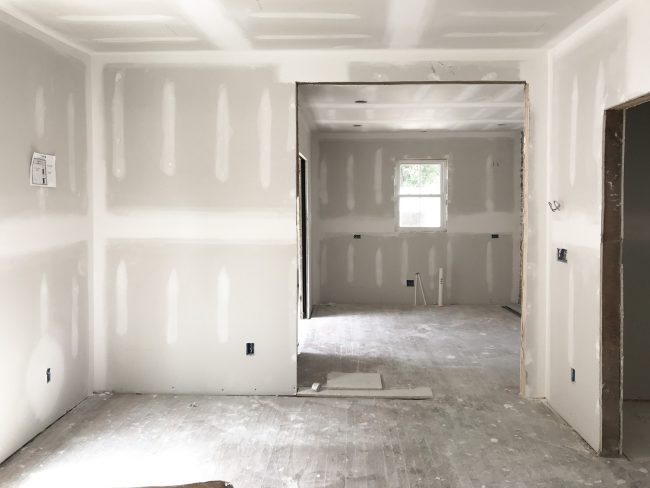
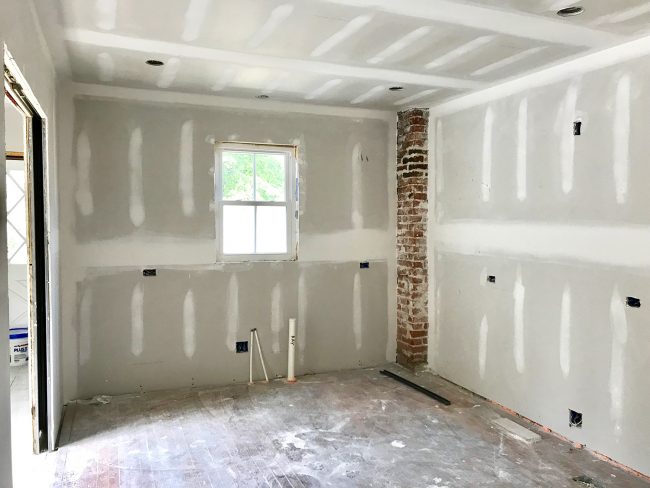
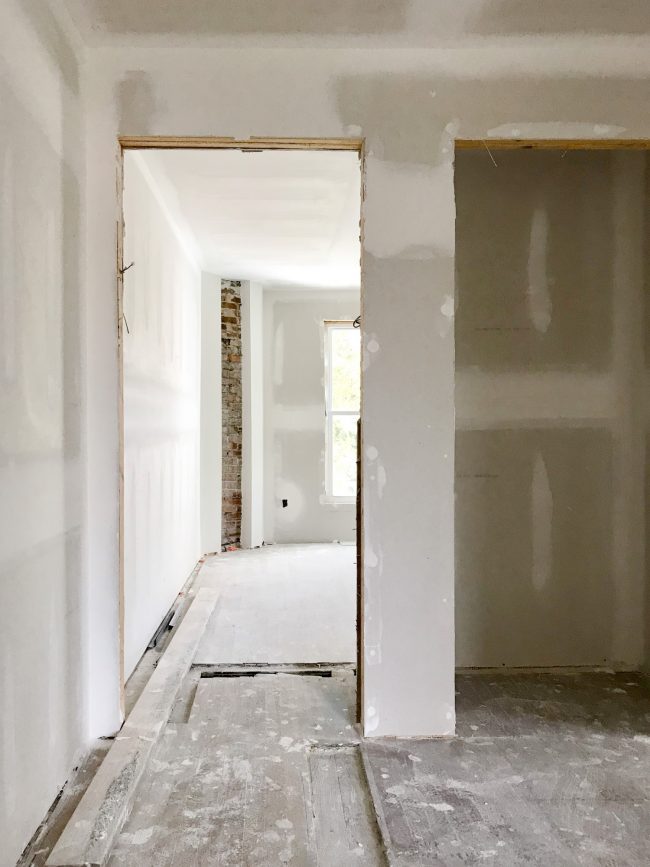
We were able to keep the brick chimney exposed, which should make for a cool accent in the kitchen. The sink will be centered under that back window, while the stove will be centered on the right wall in the photo below. The fridge will go in the corner that’s just out of frame on the right side.
You can also see one of the diamond doors peeking in on the left of the photo above. That’s the mudroom/laundry room area, which people will be able to close off to the kitchen thanks to some really beautiful pocket doors.
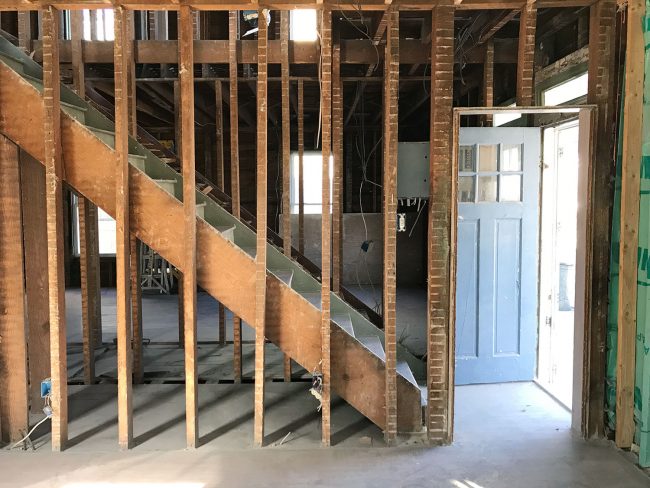
Below is the view looking back towards the front door. Again, this half of the main room will be the living area (just picture chairs and a couch facing a TV on the wall near the stairs). That closet under the stairs will host boring stuff like the HVAC, the hot water heater, and will serve as a locked owner’s closet so guests won’t need to ever lay eyes on that stuff.
We’re really excited about how this view is shaping up. I realize it’s kinda dumb to be excited about it, but we did a lot to open it up (all five of those bottom steps used to be hidden by a wall that made the stairs feel super dark and closed off like a tunnel). It really feels completely different to have it opened up so not only do the stairs feel more airy, but the front door’s transom window is now visible thanks to raising the doorway as well as widening it.
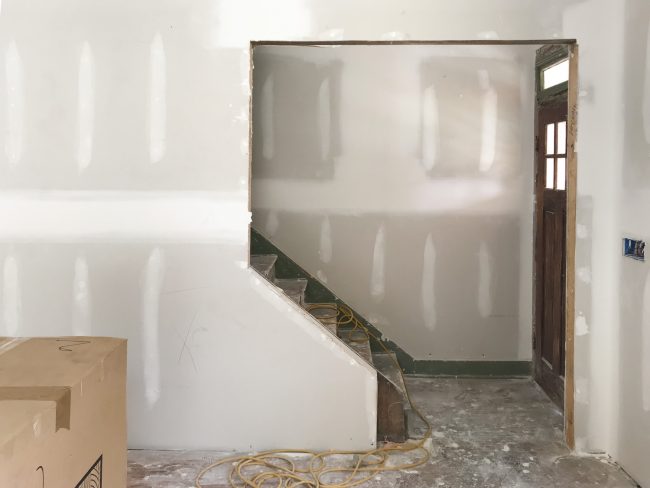
This is the best view we have of the original opening. See how tiny the closed off the area was before? Just picture all of that with actual walls blocking the light and making the entryway feel really cramped. It was a tiny low doorway leading to the living room (see how you couldn’t see the transom window before), so the new layout feels MUCH better in person.
Upstairs isn’t as interesting because it’s basically a lot of boxes (aka bedrooms) that look pretty generic right now, but a few things are making a difference – like exposing the brick in the back bedroom. We’re going to add shelves that go in that alcove so it’s a brick-backed niche for books and stuff like that. We also added that window you can see from the top of the stairs, which makes a huge difference from the landing up there (it felt a lot darker before that got put in).
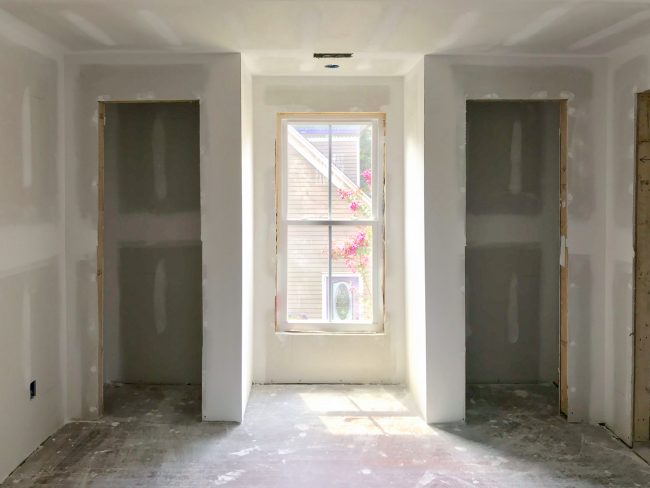
Half of that exposed brick chimney is in the master bedroom on each side (above is the right side, below is the left). Sherry explains a little more in the video how we plan to create some shelving in the nook, and she also details why we’ve made a plan to put the master bed on that wall pictured. It’s not the conventional placement, but the other options have some pretty compelling downsides.
One of the doorways above goes into the master bathroom, while the other is one of two closets we added to each master bedroom. These will not only add lots of storage in these rooms, but also give us a spot for a window bench. We think it’s little details like this that will inject some charm into otherwise boxy boring rooms. We even added a fixture box above the future window bench so we can hang a pendant in front of the window – maybe like this one.
Oh, and you may notice the closet cutouts above are different than the ones Sherry showed in the video. We’re using old doors for the other side (the side Sherry showed) which are shorter than the standard new doors that will go on this side (we only had two of those cool old doors, which is why we couldn’t do both sides the same).
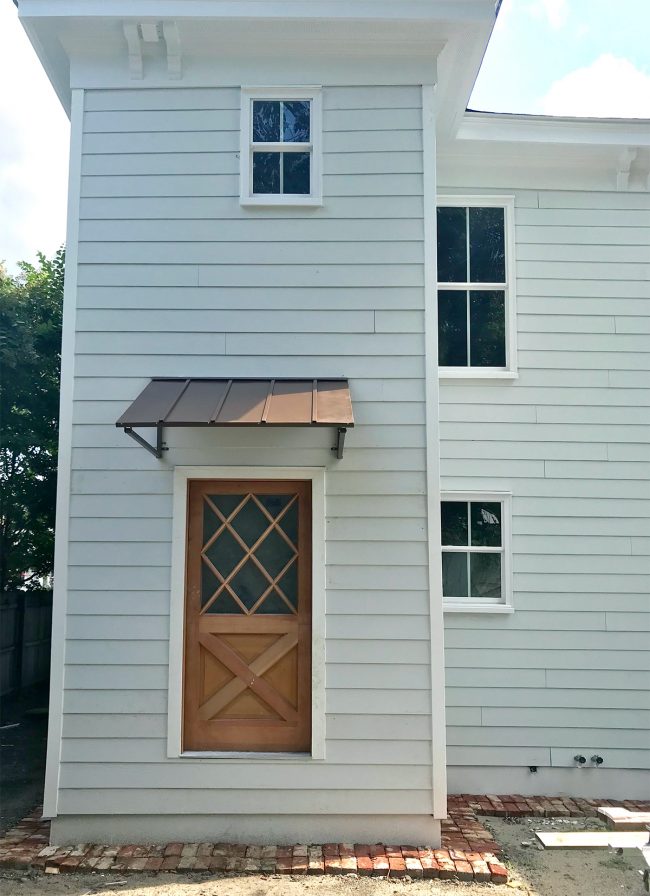
It’s actually cool to see each side shape up with some distinct features from the other. For example, the side that gets the cool old doors on the master closets gets the mint colored X-paned door in the back, but the side that you might feel sorry for (the one without the cool old doors upstairs in the bedroom) gets the all-wood X-paned door which is a SHOWSTOPPER. So each side is going to have perks and fun touches.
Next on the agenda now that we have walls is priming, painting, and installing trim, so the duplex will look even more like a real house in the coming weeks. Then comes tile (we’re planning to do both laundry rooms, both kitchen backsplashes, and all six bathrooms ourselves) and a few other big installations that will finally bring some of our design choices to life (we’re also going to be assembling and installing our Ikea kitchens ourselves, once we get a little further along and those are ready to go in). In short, it should be an exciting fall.
P.S. You can read more about the duplex and how we bought it, planned each side’s style, and have been renovating it over the last year here.
*This post contains affiliate links*
The post The Duplex Has Drywall! And A Video Tour! appeared first on Young House Love.
The Duplex Has Drywall! And A Video Tour! published first on www.younghouselove.com
No comments:
Post a Comment