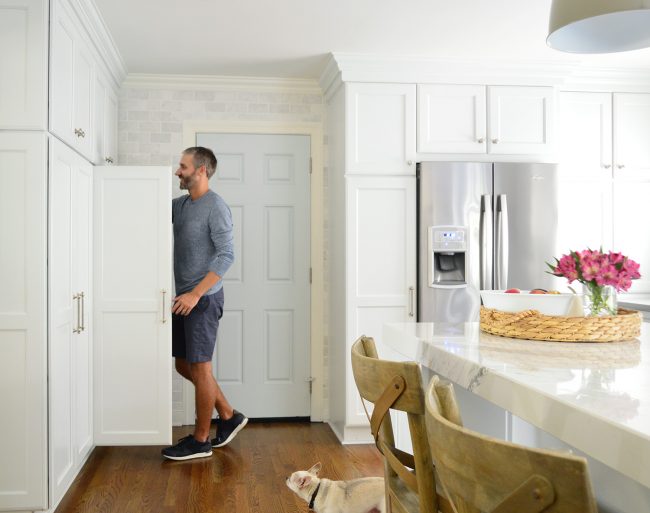
Since we don’t have a proper mudroom in our house (our garage door, which we use every day just dumps us right into our kitchen), you may remember that we squeezed the function of one into our big kitchen remodel by placing large cabinets – kinda like lockers, but prettier – right next to the door that leads to our garage. But now that we’ve lived with them for over two years (how has it been over two years since our kitchen renovation?!), we realized that a few easy tweaks would make these hidden cubbies work a lot harder for us.
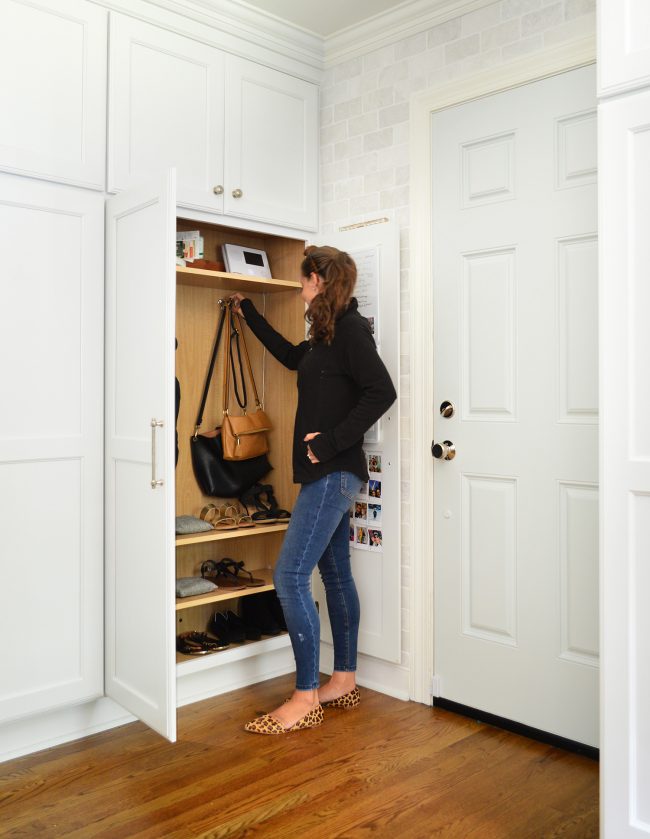
(Since I know you’ll ask – here are Sherry’s shoes, jeans, fleece, & a similar purse)
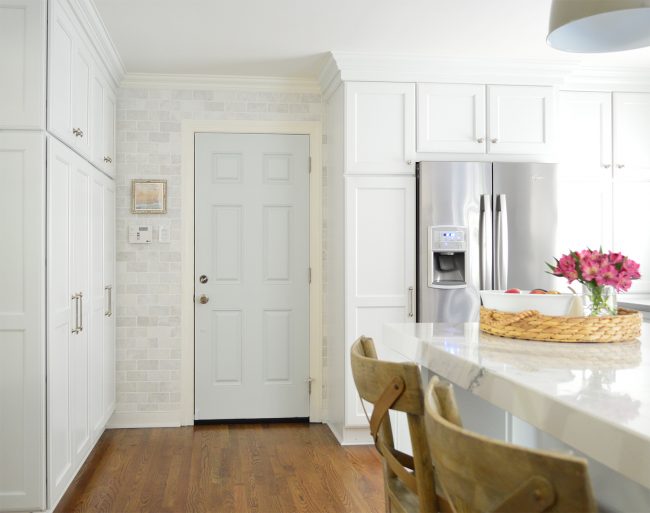
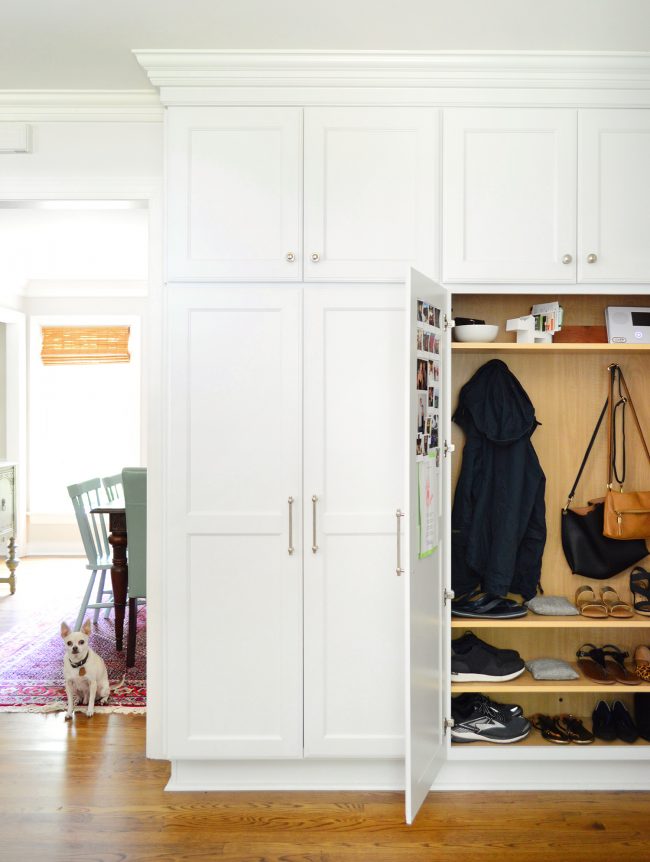
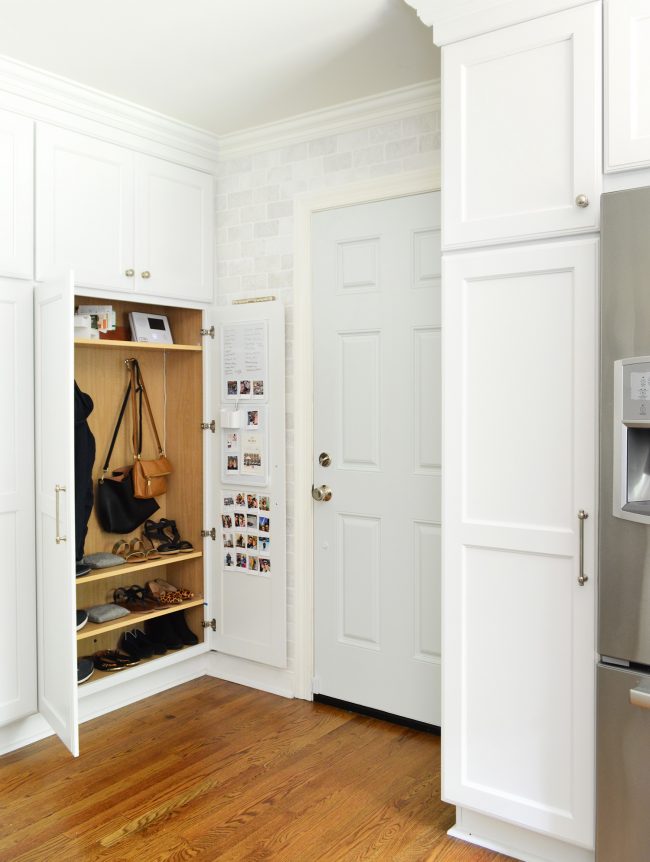
To help you get oriented, here’s the area of our kitchen we’re talking about. That door to the garage is our main entry/exit point, and if you look at the floor plan options we considered during our renovation, you can understand why having this faux mudroom has been such a HUGE improvement for us. We get to keep shoes, coats, backpacks, purses, gloves, and hats conveniently by the door, but all of that clutter gets hidden away. It has been such an upgrade from our old system of walking halfway through the kitchen to dump shoes into one big dusty shoe basket that was out in the open, and then trekking even further around the corner to the coat closet to hang everything else.
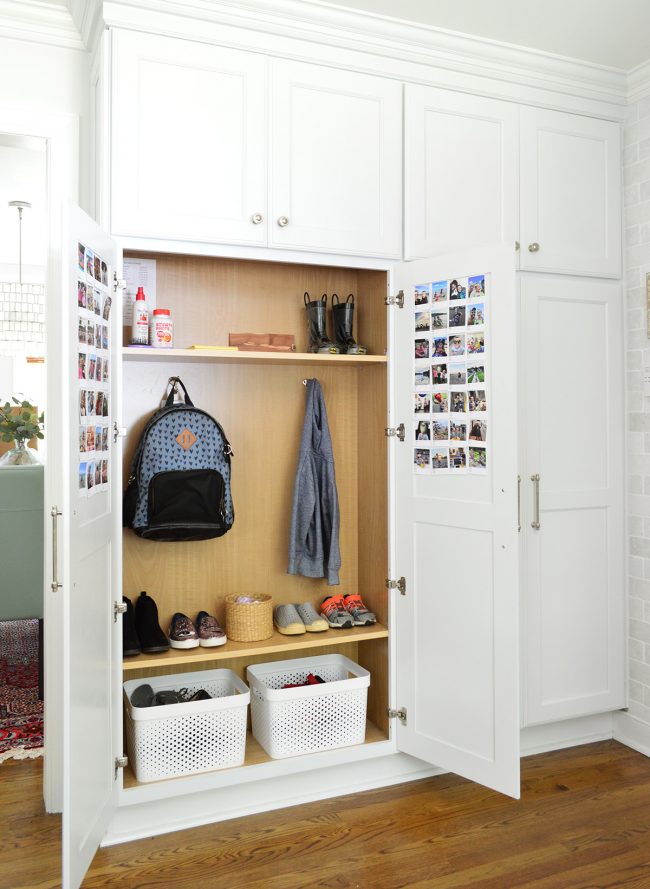
Our “mini mudroom,” as we call it, is made up of two large cabinets that go from floor to ceiling. And each of these two cabinets have two doors – meaning each of our four family members has their own side (or locker, if you please). You’ve probably seen our kids’ side the most, which has looked pretty much like this since the remodel was complete. We added hooks for their coats and backpacks, and a basket underneath to corral extra shoes. It gets a little messy sometimes, but overall it has been SUPER functional for us and for them. Tip: we keep a basket of socks in there along with their shoes, which makes it so much easier to get out the door than having to send them back upstairs for ’em.
Our side has had the same setup over the last two years: hooks, shelves, and shoe baskets… but over time we realized it wasn’t working as well for us as we’d like. The primary issue is that our stuff is just bigger. Our coats are longer, so sometimes they’d get bunched and wrinkled on the bottom where they’d hit the shelf below (instead of freely hanging), and the baskets barely hold more than three of my shoes (and 3 shoes is NOT a helpful number). Sherry’s basket could hold more of her shoes since they’re smaller than mine, but it would get so crowded that it was impossible for her to grab a pair quickly without taking the whole basket out every time. Meanwhile, our kids’ little shoes could slide out with just a slightly tip of the basket. What works for them just wasn’t working for us.
I know you’re probably thinking: just adjust the freaking shelves then! Well, the problem – and actually the reason why we had set it up this way in the first place – is that the shelves are set at the highest and lowest points they can be, based on the pre-drilled holes in the cabinet. So back in 2016 when we wrapped up the renovation we really didn’t have the appetite or energy to go drilling extra holes and moving things around. “It’ll be fine,” we said. Eh, we were tired. But fast-forward to 2018 and it finally felt like an easy weekend task.
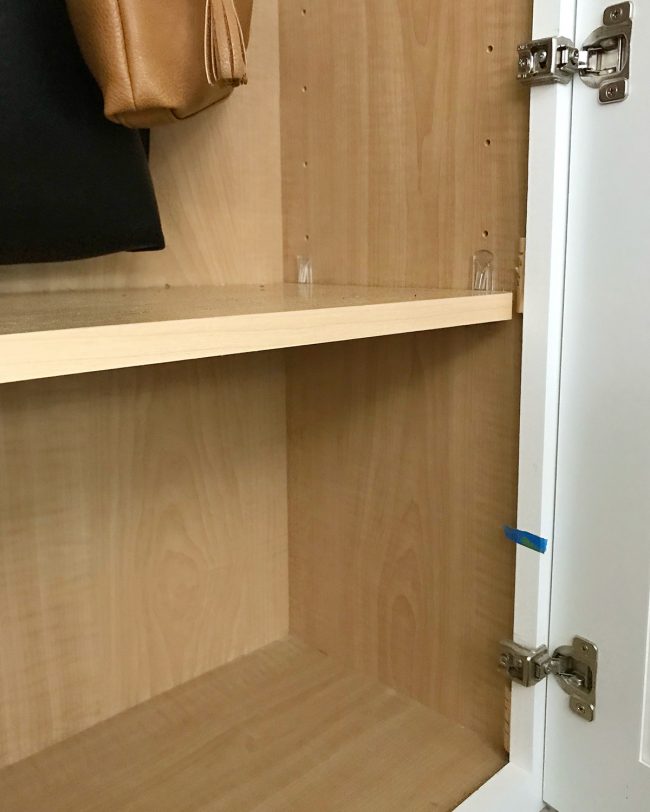
That blue tape mark above is where we decided we wanted to move the shelf, and therefore drill a new set of holes. They sell shelf pin templates and jigs for making holes like this, but I wasn’t about to spend $20 or $30 for a couple of holes, so I went old school and just marked everything on tape using a ruler, making sure it was level and vertically aligned with the holes above. The tape not only protected me from writing on the cabinet itself, but also helps to keep wood veneer from splintering when you drill into it.
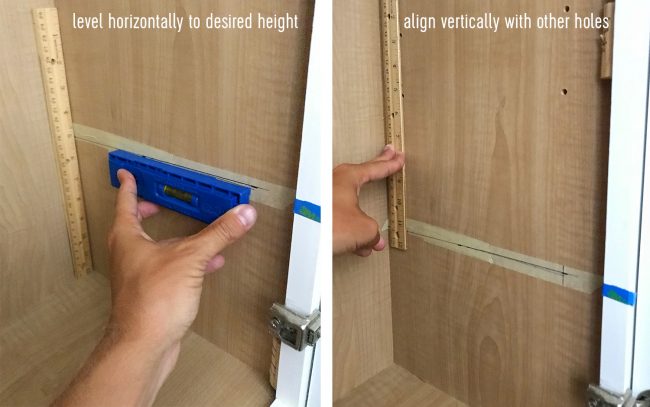
Once everything was marked, I just stuck different sized drill bits into one of the existing holes until we found the one that would create a matching hole. Then I used blue tape to mark the depth of the existing hole on the drill bit, so I didn’t end up drilling through the entire side of the cabinet. Once my drill bit sunk to meet that piece of tape, I knew it was deep enough, and stopped drilling. Boom: instant holes that were the same size and depth as the pre-drilled ones that came with the cabinet.

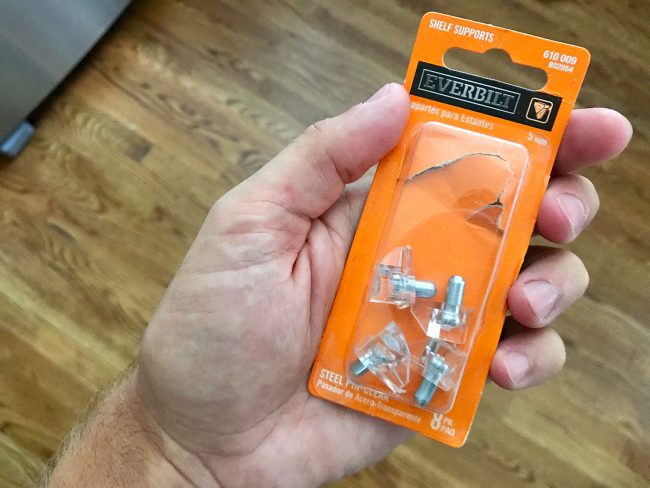
We didn’t have any more pegs in the cabinet to use to rest an extra shelf on, but you can find a box of them at the home improvement store. The store didn’t have of the click lock variety that came with our cabinets, but these fancy pegs with a sturdy plastic platform were under $3 and did the trick just fine.
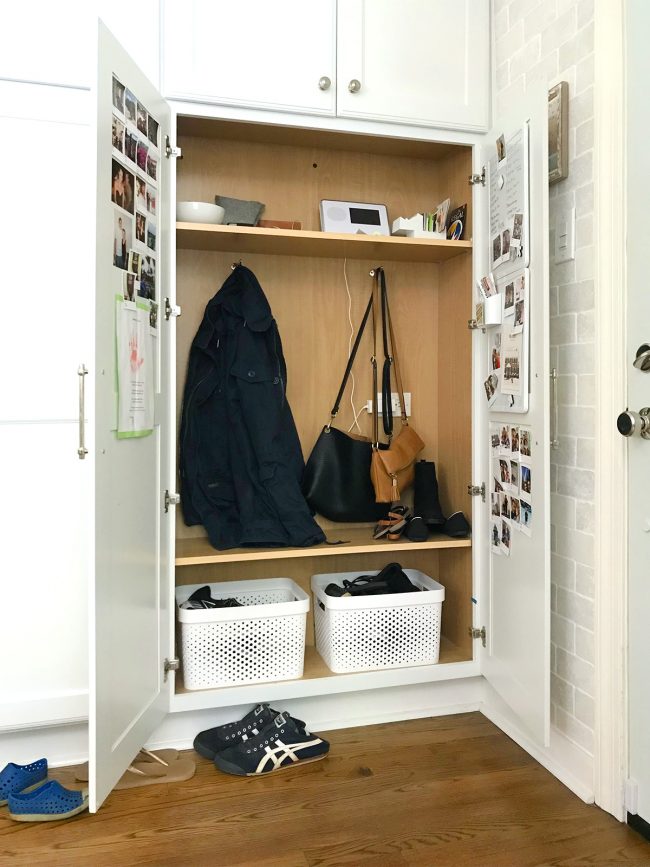
After drilling all of the new holes on the bottom (we just added two on each side) we also drilled a new set of holes up top so that we could raise the top shelf and, in turn, raise our hooks a little bit too. Suddenly our coats could hang without hitting the bottom shelf. And we had room for not one, but two shelves of shoes on the bottom thanks to moving the top shelf and the hook up. Then all we needed to do was dig out one of the extra shelves we’d been keeping in the attic (we also could have made one with plywood if we didn’t have one on hand) and – BLAMMO! Now our side of the mudroom looks like this:
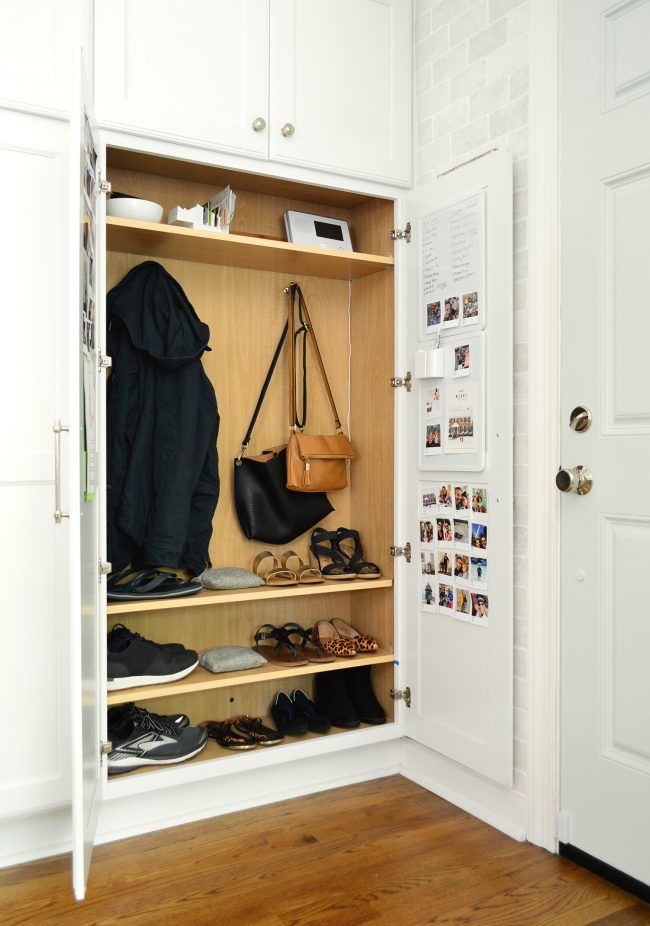
Tip: those two gray bags above are these random charcoal bags that Sherry loves. They absorb odors so they’re great for a mudroom or a shoe basket, and you just lay them out in the sun for an hour a month to air them out and then toss them back into the cabinet to keep doing their job.
It may not seem like a dramatic difference, but by adding the extra shelf on the bottom we were able to ditch the shoe baskets entirely, allowing us grown-ups to store MORE shoes and access them MUCH more easily. In fact, Sherry now can keep pretty much all of her go-to footwear down here (seven pairs!) so she’s not having to make those last minute runs up to the bedroom closet anymore. And the three pairs that I usually wear can easily fit too, even though they’re significantly larger than Sherry’s.
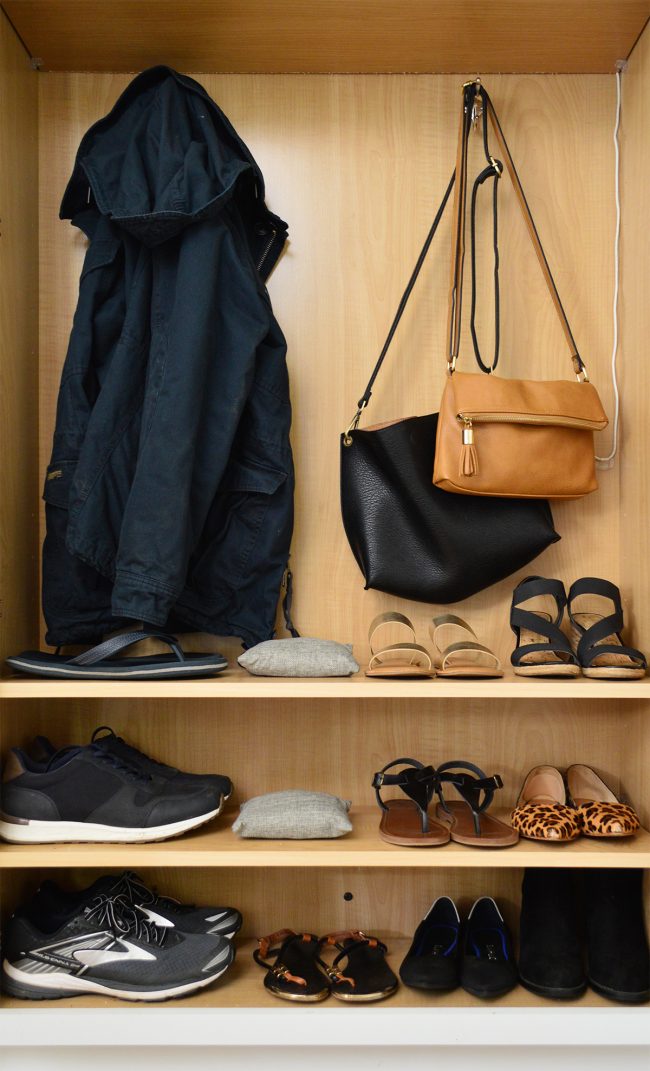
We couldn’t have found that extra space for shoes had we not moved the top shelf and the hooks up (we had a lot of dead space above the top shelf initially, but it had been on the highest pre-drilled holes before so we just sort of said “ok, if that’s the highest hole we’ll put the shelf there”). It’s a great spot for a few practical things that keep us organized, like a bowl for our keys and my wallet, a mail holder that Sherry got from Target to serve as a gift card organizer, and our alarm pad. Oh and that rectangle of wood that you see at the top is another one of Sherry’s deodorizing tricks – it’s one of these cedar panels, which definitely keeps these cubbies smelling good. There’s one on the kids’ side too.

This small update was a reminder to us that sometimes you just have to live with something for a little while to find the best ways to make it work. And sometimes at the end of a BIG project, it’s ok to be tired and think “it’ll probably be fine, and if it’s not I’ll deal with it later.” And when you finally find the steam to address them down the road, they can be surprisingly satisfying. I mean, just check out how satisfied Burger looks below:
Speaking of Burger, he likes to hover nearby whenever we break out the camera and tripod. But this time he got nervous that we were actually leaving – not just posing like we were leaving – so he was extra vigilant.
Poor guy. Photos can be so stressful.
Oh, and since I know this question will come up. All of those photos taped inside the cabinet doors are from our custom page-a-day calendar that I rave about every year. You upload 365 photos and for $40 you get a personalized page-a-day calendar. I collect photos from my siblings each year and make one calendar that we get printed like six times (for all of us and my parents and our grandma) for Christmas each year). It’s like a rotating family album that sits on our kitchen counter and we all get to see the same photo every day, so it sparks texts about a certain memory or event.
Might sound silly, but we all feel more connected when we look at the same family photo everyday. And at our house we tape up our favorites on the cabinets throughout the year, then when the new calendar comes each January we clear the ones off from the year before (saving them in a memory box) and we start fresh.
And again, if you want to learn more about kitchen remodel and how we decided on this layout (and this unconventional mudroom) you can see it all summarized in these three posts (which also include measurements of the entire room for anyone wondering how big our island is or how long the room is, etc):
- Kitchen Remodel Chapter 1: Floor Planning
- Kitchen Remodel Chapter 2: Demo & Rebuilding
- Kitchen Remodel Chapter 3: The Big Reveal
Also I know I already said this, but how was that over two years ago?!
*This post contains affiliate links*
The post Maximizing Our Mini Mudroom appeared first on Young House Love.
Maximizing Our Mini Mudroom published first on www.younghouselove.com
No comments:
Post a Comment