GUYS. GET EXCITED. Lots of major stuff is happening at the duplex. Like extremely thrilling developments that we’ve thought about and planned over the last year and finally… FINALLY!… they’re happening. You last saw the duplex about a month ago when we shared that it was drywalled, and the latest progress has basically put me over the edge. I, Sherry Petersik, am feeling what people refer to as “messy” about these recent developments. It means I’m too excited and it’s not a good look. But you know I can’t contain myself so I’m just gonna share it all anyway. GET READY FOR A CAPS LOCK EXTRAVAGANZA AND LOTS OF PICTURES!
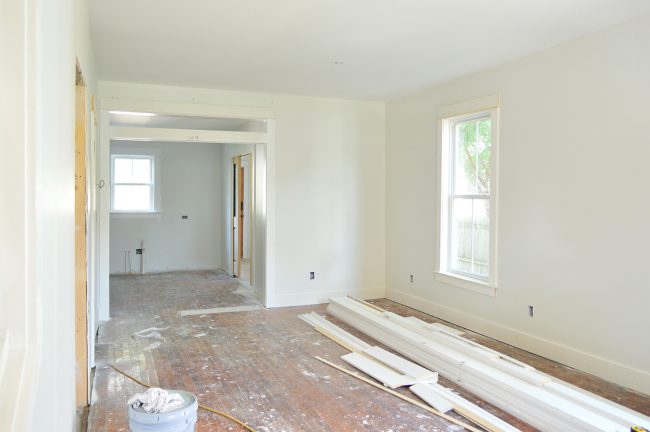
That room above is the living room on the RIGHT side of the duplex in all of its painted and trimmed glory (remember, there are two identical – just mirrored – fully separate functioning units in this house – they even have two different street addresses). The wall color that we chose for every last wall in the entire duplex is Sherwin Williams Spare White, which is a barely-there gray color with just enough contrast from the Sherwin Williams Pure White trim.
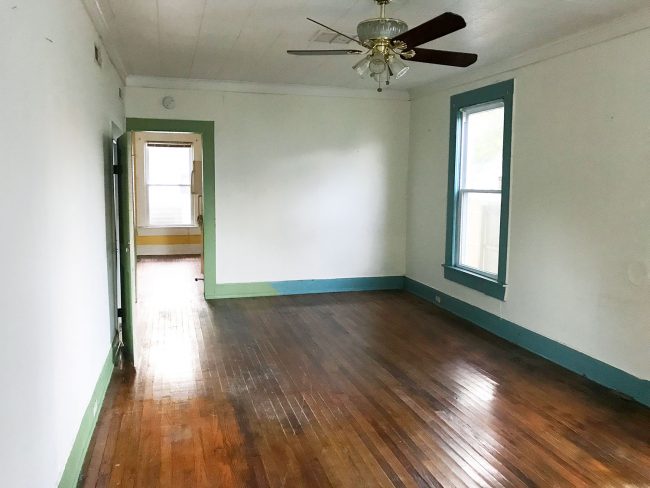
With all the colorful tile (and doors! and stair risers! and cabinets!) that we chose for these spaces, it just feels like the right backdrop to support those bolder choices. Even from the living & dining room’s extremely simple state in the photo above, you can already see the progress from what it looked like when we first laid eyes on it:
But before we get into things like that wider doorway at the back of the house (and that glorious indoor transom that we’re adding!), just FEAST YOUR EYES upon what is happening the second you walk in the front door. Our chippendale railings all the way from Richmond are in!
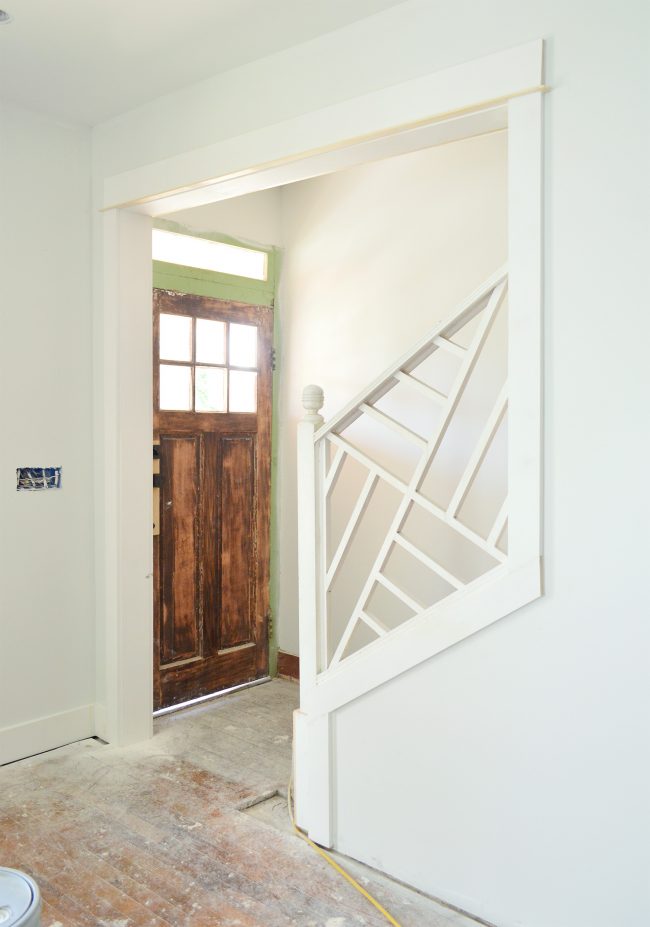
If you heard this week’s podcast, we talked about how we demo’d the railings off of our porch back in Richmond (just to open things up before we paint the house white) only to discover they were a perfect fit for the stairs in the duplex!!! If that isn’t fate, I’m not sure what is.
There’s one at the bottom of the steps on each side of the duplex. Remember we opened the stairs up because they were originally completely closed in and dark. This is the old framing. Picture drywall covering the entire staircase from both sides.
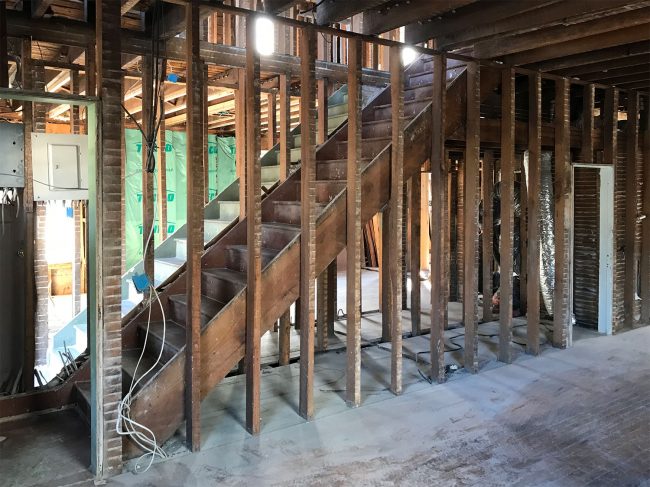
This helps you see what it looked like from upstairs looking down. There was just a tiny doorway to squeeze through to see into the living room.

It’s so much nicer to have the bottom five stairs opened up to the living space – and it still blows my mind that the railing that we needed happened to be the exact railing size that we had in Richmond from our porch! There were also two straight railings that we removed from the sides of our porch back in Richmond, and they’re virtually the exact length that we need for the top of the stairs on each side of the duplex. Literally just some trim pieces need to be added, but they’re going to be a perfect fit as well. WHAT ARE THE ODDS?!?!?!
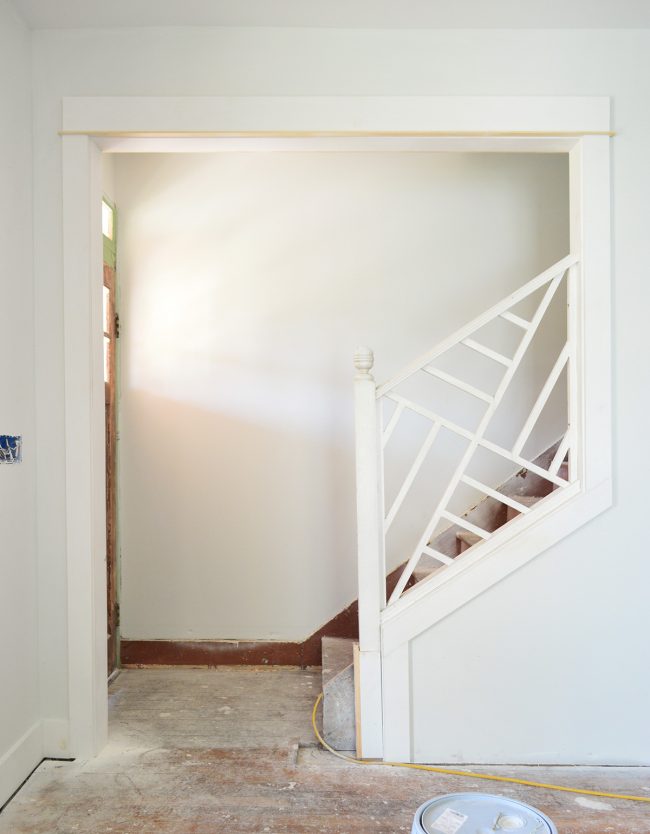
In summary: It was RIDICULOUSLY THRILLING to see that the railings at the bottom of the steps truly do fit perfectly and that they do exactly what we wanted them to do for this house’s interior: which is to add a little bit of geometry and interest. We still might tweak the newel post situation (I call the round thing at the top of the post a “hamburger” and I’d like to cut it off and add a more square top there) but I’m not gonna let that rain on my railing parade.
But back to the back of the house – because there’s lots of good stuff happening there too. First of all, Sean mocked up the transom window that we’re adding to the (now much wider) doorway into the kitchen. It’s just two 1 x 6″ boards nailed in to create the base of the window and check the proportion, and thanks to that exercise in mocking it up, we all agreed that it would look better if we made that bottom trim a little narrower, hence the 1 x 4″ note written on it by Sean.
![]()
We think that will help the glass-to-trim ratio feel a bit more balanced (more glass, and trim along the bottom that’s the same size as the trim on the sides). But again, I’m not gonna let that little need for tweaking rain on my parade… which is now a railing AND transom parade, in case you’re keeping track.
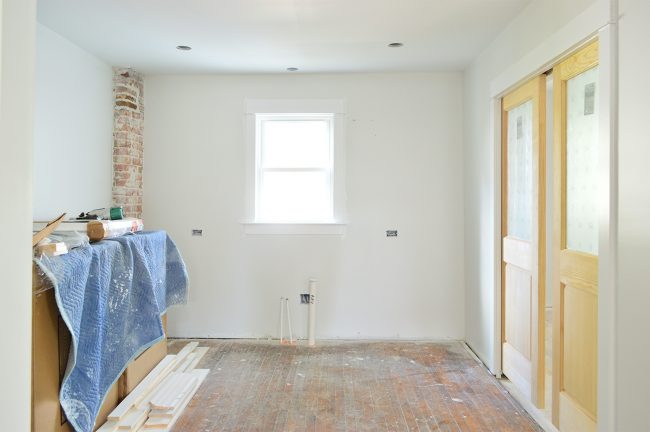
Almost all of our primed solid wood five-paneled doors were hung too and – as you’ll see in a minute – some even got their first coat of paint (hint: they’re not staying white… so the one below hasn’t been painted yet). But it was really excited to see this view start to come together. The pretty paneled doors, the transom window, and the exposed brick chimney back in the kitchen all feel like “something special” – and they all seem like they could have been here all along, which is always the goal.
![]()
Since this house was a rental for so many years, it had a lot of small & cheap upgrades and patch-jobs over time, so there was significantly less original stuff to salvage than the pink house (almost all of the doors, lights, and hardware were replaced by newer and less cool things). Which is why our goal to bring back some of that older feeling charm with things like the transom window, the exposed brick chimney, and nice solid wood doors are so exciting to finally see in the space.
The kitchen itself is crammed with boxes at the moment (they’re our bathroom vanities) but it’s going to be such a nice space in the end. It feels like the perfect size, and we love how balanced it feels with that wide opening to the dining room and those nice double pocket doors that lead to the laundry room/mudroom. It’ll have even more fun details – like a wall full of tile to the ceiling – which you can see in this post about our tile choices.
The pocket door glass isn’t frosted, it’s just covered in a protective paper for now – but look how pretttttty this area is becoming with the addition of these doors. We’ve been going back and forth on whether or not to paint the pocket doors. I love the wood, but John thinks that we might have trouble staining the pockets to match the color of the diamond door (they’re different base wood types) plus we are doing blonde wood cabinets in the nearby kitchen.
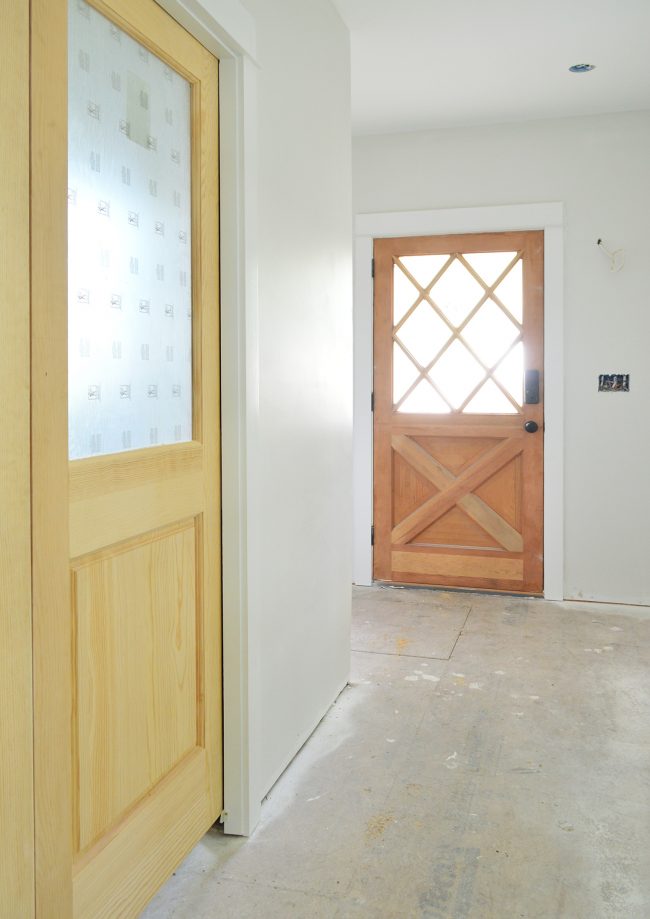
So even if we can get them to match the diamond door, they won’t match the lighter wood cabinets in the kitchen… which is why John’s voting that we paint them (but not white… more on that in a second). We definitely want to stain the identical pocket doors on the other side of the duplex (since that kitchen will have blue cabinet doors and that diamond door is already painted). So in the end both kitchens will have a mix of wood and painted accents.
Speaking of painted accents, Sean’s crew started painting some of the interior doors upstairs and they are EXACTLY what we were hoping for. On this side (the unit on the right) all of the doors are getting painted Sherwin Williams Oyster Bay, which is sort of a gray-blue with a hit of seafoam in it. It’s very neutral, but still pops nicely agains the white walls and trim. I could not be more in love with this wall/trim/door combo, guys. If I could give it ten jazz hands I would.
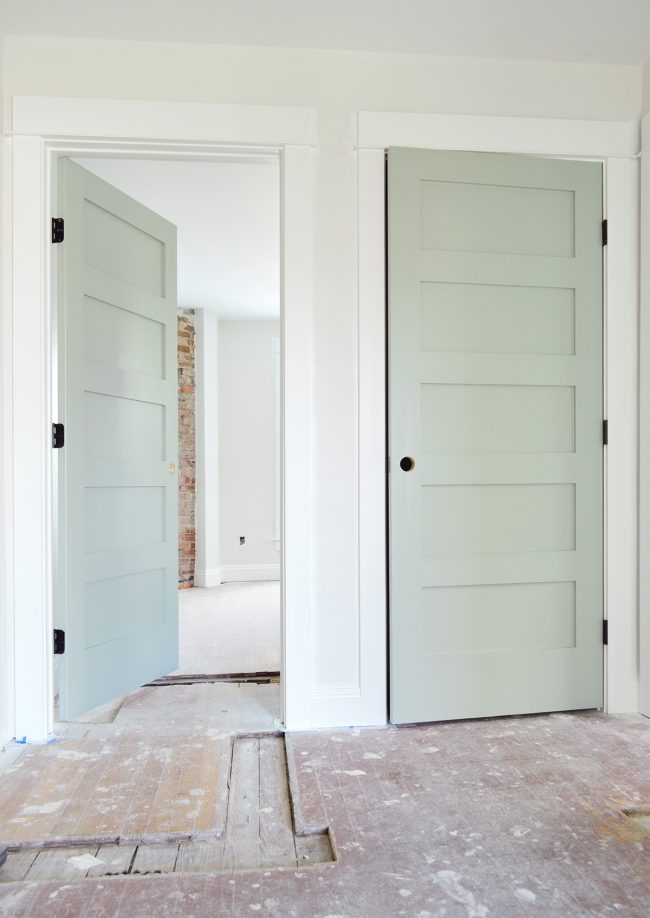
Plus, look how charming they look with the shadow of my diamond paned windows reflecting on the floor in the front bedroom!!! I DIE.

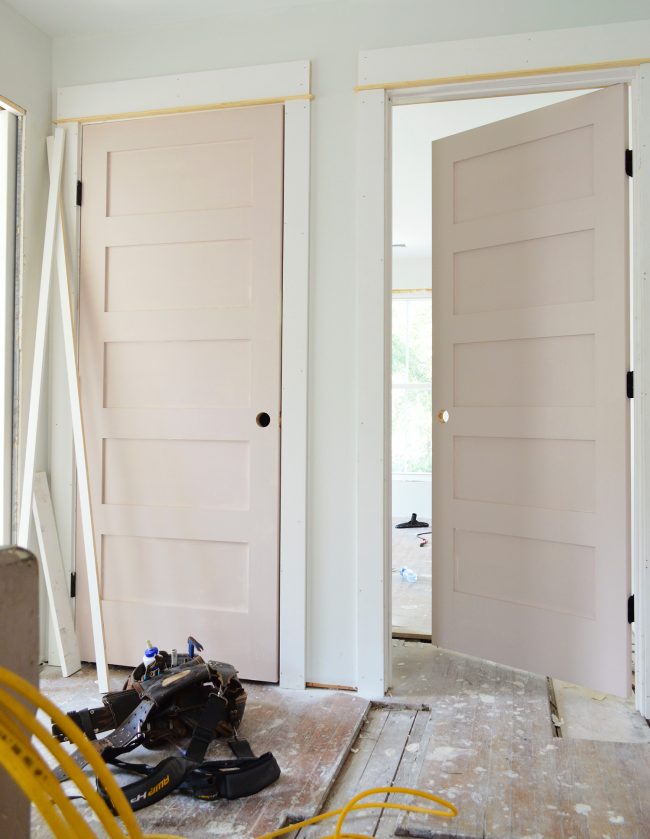
On the other side of the duplex (the unit on the left) the doors are getting painted Sherwin Williams White Truffle, which – despite the name – isn’t white at all. It’s a soft muted pink that also pops nicely against the light walls and white trim without being like a crazy hot pink. WARNING: THESE DON’T LOOK AMAZING YET BECAUSE IT’S JUST ONE COAT (and the walls look green here because leafy trees were reflecting in the window) but hold out for the final look. It’s gonna be great. I CAN FEEL IT IN MY BONES.
We’re headed there this weekend to – cross your fingers everybody! – hopefully start tiling. I KNOWWWW! WE ARE AT THE TILING PHASE! That means all that’s really left after that is floor refinishing and assembling the kitchen and hanging the lights and installing the bathroom vanities. BUT WE CAN TASTE THE FINISH LINE!!!! I told you this post was gonna have a lot of caps lock. And I feel like they’re warranted. WHAT A TIME TO BE ALIVE!!!
Anyway, stay tuned for more updates and progress as our little twins start to feel more and more like real houses. And to catch up on everything we’ve done to get the duplex to this point, you can read all the previous posts here. And you can listen in on how we could even afford to take this project on (in the middle of finishing the tile at the beach house) in this podcast, if you’re interested in investing in vacation rentals – or just houses in general.
The post Exciting Developments At The Duplex appeared first on Young House Love.
Exciting Developments At The Duplex published first on www.younghouselove.com
No comments:
Post a Comment