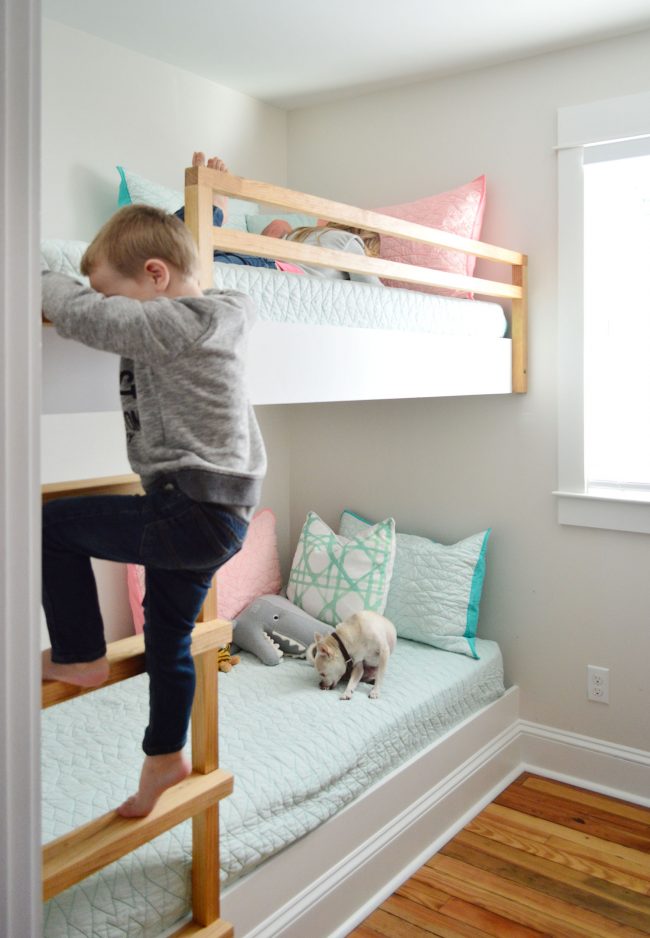
The built-in bunk beds at the beach house are complete (!!) and I’m excited to share with you guys how we created them. Although, it should be noted that my excitement pales in comparison to our kids’ when they saw the much-talked-about bunks finally become a reality.
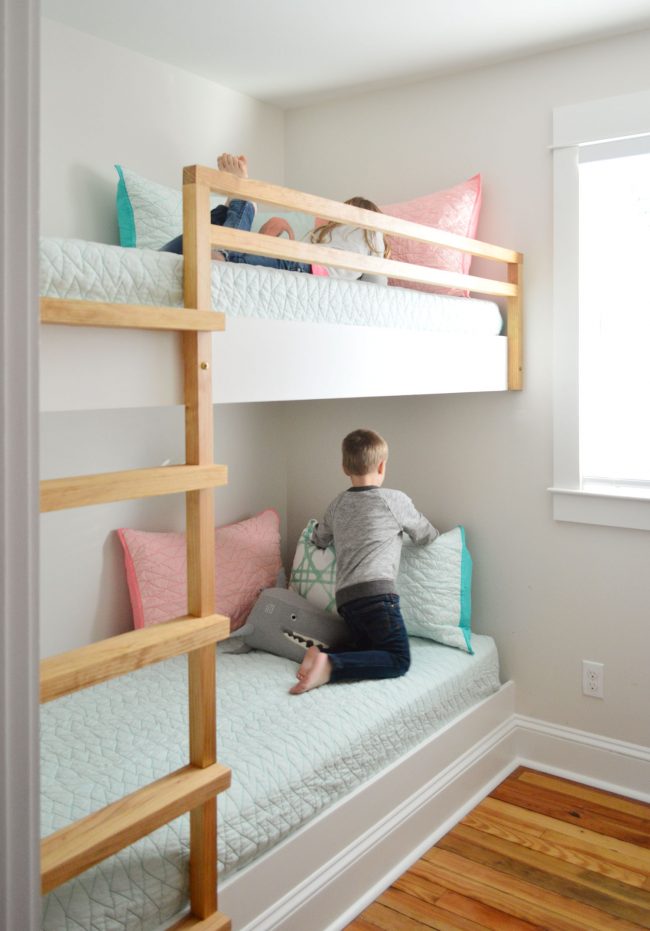
And if I’m being totally honest, I was a little nervous about this project. This was our first time building bunk beds, which felt significantly more high stakes than, say, building a bookcase or a table. This is a bed that literally FLOATS IN THE AIR so one person can sleep ON TOP OF ANOTHER PERSON (or the occasional chihuahua).
But my nerves are calmed by the fact that we’re extremely happy with how it turned out, and how extremely sturdy they are (Sherry and I have been up on the top bunk together and it’s solid as a rock). It wasn’t exactly a straight line getting to the end product, so I wanted to share the process so you can file this post next to the hundreds of others currently on Pinterest. #bunkwagon
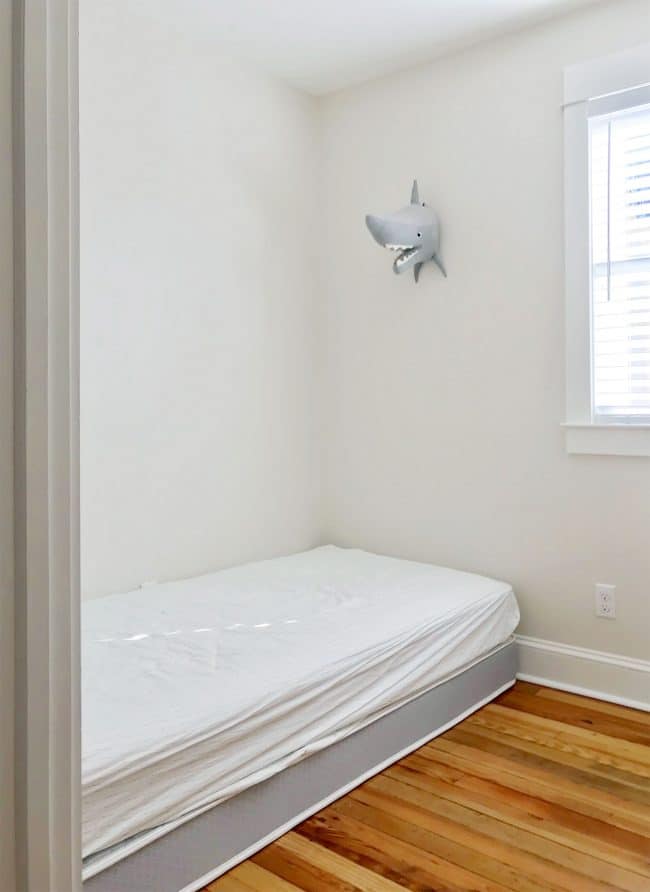
This space is pretty unique in that it was the perfect width for wall-to-wall twin XL mattresses. The room is exactly 81.5″ wide and a twin XL is 80″, so there’s just enough wiggle room to comfortably tuck in a sheet or bedspread. Having known that early on in renovating this house, we decided pretty quickly that this would be a perfect spot for extra long bunks. Adding some overflow sleeping space + novelty-factor for any kiddos who stay here (including our own bunk-obsessed offspring) = no brainer. But for the last three months, it pretty much looked like this:
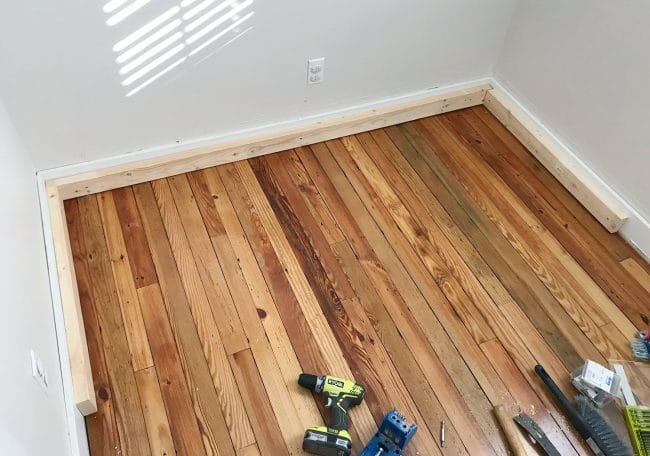
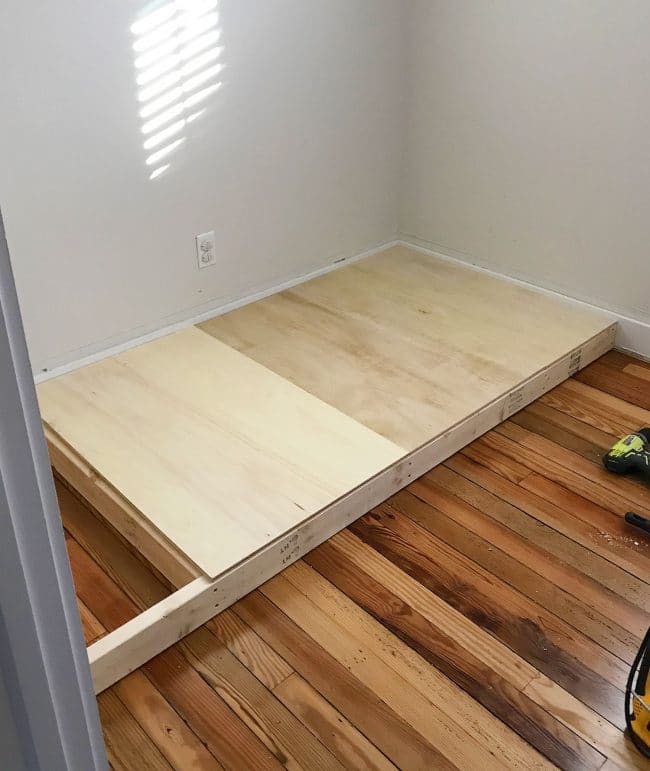
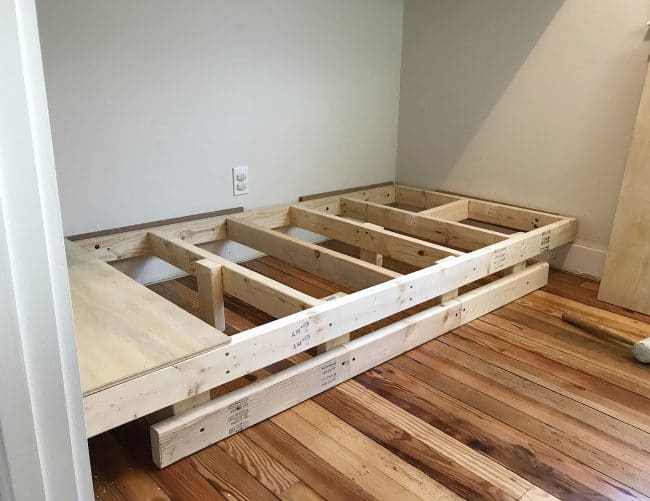
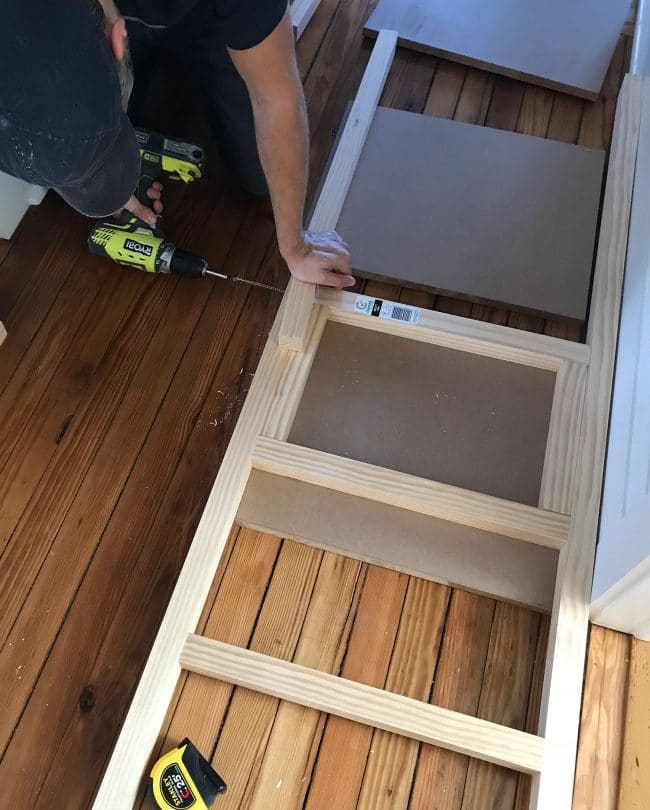
A few weekends ago we finally got to the “build the bunk beds” line item on our to-do list, and we hauled a bunch of 2 x 4″ boards all the way from Richmond to Cape Charles, along with some pieces of plywood and a lot of heavy duty screws. We started with the bottom bunk which we decided to build directly on the floor to maximize headroom for each bed. Note: After some debate, we nixed the idea of any under bed storage for simplicity’s sake, and because we didn’t want the raise the bed too much off the floor for younger sleepers like our son. We’ll be adding some drawer storage elsewhere in the room.
We later changed our minds (surprise!) and decided to raise the bottom bunk a few more inches off the floor (not high enough for any drawers to make sense or anything), but you’ll see how we redid this platform in a bit. But for now, pretend you’re blissfully unaware of that change. Ah construction, you unpredictable animal.
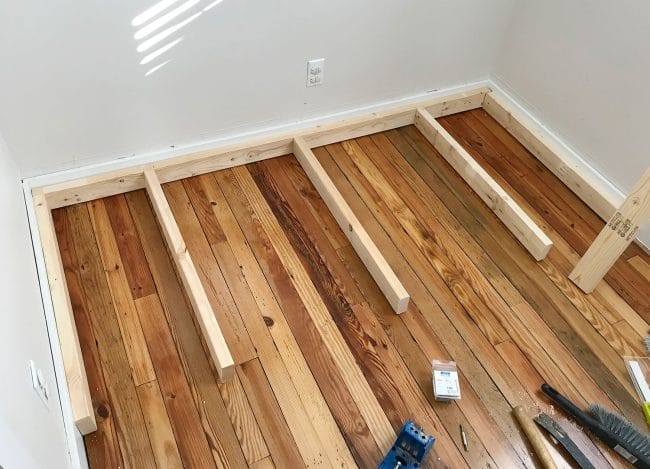
The advantage of this room is that we could attach three of the platform’s four sides directly into wall studs, which gave us a HUGE amount of confidence in the sturdiness of this contraption. So once I had those first three 2×4″s around the perimeter cut and secured into studs with long screws, we cut three short pieces to create some cross bracing under the platform, which you can see below. We’d go back and add more later on, but again – you’re blissfully unaware of that for now.
Since I don’t own a framing nailer, I attached all of these using my Kreg Jig. It makes pocket holes in your wood that allow you to join pieces really tightly together. I’ve lost count of how many projects I’ve used it for at this point, so I highly recommend one.
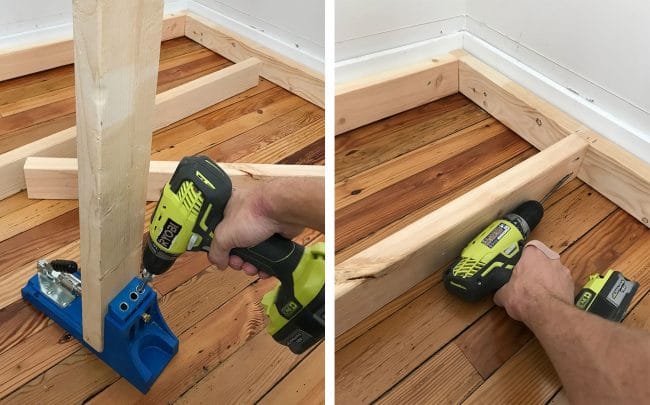
Once the cross-braces were attached, I attached the fourth side of my frame across the front. I’m no framing expert, but I assume a lot of people would just build the complete frame to size, slide it into place, and secure it to the wall last. We debated this, but we trusted ourselves to get a more precise fit (we really wanted this thing supremely snug to the wall) if we built it in place instead.
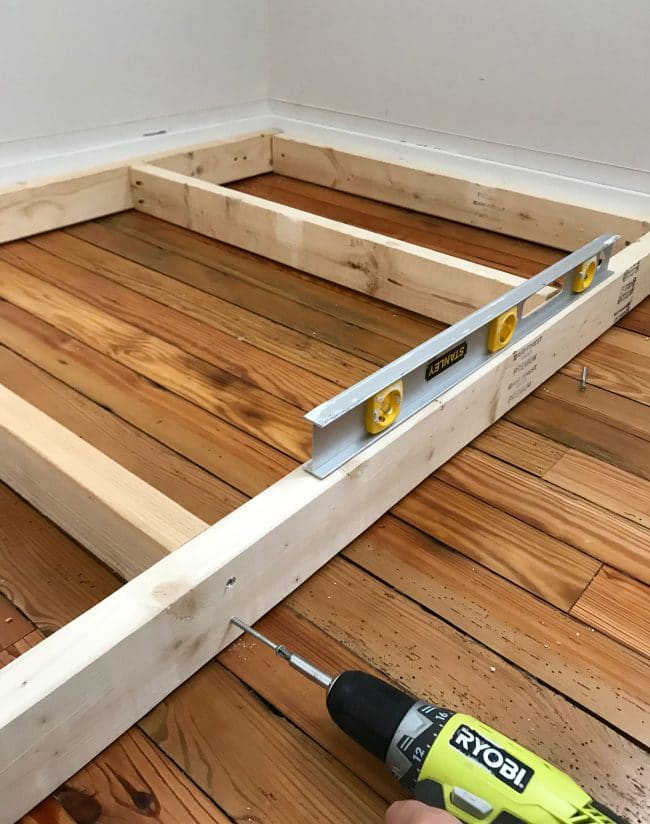
With the framing completed, we nailed down some planks of 1/2″ plywood to create a solid surface for the mattress to rest on. We used small 2 x 4′ plywood sheets because they’re the largest we could fit in the car with everything else we were trekking to the beach house, so my 2 x 4″ cross-braces were placed to make sure each plywood edge rested on the frame. Again, I’d go back later and add more support under the middle of each section.
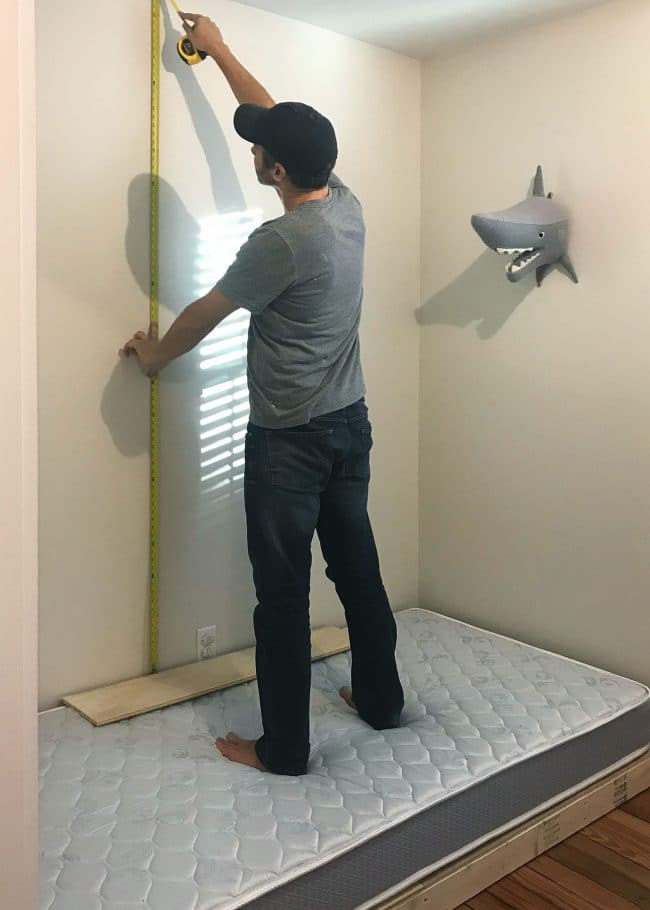
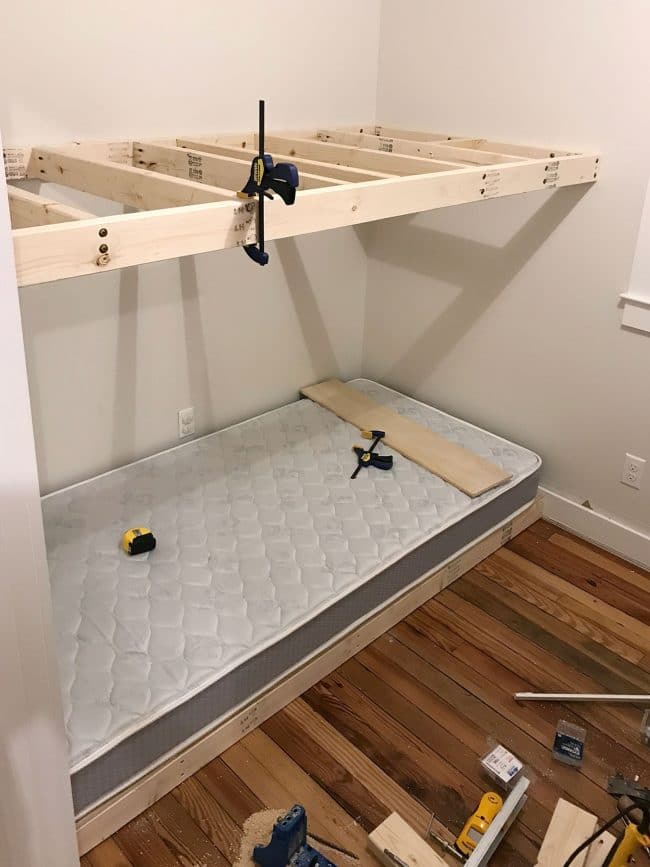
Next, we brought in the bottom mattress so we could figure out how high we wanted the second bunk. This was our main criteria in deciding that height:
- We wanted the headroom roughly equal on both bunks
- BUT we wanted it cramped enough on the top bunk to discourage horseplay / jumping / attempts to stand up
- AND we wanted enough room on the bottom bunk for an adult to sit up without knocking their nogging (think: during storytime)
Long story short – we cheated the top bunk a little higher than halfway to accomplish #2 and #3. I’ll give you all of the final measurements at the end of the post, since this is before we moved up the bottom bunk a few more inches later.
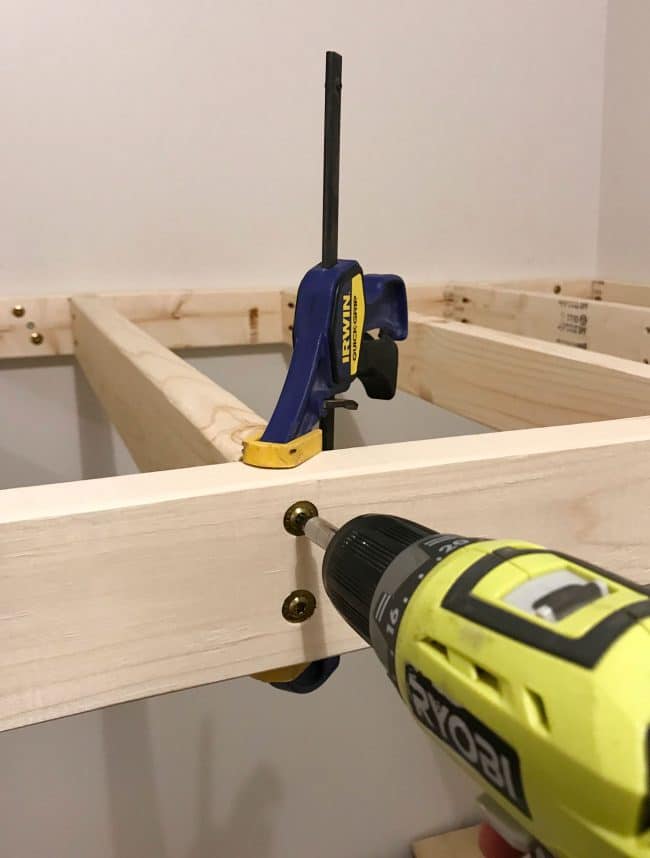
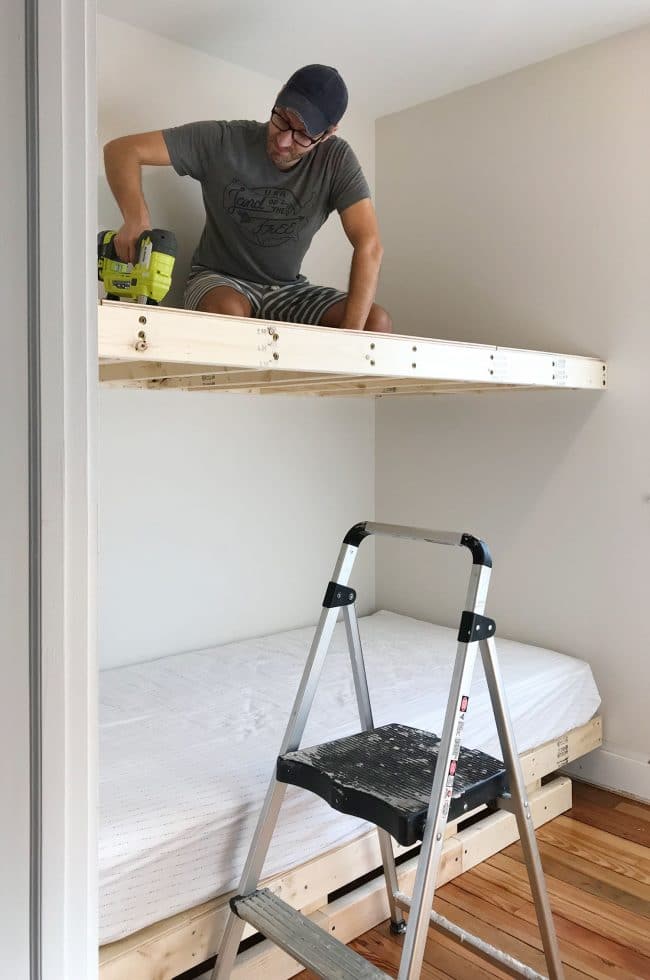
We followed the same process for the upper bunk, but with some adjustments that we learned from constructing the lower one. For one, we added some extra cross bracing to make sure the upper platform was extremely solid. And we broke out these heavy duty “Rugged Structural Strength” screws to secure it to the wall. We read about them in this bunk bed tutorial and my ears perked up at the idea of a “lag screw alternative” that I could install with my regular driver. They. Are. Awesome.
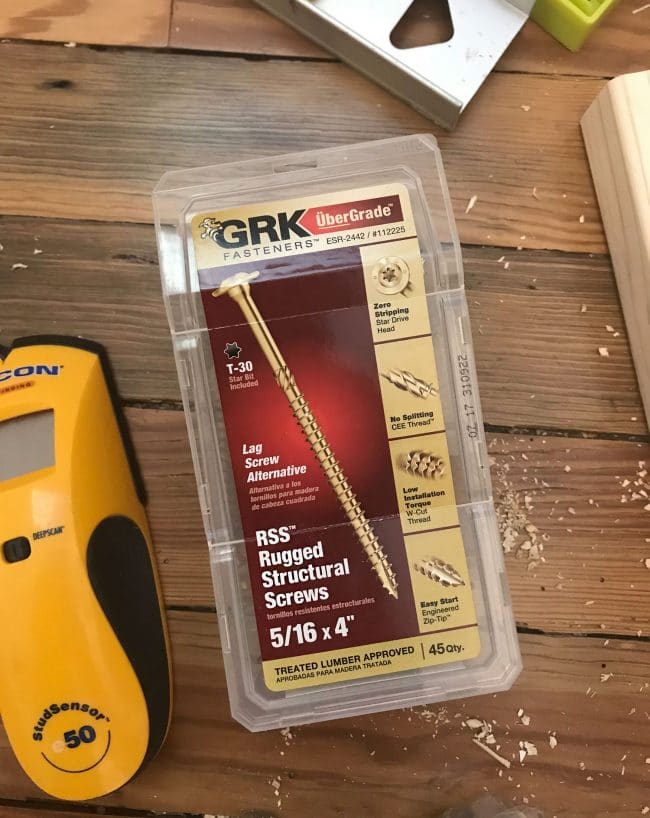
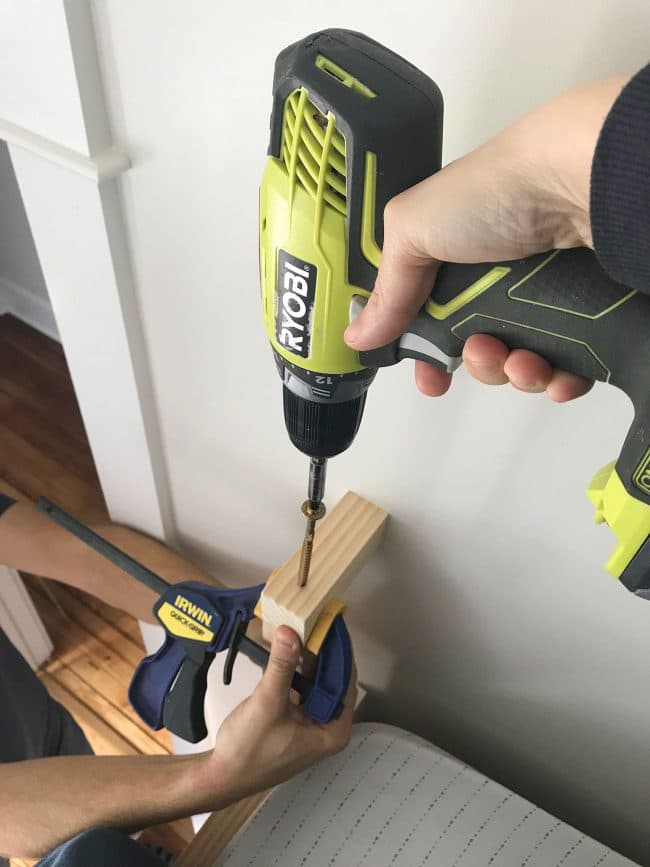
Installing them still took a little bit of oomph (check out that lunge!) especially to make sure all of my 2 x 4″ boards pulled tight into the stud, but it was so much simpler than dealing with bulky lag screws. No pilot holes needed, and my regular ol’ electric driver did the trick. We joke that a hoard of wild elephants could stampede this house and the only thing that would remain standing would be these bunks. I’m not saying I know for a fact that they’re elephant-proof, but I’m pretty confident they are…
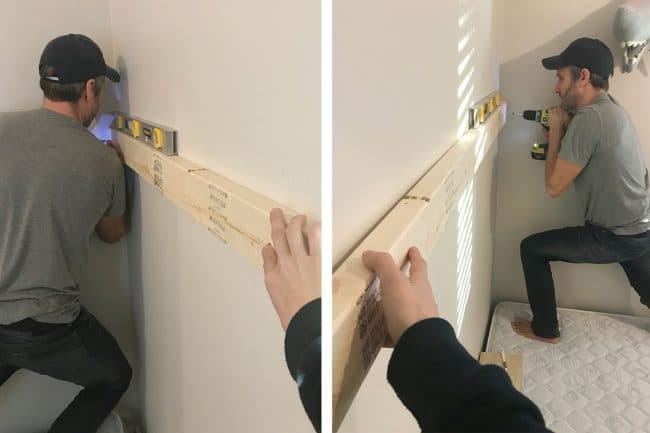
Again, the process for making the upper platform was the same as the lower – just more cross braces (one every 12 inches-ish) and we used those heavy duty screws to secure all of the 2 x 4″ boards to the wall (right into the studs on the back and both side walls), as well as to secure the front piece to the rest of the frame.
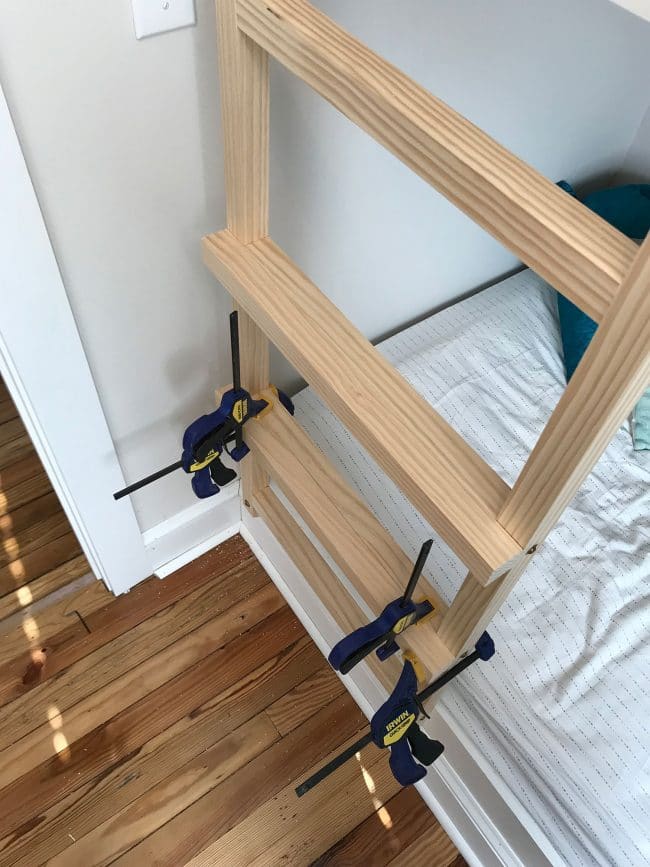
If those Rugged Strength Screws are the heroes of this build, then these bar clamps are the Robin to their Batman. They were a huge help in keeping things in place while we worked on attaching them.
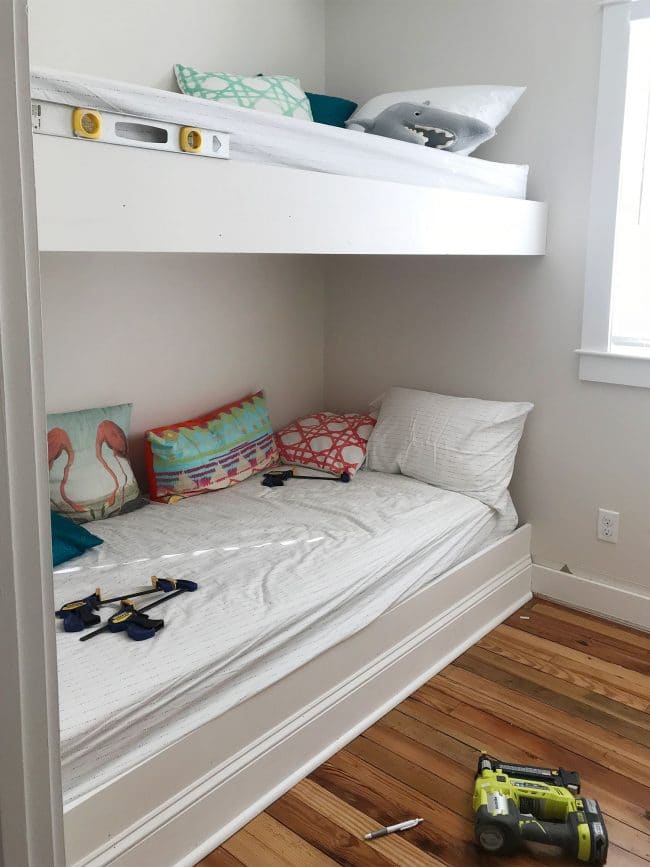
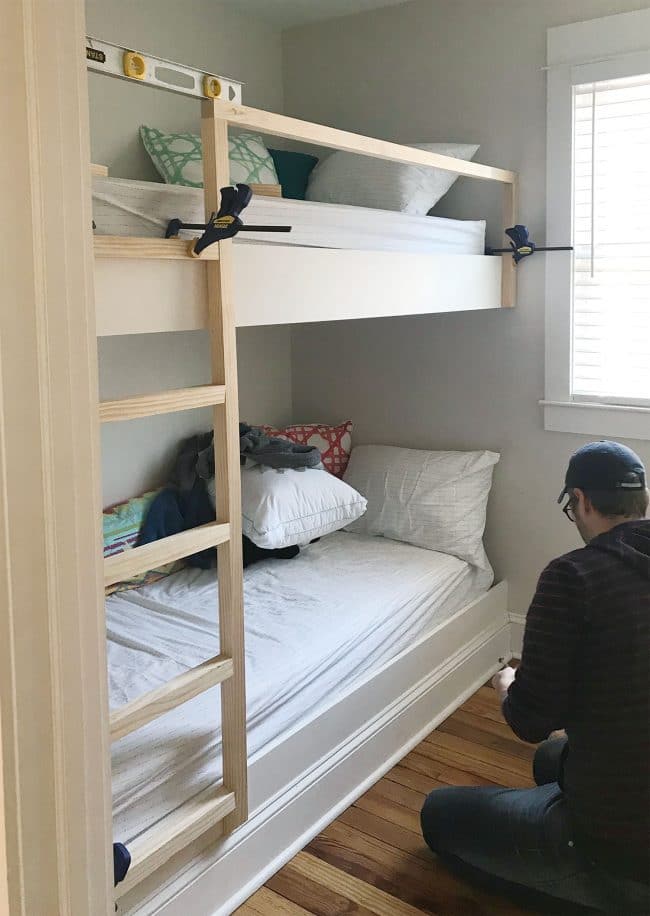
It eventually got too dark outside for us to cut the upper plywood to size so it would rest flush against the floating platform we had built (which is why you can see the plywood under the top mattress in this picture overlapping), but we threw some full pieces up there so we could at least check out how it would look with the two mattresses in place. Thaaaaaaat’s when we realized we didn’t like the heights. ::facepalm::
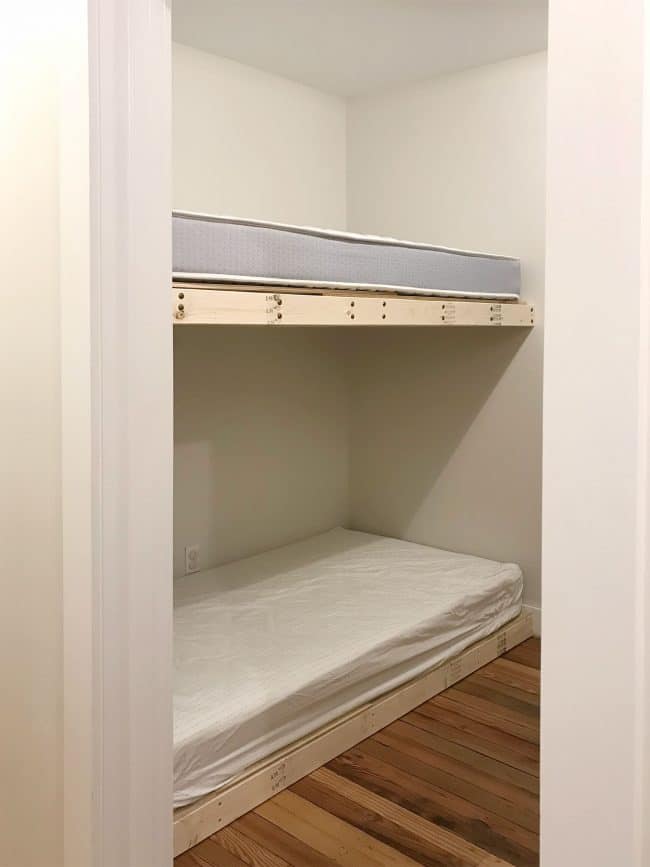
While we’d accomplished exactly what we were going for with the top bunk height (even small kids can’t jump around up there since it’s too close to the ceiling for those sorts of acrobatics), we had overcompensated in our attempt to make the bottom bunk-gap a bit more generously sized than the top, and they looked more uneven than we intended (plus now a kid could jump on the bottom bed, which could also result in some serious head smacking – d’oh!).
So we decided to raise the bottom platform a little bit since we also concluded it would look nicer to not be so close to the floor. This also makes it more comfortable for an adult to sit on that bottom bed and read a story without feeling like they’re crouched super low to the ground. Again, I’ll share final measurements at the end of this post, but we’ve been really happy with how everything turned out since we made the adjustment. I’ll jump ahead one more time to show you the final proportions of everything:
Bright and early the next morning we deconstructed the bottom platform enough that we could re-secure it a little bit higher off the floor (this also gave us the chance to add a bit more cross support under the plywood). There’s a lot going on in the photo below, so don’t hurt yourself trying to decipher it. Just know that we added some scrap 2 x 4″s along the floor so we’d have a place to nail in the baseboard, and since we had cut some “legs” to attach those baseboard-holding boards, we also took the opportunity to add some support legs in the middle for good measure too. Even though the platform was fully secured to the wall, we figured why not!
So with the bottom platform fixed, we finally turned back to cutting that plywood for the upper bunk to size and attaching it. It was also a chance to put my money where my mouth was (or my body where my build was?) and prove to Sherry that this puppy wasn’t going anywhere. Later when Sherry was up there with me building the railing, we felt pretty great that our combined weight (nearly 300 pounds!) was no sweat for this floating platform.
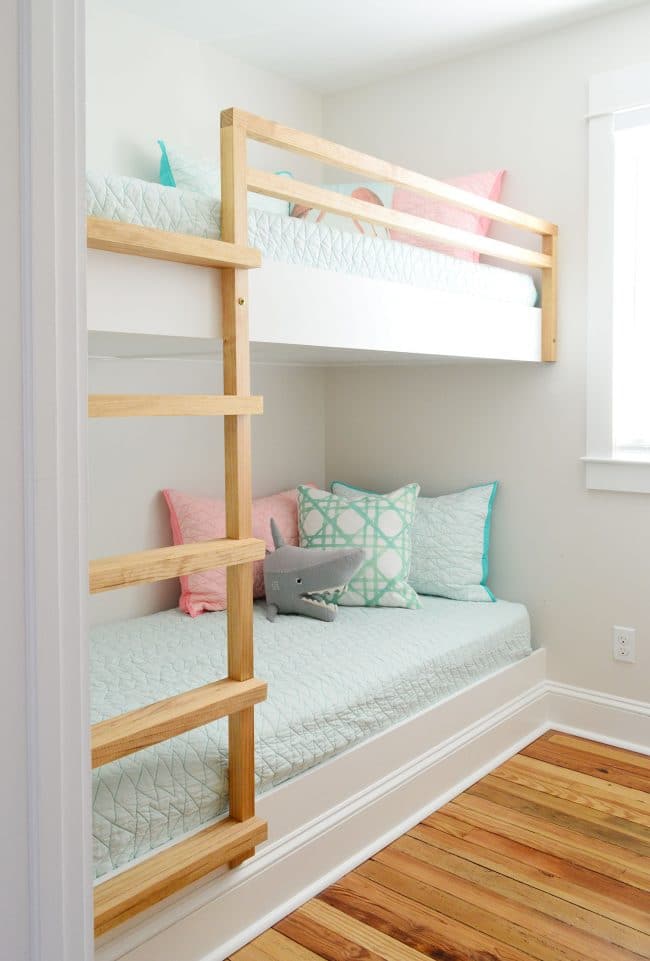
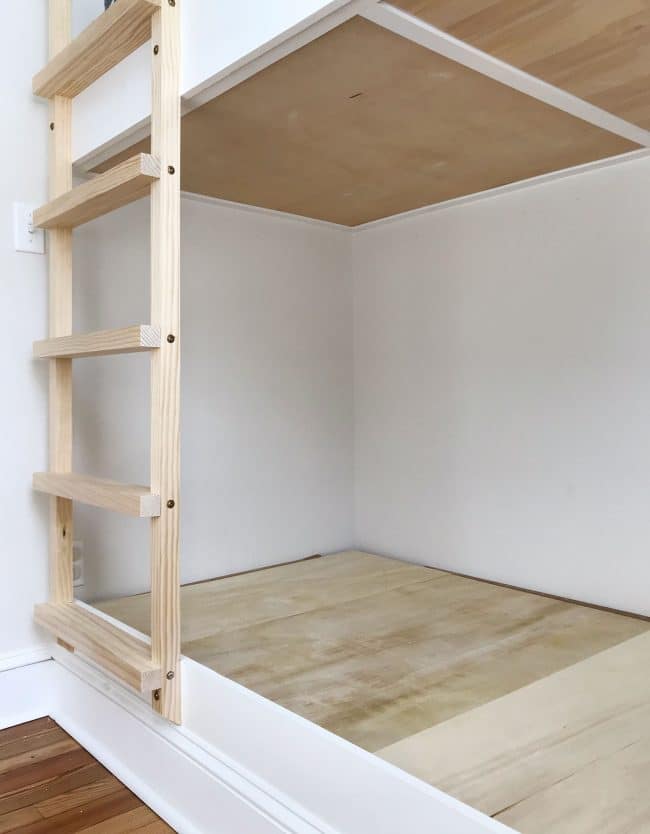
On our next trip to Cape Charles we brought the wood for the trim and the railings, which is when these started to look more like built-in bunks. It really just took some pre-primed 1 x 8″ boards nailed into place over the exposed frames to dress things up, along with reinstalling the baseboard trim across the bottom.
We were working off of these bunk beds from Studio McGee as our inspiration for the railing. We liked how clean-lined they were and the mix of wood and white was nice too. We thought the X-pattern along the top rail might be a little busy in such a small room (and harder to accomplish), but everything else gave us a good starting point.

We bought a bunch of 2 x 2″ square pine boards at Home Depot to work with and we started with the ladder first. We cut the 18″ wide rungs in groups to try to keep the cut size exact for each step. Here it is laid out on the hallway floor.
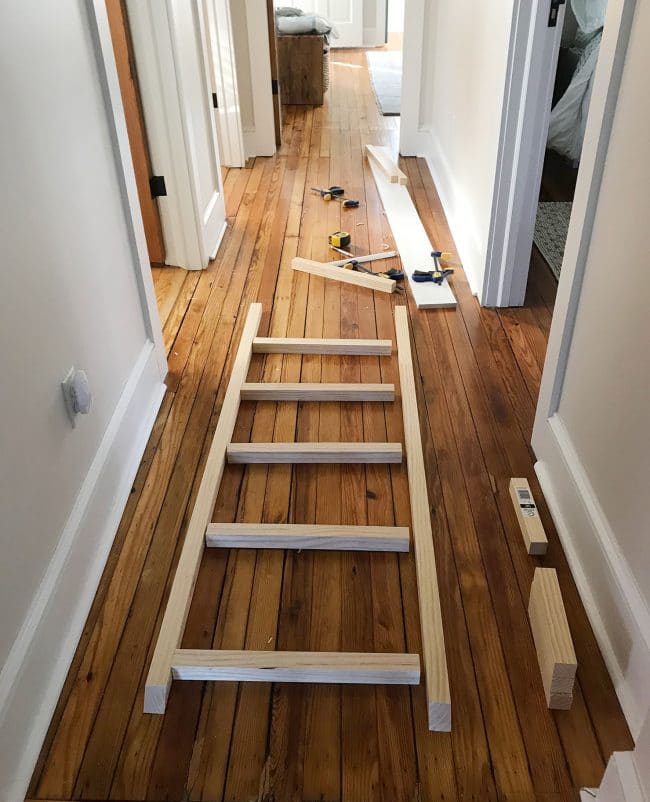
To secure it together we used long 5″ Rugged Strength Screws through the side rail into each rung. We didn’t have a clamp that would hold things together, so we made sure I was working on a flat surface (some scrap MDF leftover from the pantry project) and could press everything against the wall to keep it in place as I screwed things in. Also, note the “blocks” that Sherry cut and put between each rung to keep things spaced evenly (our rungs are 12″ apart from top to top, so the spacers were 10.5″). I also used another scrap piece of wood that I rested on top and pressed down to keep everything flush as I drove in the screw.
Once it was constructed we clamped the ladder into place and began mapping out the other parts of the railing, since they’d all be visually connected. Again – clamps are the trusty sidekick of this project.
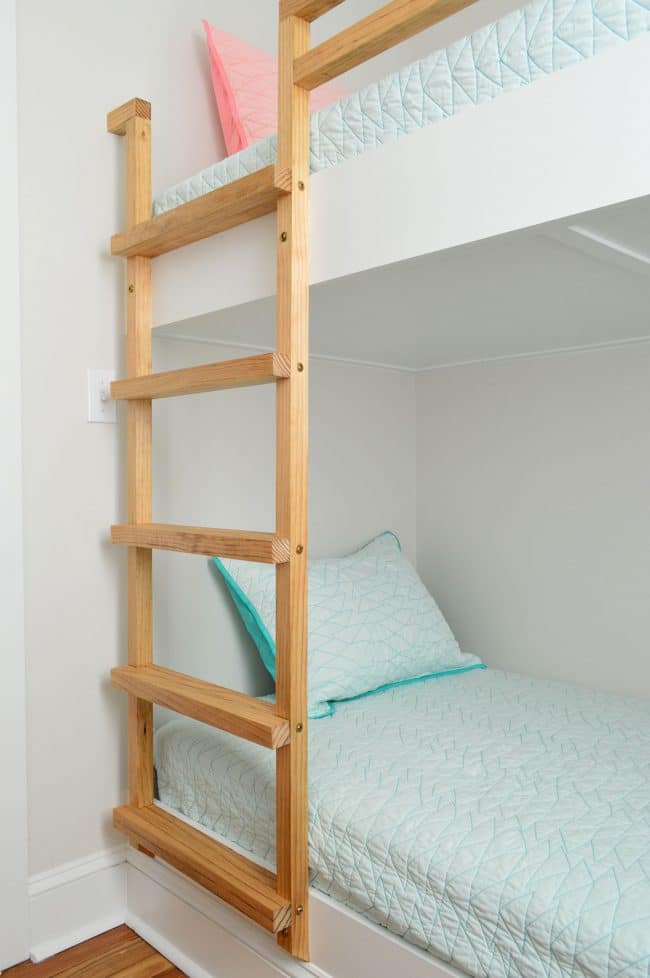
After we attached the ladder to the bunks (using more 5″ RSS screws) we realized the 2 x 2″ rungs were a little small – like your foot felt like it needed more surface area to rest on. So we cut longer pieces and attached them on the front of each rung (screwing them in from the backside) to make each platform deeper (and much more comfortable). We also sanded all the corners of the wood so they are more like a rounded square edge as opposed to a super sleek sharp one.
We secured the top rails from the topside with more RSS screws. Pictured below is the tiny top rail on the wall side of the ladder. Normally we would’ve just put the ladder right against the wall, but it would have interfered with the light switch, so we floated it off a couple of inches – which is actually nice because when you hold the side of the ladder there’s room for your hands to wrap around it. Worked out really well.
We attached the lower horizontal rail across that upper bunk using pocket holes from the backside, so they’re not visible from the front. And speaking of visible from the front – if I did it again, I’d probably make it so those two screw heads couldn’t be seen. Part of us thinks it’s kind of a nice little detail (they’re industrial looking and brass in color, so they’re almost like gold rivets that are also visible along the sides of the ladder). But when viewed at angles like the one below, only 2 are visible, so it looks more random than it does from the other corner of the room. We could’ve avoided those being visible by screwing it into place from the backside, so that’s an option if you’re going for a more seamless look.
![]()
Oh and as for the underside of that top bunk, it’s just some thin 1/4″ plywood sheets that we glued and nailed into place, and then trimmed out with some primed lattice strips to cover the seam in the middle. This angle shows more of how the ladder has those brass screws running down the side, so they look pretty neat when you see them all lined up en masse like that.
Not to jump ahead, but we thought the brass screw heads looked even cooler once everything was stained.
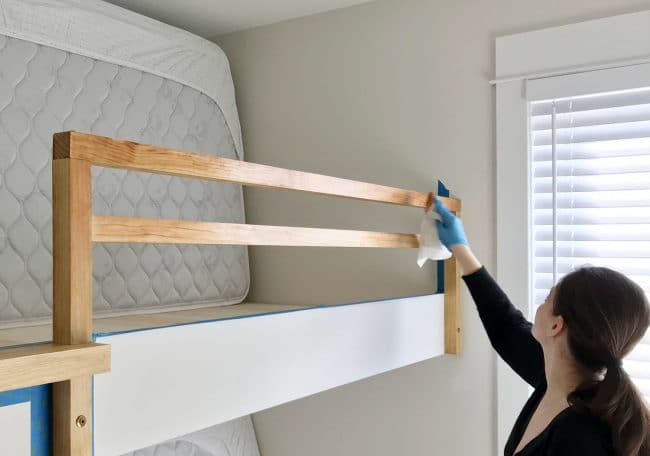
Actually, speaking of staining – this past weekend we were finally able to finish up the project with caulk, paint (Sherwin Williams Pure White), and stain (more on exactly what we used in a second – we still need to seal it next time we’re back). If you follow us on Instagram you saw in our InstaStories that it took a fair amount of stain testing to get a color that was similar to the floors and doors. But once we landed on the right color, we taped everything off and got to work.
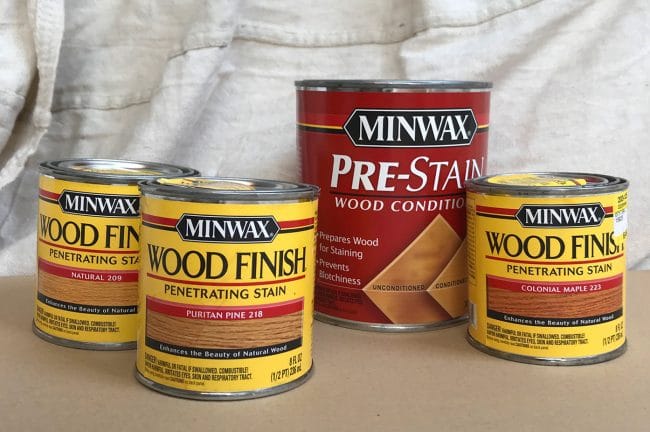
The final mix ended up being a four-step process:
- We did a coat of pre-stain wood conditioner on everything to get a more even and less blotchy finish
- Sherry brushed on a coat of Minwax Natural on all of the cut ends. The raw cut ends of wood boards tend to absorb WAY more stain, making them darker in the end, so we used a lighter color on them instead.
- Then we did a coat of Minwax Puritan Pine everywhere else using a brush. Once it set for around 15 minutes, we wiped off the excess.
- After all that, it wasn’t quite red enough, so we did a quick coat of Minwax Colonial Maple everywhere using a rag to give it a slight reddish cast.
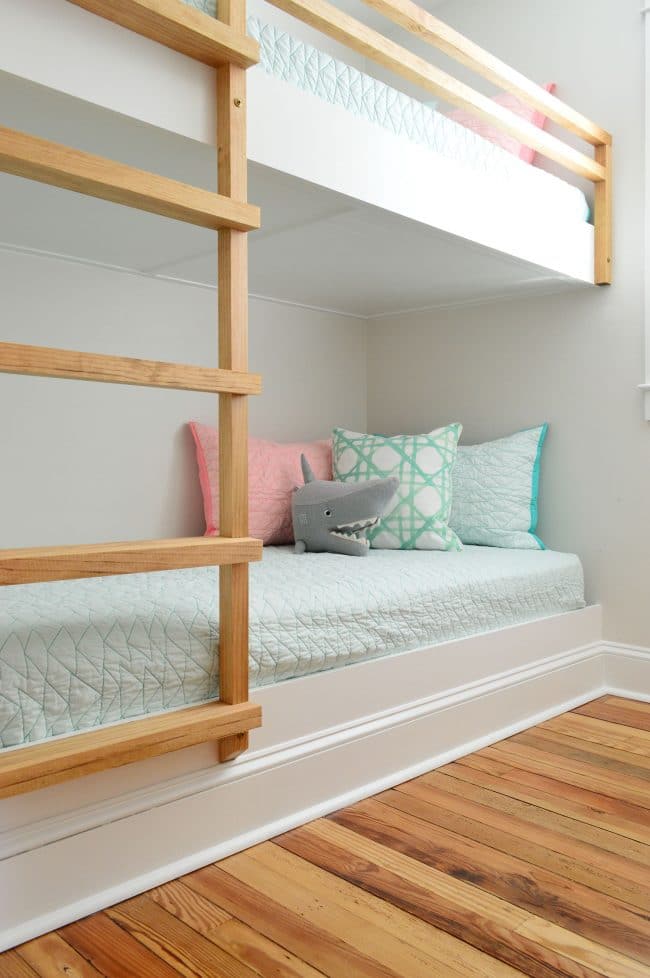
Despite being a little bit complex, we’re really happy with how it turned out. It’s not a perfect match, but it certainly feels right within the family of the 100-year-old pine floor tones. Victory!
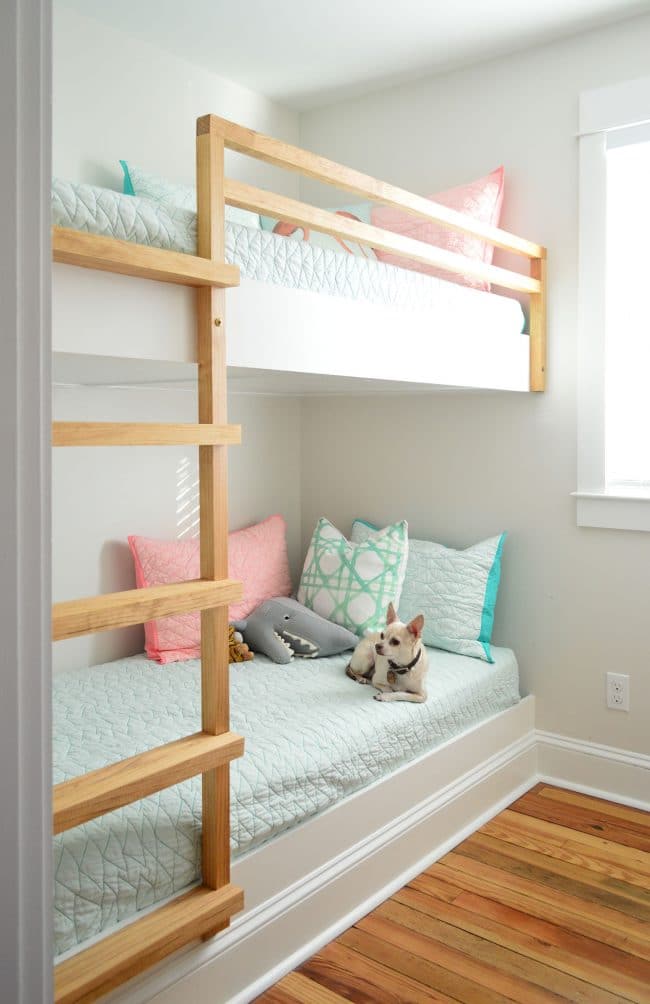
Like I said at the start, these have quickly become the kids’ favorite spot in the house. And actually, one of Burger’s too. He has discovered that the sun sweeps through here throughout the day, creating several dog-friendly hot spots on the bed and floor. He even graced us with his presence while we were snapping pics… and then promptly started grooming himself.
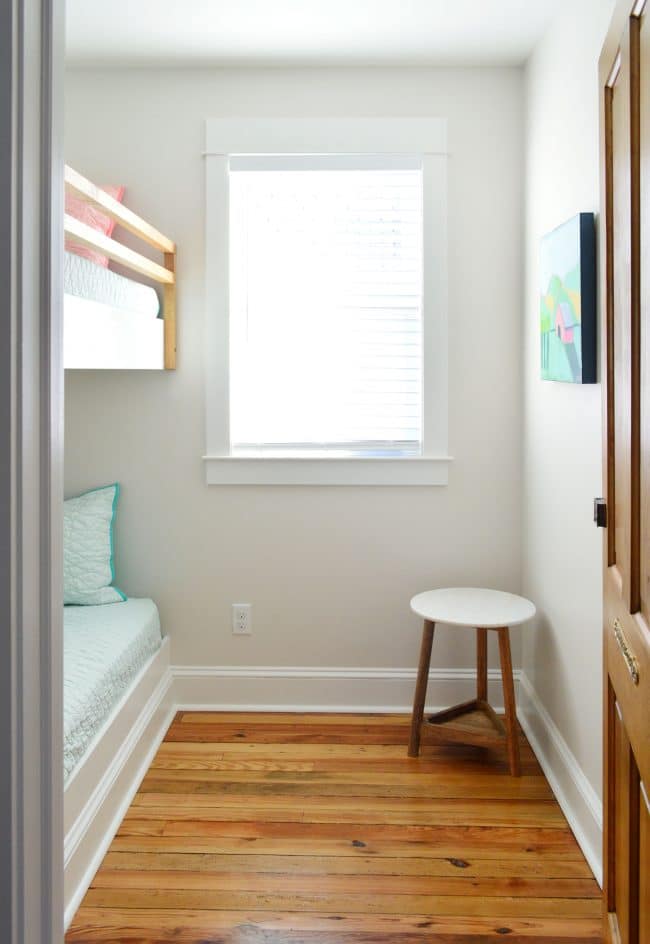
Beyond the bunks, the room itself needs a bit more work. We’re keeping an eye out for the right dresser or cabinet to add a little bit of storage (and surface area) to the opposite wall. Then we might add a cozy rug, and maybe some fun paint color on the ceiling?
I also promised final measurements, so here they are all in one place for you:
- Both platforms are 81.5 x 40″ (to accommodate an 80 x 38″ twin XL mattress)
- Bottom bunk: Top of the platform is 10″ off the ground, making the mattress 17″ off the ground, with 34.5″ of headroom
- Top bunk: Top of platform is 56″ off the ground, making the mattress 63″ off the ground, with 32.5″ of headroom
- Ladder rungs are 18″ wide making the full ladder 21″ wide from edge to edge. Rungs are 12″ apart from top to top.
- Top railing is 7″ above the mattress top (5″ is required) with a 3″ gap between the two
Okay, and in the end, the entire process was around 88% less nervewracking than I thought. Basically, child’s play compared to building a deck or installing an irrigation system. Which is a very good thing, because our most recent plans for the duplex have a similar spot for bunks, so we may have two more sets of these in store for ourselves. Better buy my weight in those gold screws.
P.S. For more builds & furniture hacks we’ve done over the years, check out this archived collection of Furniture Upgrades & Building Stuff
*This post contains affiliate links*
The post How We Made Built-In Bunk Beds At The Beach House appeared first on Young House Love.
How We Made Built-In Bunk Beds At The Beach House published first on www.younghouselove.com
No comments:
Post a Comment