We finally got there guys – and not without a few notable setbacks. But that might be why it feels extra good to finally say: the duplex is officially demo’d! And today we’re going to show you around (in photos and even on video) and share some of our plans for this beast.
We learned from doing the pink house that when a house has this much moisture damage, it’s best to take all of the walls down so there’s no mystery about what kind of mold/decay/structural issues are lurking back there. And considering the duplex already had several troubling spots that were blatantly obvious before demo (see the black mold spots on that side wall and that ceiling caving in from moisture damage?), we knew a full gut job was the prudent first step here. Spoiler: we also found lots of bad framing, bad wiring, bad plumbing, and even a few squirrels nests within the walls and even the HVAC system itself, which was an especially nutty discovery. Get it? Squirrels? Nuts? I’ll pause for laughter.
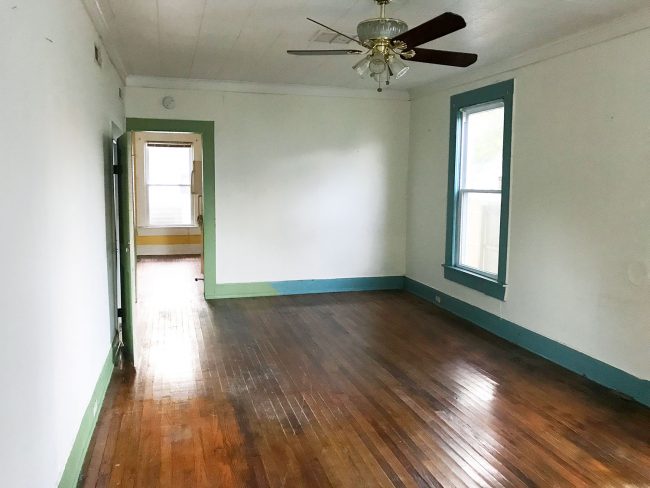
The photo above is the living room on the LEFT side of the duplex (you can see more before photos in our original duplex tour) And below is what that room is looking like now. The hardwood floors look extra dusty at the moment, but they should clean up just as nicely as the ones at the pink house. And on that day I’ll dance on them like no one is watching.

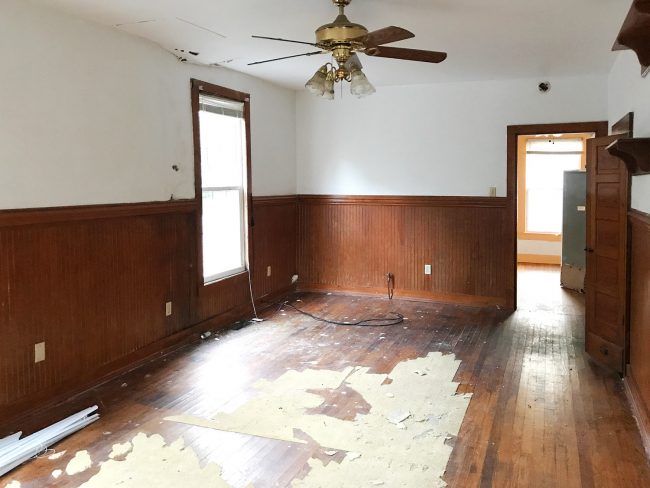
Jumping over to the other side of the duplex, this was the living room on the RIGHT side when we bought it… which appeared to have slightly less water issues and mold.
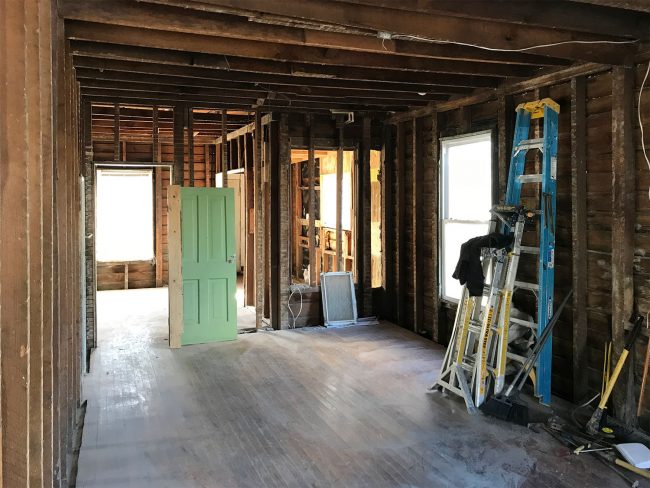
…and here’s the same shot after demo. We lost some walls, but gained some ladders apparently. And we discovered some pretty impressive rot spots on that right-hand wall, along with some framing that will need to be reinforced in the name of safety. No squirrels living on this side though.
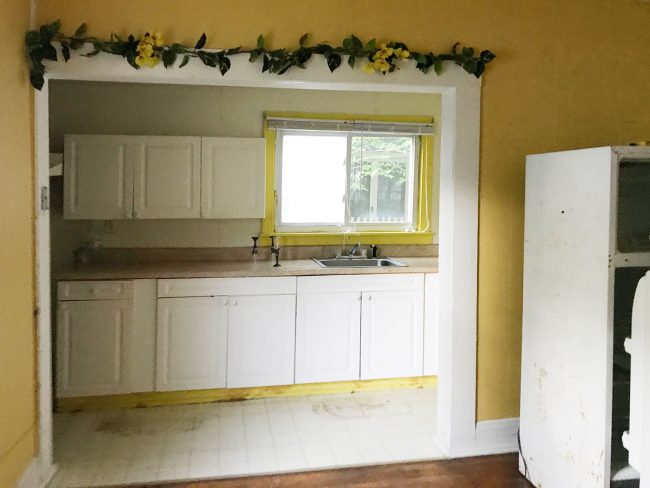
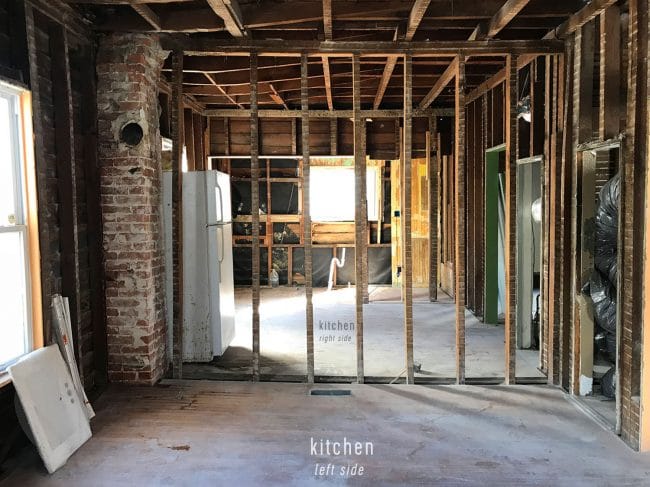
And one last “before and after” comparison before we move on to floor planning. Here’s a shot of the kitchen on the right side, which was located in a side porch that was enclosed at some point. Fun fact: if you listen to the podcast, this is the area where water started gushing out of the walls when we turned on the water meter. But this photo is from before that happened, so the discolored/rotten spots on the floor came with the house.
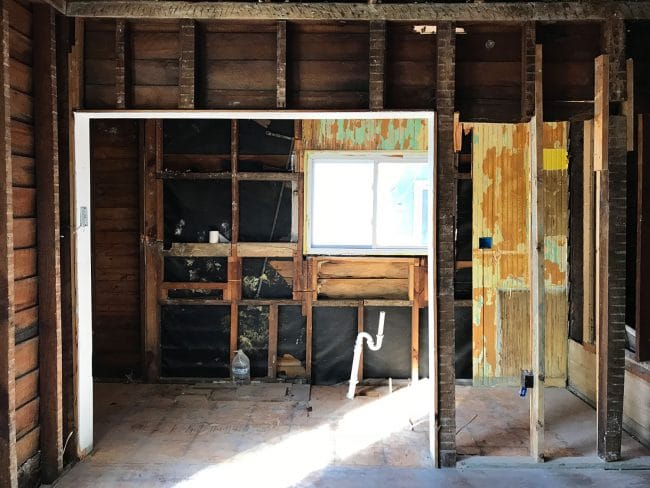
This is the same area after demo, where you can see some of the crazy, not-at-all-to-code structural stuff that was lurking behind those old walls. It looks kinda like someone built that back wall out of scrap wood they had laying around, so it’s a miracle it was staying up at all!
We have more photos for you, but the best way to get the full tour is through the video below (or here on YouTube), where Sherry points out a lot of the floor plan changes we’re considering, along with some strange things that were uncovered during demo. We’re going to do a follow-up post with an actual floor plan soon, but we’re still finalizing a couple of things.
For anyone who who doesn’t have time to watch the video at the moment, I’d definitely recommend coming back to watch it (a video tour is worth a thousand words and pics) but here’s some of what’s covered.
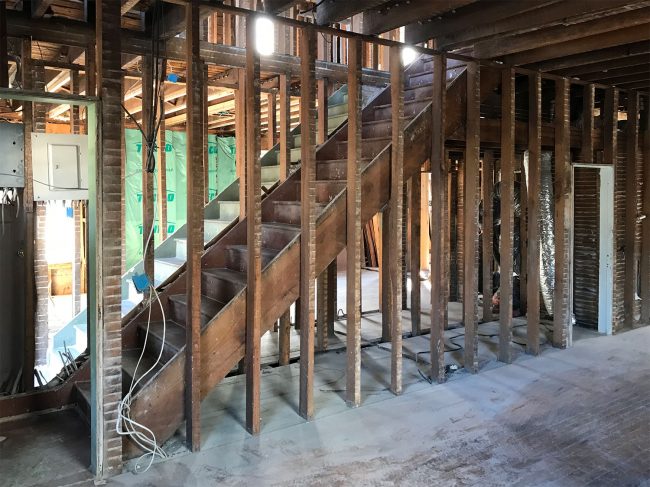
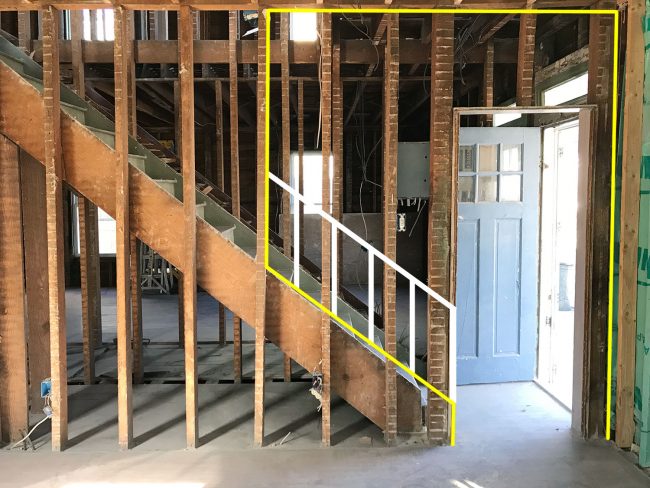
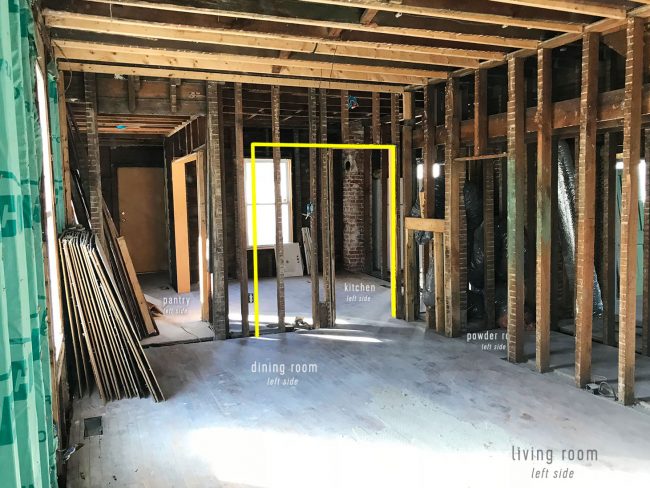
One update we’re excited about is opening up the entryway on each side, so that the stairs are a lot less closed off. We’re going to take that wall back several studs so that the side of the stairs are more open, so they become more connected to the living room and less of a dark, narrow vestibule.
To give you a better idea, here’s the view from within the living room. Don’t quote me on exactly how far back the wall will be opened, but that yellow line gives you a sense of the new opening we’re aiming for (and I added a white line to show where a railing would go). You know, something like this inspiration picture.
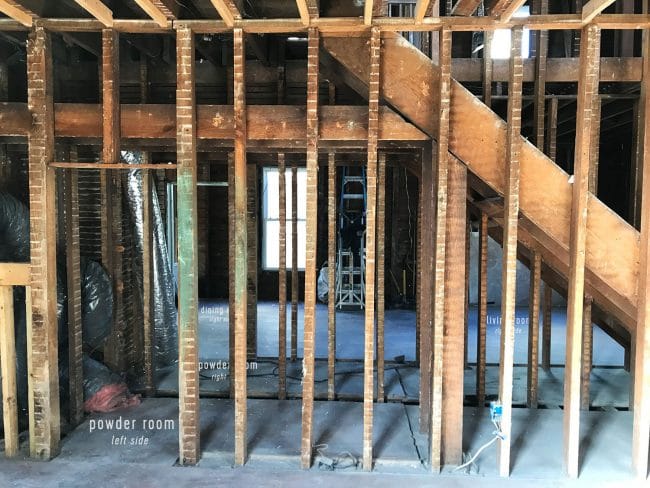
Another big functional change downstairs is that we’ll be adding a powder room/half bathroom. Originally both sides just had one full bathroom upstairs, assuming you don’t count the random toilet by the back door on the right side (it wasn’t behind a door or anything, it just kinda sat a few steps from the kitchen sink!). So we’re turning the former closet under the stairs into a half bathroom with a proper sink, toilet, and even a door. Imagine that!
The only other doorway we’re widening (in addition to the side-wall-of-the-stairs that we mentioned above) is between the living room and what will become the kitchen, which we believe was previously used as a dining space. We’re going to put the dining table at the far end of the living room instead, meaning we can create a larger and more spacious kitchen in that back room. And the wider doorway (which I’ve marked below in yellow) will help it to feel less closed off and more light-filled.
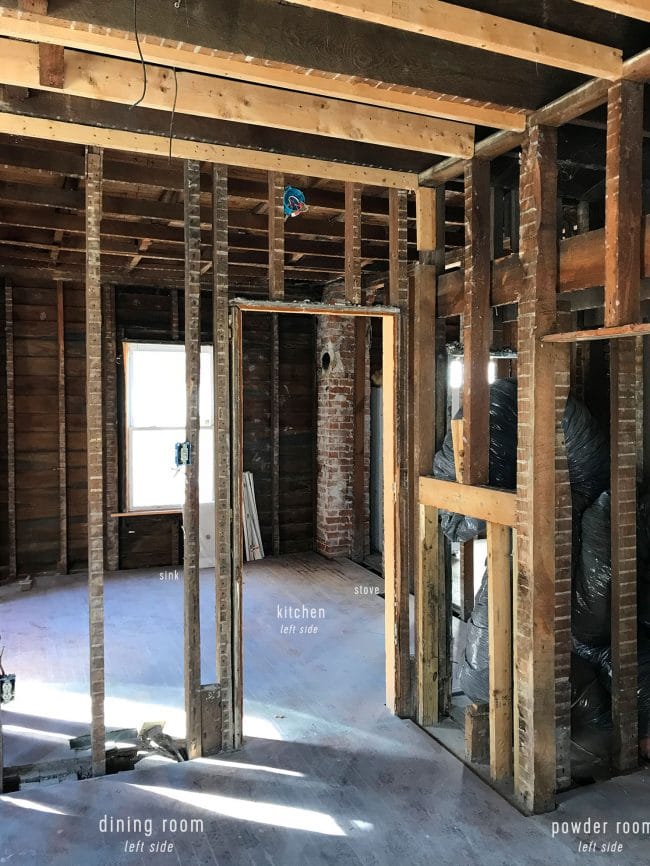
For the kitchen itself, we’re planning to put the sink across that back wall under the window (we’ll be switching out that window with a slightly less long one so cabinets can pass below it) and then we plan to continue the cabinetry along the entire right kitchen wall, where we’ll also put the stove and fridge. And yes, we’re psyched to have found that brick chimney behind the walls and plan to keep it exposed!
Like the yellow kitchen you saw above, here’s the original galley-style kitchen on the left side, in all of its orange glory. And true to form, it was also shoved into what used to be a former side porch.

Here’s what it’s looking like now, which we’re planning to use as a multi-functional space to house the washer and dryer, more cabinetry (think: pantry), and even a small mudroom area since it leads to the back door where the outdoor shower will be.
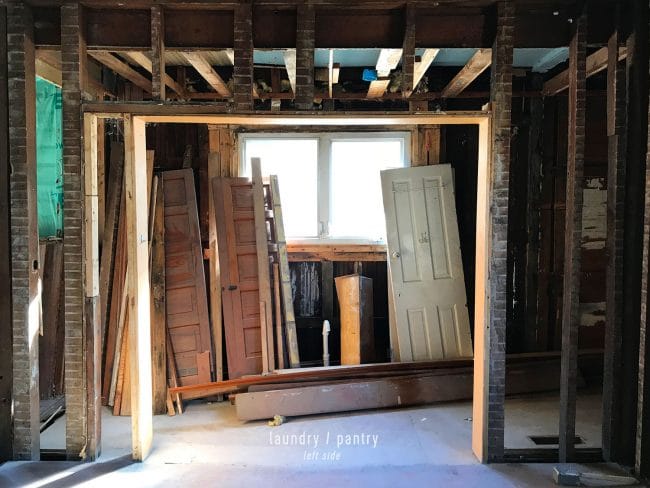
Just like on the other side, the framing in this section is crazy (you’ll see it better in the video – the studs are oriented the wrong way!) so there’s a chance it will have to be completely rebuilt from scratch. But it’s not like we haven’t already been there and done that with the pink house!

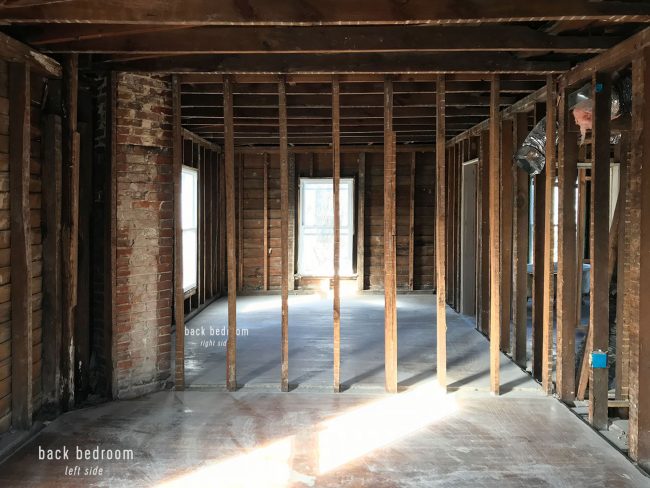
All of the changes I’m describing will be the same on both sides, so I won’t bother going through it twice, but before we move upstairs, I just have to share this one last view we took downstairs on our last visit. This is standing in the left side’s kitchen, looking into the right side. In a few months we won’t be able to see from one side into the other anymore, so we’re relishing views like this while we can. It’s so crazy looking!
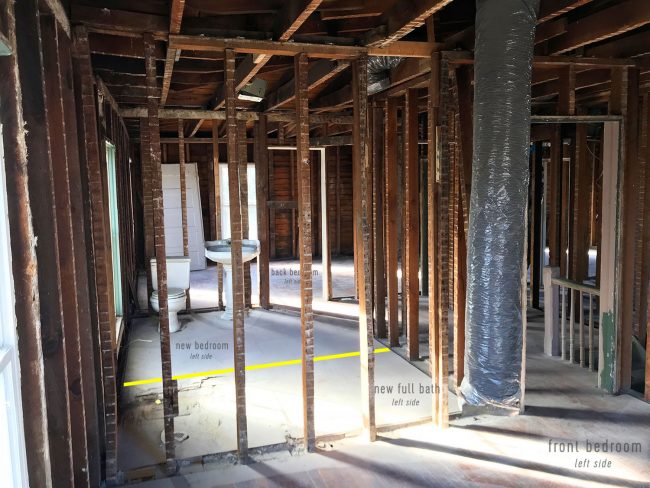
Upstairs is kinda confusing to explain, but the main things to take away from this picture is that 1) we’re standing in the front of the house (the front bedroom on the left side) looking towards the back and 2) the bathroom was really disproportionately sized (so long that you could practically put a 5 x 7′ area rug in the middle of it and not touch the shower or the toilet/sink!). So we’re going to steal some of that wasted bathroom space (see the yellow line) to create a small third sleeping nook, sort of in the spirit of the pink house’s bunk room. It won’t be exactly the same (and we’re not certain we’ll do bunks again) but it will create some much needed bonus sleeping space, which is always nice in a vacation house.
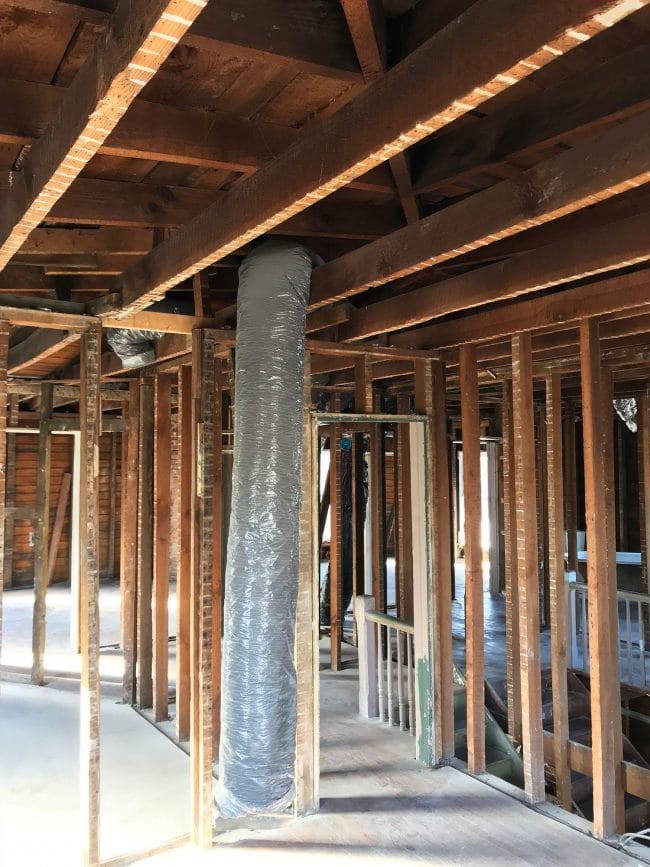
The other thing you can see in some of these upstairs photos is just how shallow the roof is. See how there’s basically NO attic up there? Yes, those sloped beams that you see behind the ceiling joists are the actual roof supports! Just a few inches above the ceiling! That’s why we’ve been hankering to increase the pitch as much as possible so that we can try to sneak our upstairs HVAC system up there somewhere – and so when it rains the slope of the roof is a lot more conducive to avoiding leaks thanks to adequate water shedding. Thank goodness the Historic Review Board approved the change to make that happen!
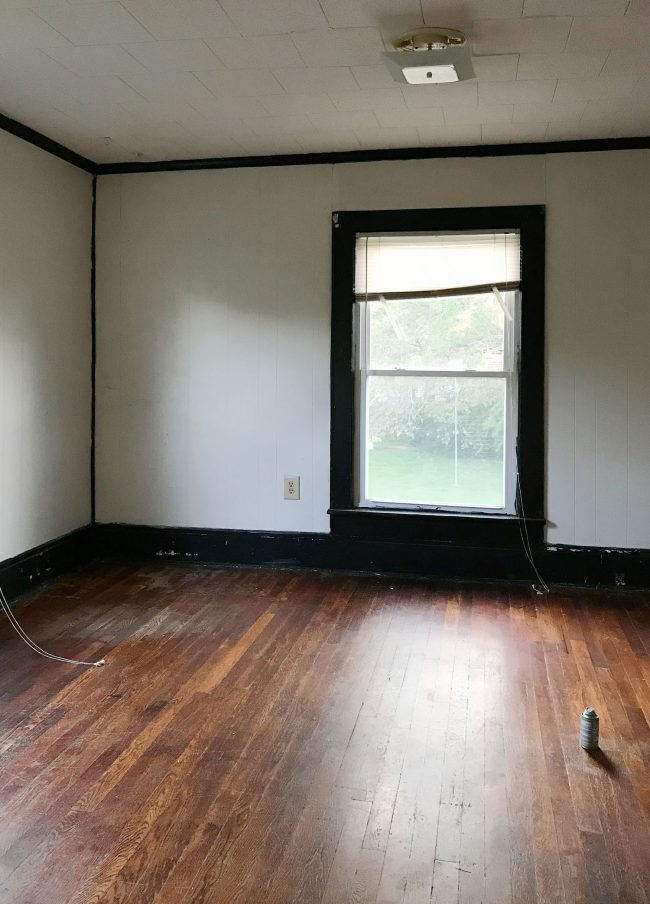
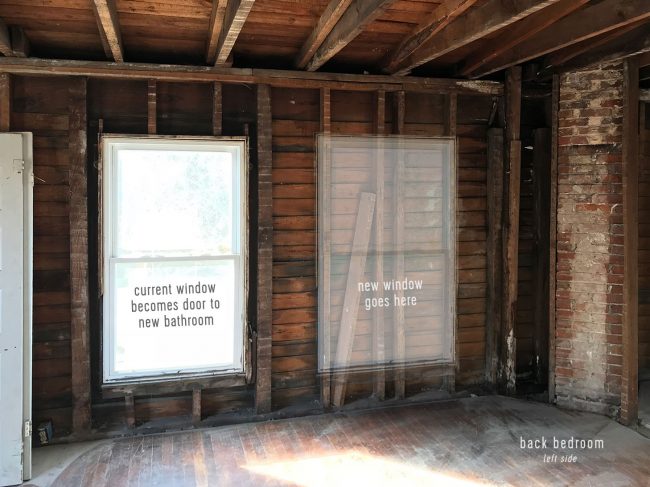
The front bedroom is staying relatively the same layout-wise, but the other notable change in the upstairs is the back bedroom. It used to look like this, with that window overlooking the backyard. But we’re turning that window into a door that will lead to a very small addition to the top floor: another full bathroom.
The downstairs footprint of this house already has a little bump out on the back right there (it’s the area in the future mudroom/pantry/laundry room that leads to the back door) so we’re essentially just continuing that bump out upstairs too. It will give this bedroom an en suite bathroom AND bring both sides from just 1 bathroom to 2.5 bathrooms total. Plus, we already have approval from the Historic Review Board to add that tiny addition along with a new window between the chimney and the old window (which, again, is becoming the bathroom door) so we won’t lose any light in the bedroom. Victory!
Here’s another one of those shots looking through both sides of the house (from the back bedroom on the left side into the one on the right). Again, we’re planning to keep the brick exposed on each side. And fun fact number two: we discovered after demolition that this chimney TWISTS. Notice how it’s angled in the photo below? Scroll up to the kitchen photos and you’ll see that it’s parallel to the walls downstairs. So strange, right? It does this twisting between floors, but you can see it from the kitchen when you look up now that things are demo’d.
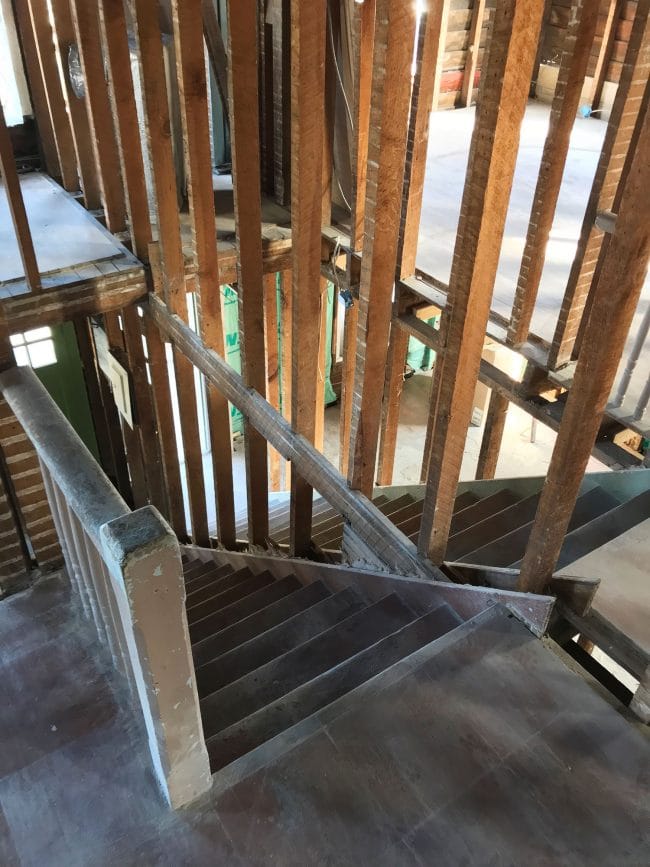
Speaking of strange, I still can’t get over how weird it is to see these two mirrored floorplans open to one another – especially where they meet at the stairs. It feels like the moment when American Lindsay Lohan meets the British Lindsay Lohan at summer camp in the Parent Trap and they realize they’ve had a twin all along.
Pretty exciting stuff, eh? Also, I clearly need to work on my squirrel jokes. But in the meantime remember that the video walk-through that we included earlier in this post has a lot more details about the floor plan that we’re leaning towards (along with generally being a lot more orienting than photos can be by nature). So be sure to watch that for more info and priceless quotes like “I don’t think that’s actually pee in there…” There’s a reason why our kids call this the smelly house, but hopefully not for long!
P.S. For more duplex background, here’s our podcast about buying it (complete with how much we paid), a post with a full before tour (pics AND video), and a podcast about some setbacks that popped up before we could even start renovations (and then a post about some additional bad news that made us feel extra rage-y). And here’s a podcast about the loophole we found that made demo possible, which gets us to today’s demo pics & video tour. Quite the journey already.
The post A Duplex Demo Tour (Before & After Pics + A Video!) appeared first on Young House Love.
A Duplex Demo Tour (Before & After Pics + A Video!) published first on www.younghouselove.com
No comments:
Post a Comment