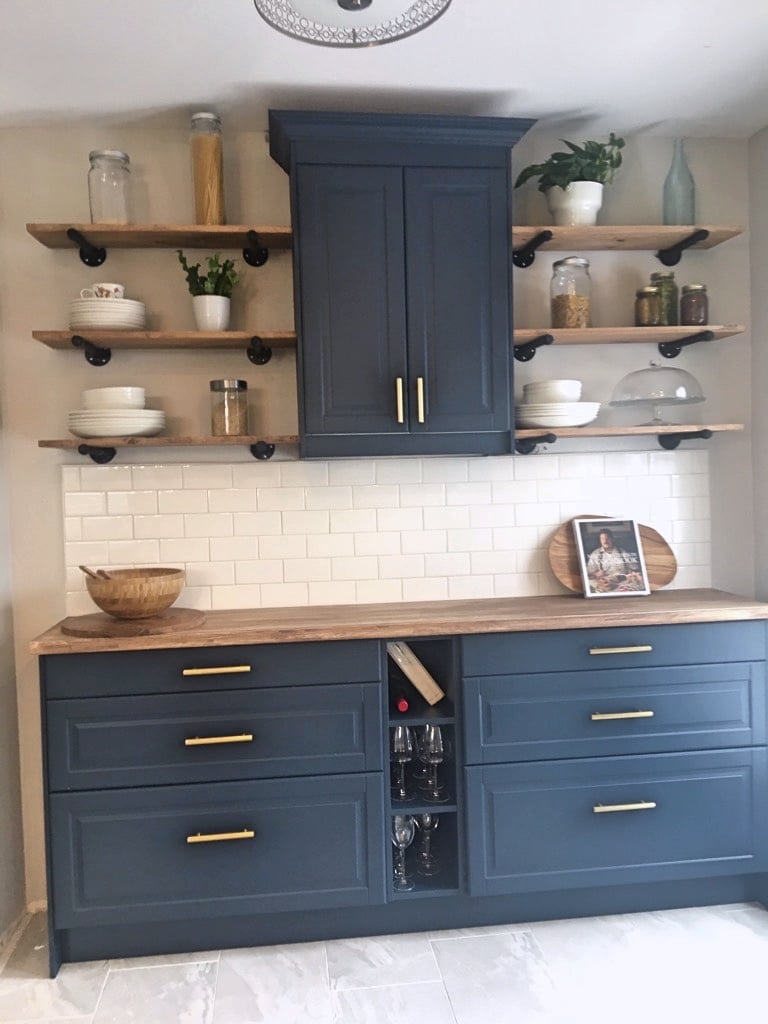
We had an open wall in our kitchen and needed some extra cabinet storage. We really liked the look of open shelves and wanted something that would complement our current gray cabinets. Here’s the result our IKEA kitchen nook and painted kitchen cabinets.
IKEA items used:
- SEKTION kitchen cabinets
- BODBYN doors
- VADHOLMA shelf
- KARLBY birch countertop
Other materials:
- 1/2″ Iron pipe and fittings
- 10′ pine boards
- MDF sheets
- Crown moulding
- Gold cabinet hardware
- Sherwin Williams Emerald Trim Urethane
- Minwax stains
- Subway tile and accessories
Kitchen nook instructions
1. First, I assembled the base and wall cabinets. And I decided I could fit the VADHOLMA shelf between the 2 SEKTION base cabinets with drawers to give some open storage as well.
2. Next, I created trim and side cover panel pieces using sheets of MDF. All cut using a table saw and mitre saw.
3. Then, I installed the base cabinets with VADHOLMA mounted between SEKTION drawer units. Installed the upper cabinets and added crown moulding.
4. Painting IKEA SEKTION kitchen cabinets. Here’s how I did it.
Painted kitchen cabinets: Preparation
I prepared to paint doors and side panels by first sanding all BODBYN doors slightly to remove the sheen and give some profile for adhesion.
Do not sand too much or you will penetrate lacquer coating and expose MDF below. Sanding is critical for primer adhesion. After sanding I wiped with tack cloth to remove residue.

I prepared the MDF panels for paint by filling cut edges with Drydex filler and sanded flat. If you don’t finish the edges with some type of spackling the edges will soak in more paint and you won’t get a proper finish.
Painted kitchen cabinets: Priming
Next, I primed each door using Sherwin Williams water-based adhesion primer Extreme Bond and a mini roller. You must apply this very thin. The next day I sanded lightly with 220 grit sandpaper and and wiped with a tack cloth. This is key to a perfect kitchen cabinet finish.
I then primed all MDF panels with Multipurpose Oil-based primer and sanded after dry. The reason to use an oil-based primer is because a water-based primer can swell MDF, especially on cut edges. I wiped each with a tack cloth.

The panels are now ready for the finishing coat.
Painted kitchen cabinets: Spray finish
I borrowed a paint sprayer. For the best possible finish, the only way to go is HVLP – high volume low pressure or cup gun and compressor.
An airless sprayer will work with a fine finish type but you will have more overspray and lack control. As I was doing this in my garage and finished kitchen, it would have been challenging.
The paint is Sherwin-Williams Emerald Urethane Trim Enamel. This is the best trim finish paint you can buy. After much debate with my wife over the colour, I finally made my own colour from samples and had the store colour match.


Finally, ready to spray. I set up shop in the garage and taped off and papered base cabinets for the overspray.
I sprayed a total of 3 coats. Ideally a garage isn’t the best environment. I did get a little dust on the doors but not noticeable. It would be best to lightly sand with very fine sandpaper and tack cloth between coats but I didn’t have time for this.
Voilà! Painted kitchen cabinets complete.
Installation
5. The next step would be to install the door hinges and drawer hardware. Then, I installed the doors.
6. Now, on to the countertop. I cut and installed the KARLBY countertop. Birch was too light for the blue so I sanded, wiped down and stained with Minwax Special Walnut Stain. I finished with Minwax pasting wax.

7. I then installed the iron pipe shelving brackets with heavy duty drywall anchors in each screw. These were rated for about 200lbs each. Next, I cut pine boards stained using Special Walnut Stain. I had to mix a bit of Natural Stain to lighten it up. Also I spray painted the pipe with flat black spray paint from Krylon.

8. Installed subway tile, grouted.
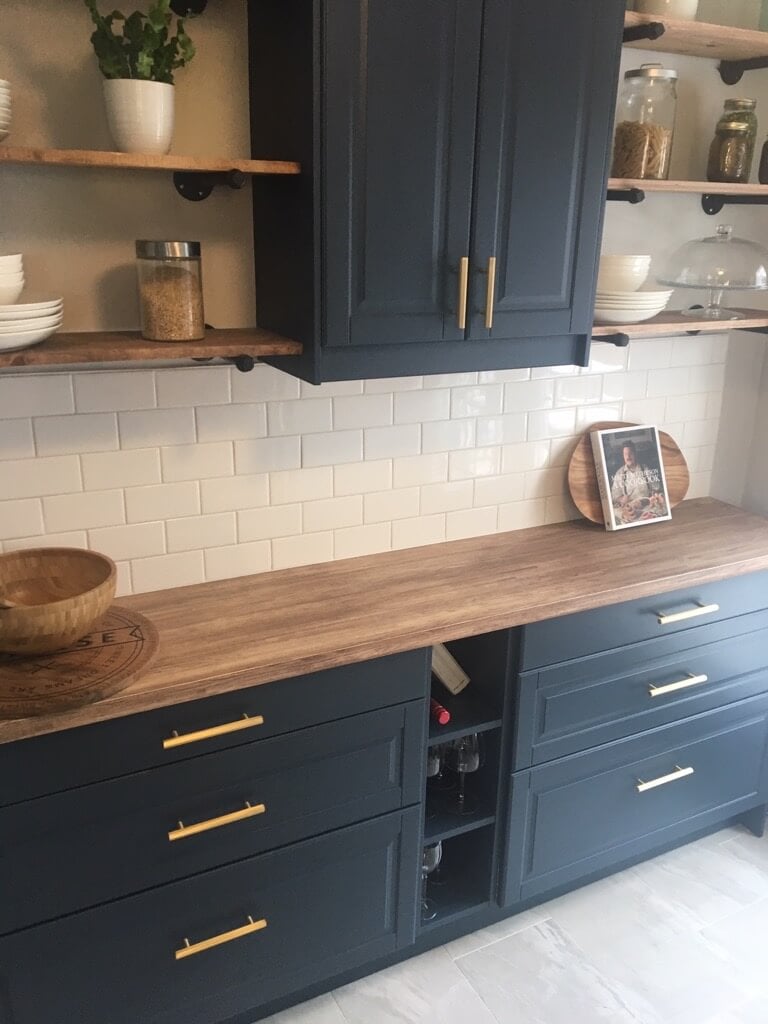
9. Ordered brushed brass hardware from CB2 and installed.
Kitchen nook and painted kitchen cabinets — all done!
This project took me every weekend for 3 months.
I was very limited in the time I could spend on this with a sleeping baby at home. It took some adjustment and changes of plans along the way but well worth it.
Total cost is probably about $2500. I’m sure a professional would charge much more.
~ by Micah DePeuter
You may also like these IKEA kitchen hacks
- Upgrade your freestanding kitchen island with a hot new rack
- How to hack a flat front IKEA corner sink
- Probably the most beautiful IKEA farmhouse kitchen
- Amazing open kitchen with cabinets as space divider
- Kitchen pantry organisation with IKEA STUVA
The post How we painted kitchen cabinets for our new kitchen nook appeared first on IKEA Hackers.
How we painted kitchen cabinets for our new kitchen nook published first on www.ikeahackers.net
No comments:
Post a Comment