Sunday, March 31, 2019
Friday, March 29, 2019
9 = 3 faux apothecary drawers for girl’s room
Here’s my tricky RAST faux apothecary drawers called Nine equals Three.
My daughter Valentina (6 years old) and I (Miguel Angel, 54) made it. The dresser looks like a nine drawer chest but it’s really just three drawers.
Material list:
- IKEA RAST chest of drawers
- Some sheets for paper patch work
- Nine thin (3 mm) wood veneers
- Spray paint
- Transparent glue for wood
- Nine colored knobs
The process for the faux apothecary drawers is very simple:
1. Cut the wood veneers to the right size to fit 3 of them on each RAST drawer front. You could get the hardware shop to cut them for you, if you don’t have the tools to do so.
Related: One RAST chest, 14 ways to dress it
2. Then, decorate the wood veneers with papers using a patch work style. We chose a variety of matching papers but in different colours and tones. After that, we cut and glued on irregular pieces of paper using a transparent wood glue. (eg. Mod Podge)
3. While you wait for your decorated wood pieces to dry, spray paint the RAST frame. You can paint the drawers too if you want but we didn’t as they would not be visible.
4. Once the glue has dried, nail the decorated wood veneers to the front of the drawers.

5. As a final touch, make new holes on the front for knobs. Add the new colored knobs and that’s it, your faux apothecary drawers are done.

Now, our tricky RAST is ready for Valentina’s bedroom! I only spent around €70 in total ($80 roughly), including the IKEA RAST itself.
~ by Miguel
You may also like these faux apothecary drawers
#1 DIY Card Catalog for $75

Shirley was very nostalgic for library card catalogs so we decided to make a card catalog. We settled on using a RAST dresser because of its hackability. See more of the DIY card catalog.
#2 Apothecary cabinet

Ines turns the plain RAST chest into a classic apothecary cabinet, with faux fronts. See the apothecary cabinet.
The post 9 = 3 faux apothecary drawers for girl’s room appeared first on IKEA Hackers.
9 = 3 faux apothecary drawers for girl’s room published first on www.ikeahackers.net
Thursday, March 28, 2019
10 best IKEA and LEGO storage ideas
IKEA and LEGO go so well together that it’s inevitable to use them together.
While we wait for the fruit of their collaboration, we round up a few of our best IKEA and LEGO storage ideas.
But first … a few words from the wise.
An expert LEGO organiser recommended a 3-step process, which makes a lot of sense if you want a super organised LEGO storage system.
1. Organisation – set up a list of rules to decide where each type of element goes
2. Storage – decide on the right sized containers / storage unit for your categories
3. Sorting – the process of putting each piece in its right place (which is probably the hardest bit to keep up with)
Taking these steps to organise and sort will make it much easier to find the pieces you need and build your LEGOs. Less time hunting and more time playing.
Now, once you’ve decided on the LEGO organisation best for you and your stash of bricks, it’s time to go shopping at IKEA.
10 best IKEA + LEGO storage ideas
#1 A LEGO organizer with TROFAST toy storage
 An impressive storage system to store over 9,000 LEGO bricks! See how Uncle Kai hacked this LEGO organizer.
#2 Dual personalities table and storage

This LEGO shelf serves a dual purpose. It is a LEGO table on one side and a smooth work surface (to be used as a shelf, art table, etc.) when the table top is flipped over. It’s capable of storing LEGO bricks and takes up no floor space. See more of the dual personality LEGO shelf.
#3 Mega LEGO storage table

Got tons of bricks? Try this U shaped mega LEGO storage table on for size. It’s based on the TROFAST storage system. See more of the U-shaped large LEGO storage table.
#4 Ultimate LEGO bricks organizer

Need to store your LEGO bricks but have them accessible as well when you want to use them? This is an amazing LEGO organizer made with the MANDAL headboard (unfortunately discontinued. You can replace it with wooden slats) and GLIS boxes. See the GLIS LEGO bricks organizer.
#5 LEGO wall storage

Now, this is one of the top LEGO storage ideas for fans of IKEA and LEGO. The BESTÅ doors can be transformed into giant LEGO plates. See the LEGO wall storage.
#6 LEGO storage and height adjustable TROFAST play table

A height adjustable LEGO play table and storage unit that grows with your kids. This hack used the IKEA Trofast storage systems, with an adjustable shelf that serves as a surface for building. See more of the height adjustable LEGO play table and storage unit.
#6 LEGO Play table and storage

Need a place for your kid to build his LEGO pieces? This DIY LEGO play table with drawer storage is the perfect solution! It’s so easy to make and affordable too. It uses the IKEA LACK side tables and TROFAST bins. A cheap and easy project anyone can make. And don’t you just love the red mini drawers with brick pulls? See more of the DIY LEGO play table with drawer storage.
#7 LEGO tray storage
 These 2 trays are perfect for containing LEGO bricks and even better at sliding away under the sofa at the end of the day. See more of the LEGO tray storage.
#8 LEGO table with undertable storage

It turns out that the large LACK coffee table is perfect as a LEGO play table. It is easy to fit 9 road plates and 2 large base plates with double-sided tape. See more of the LEGO table with undertable storage.
#10 Rolling LEGO storage cart

Roll this LEGO storage cart to where the action is. When playtime is over, roll it away from sight. See more of the LEGO storage cart.
Here are also a few useful items to help you complete your IKEA + LEGO storage ideas. (contain affiliate links)
What other LEGO storage ideas can you come up with? Let us know in the comments.
The post 10 best IKEA and LEGO storage ideas appeared first on IKEA Hackers.
10 best IKEA and LEGO storage ideas published first on www.ikeahackers.net
Wednesday, March 27, 2019
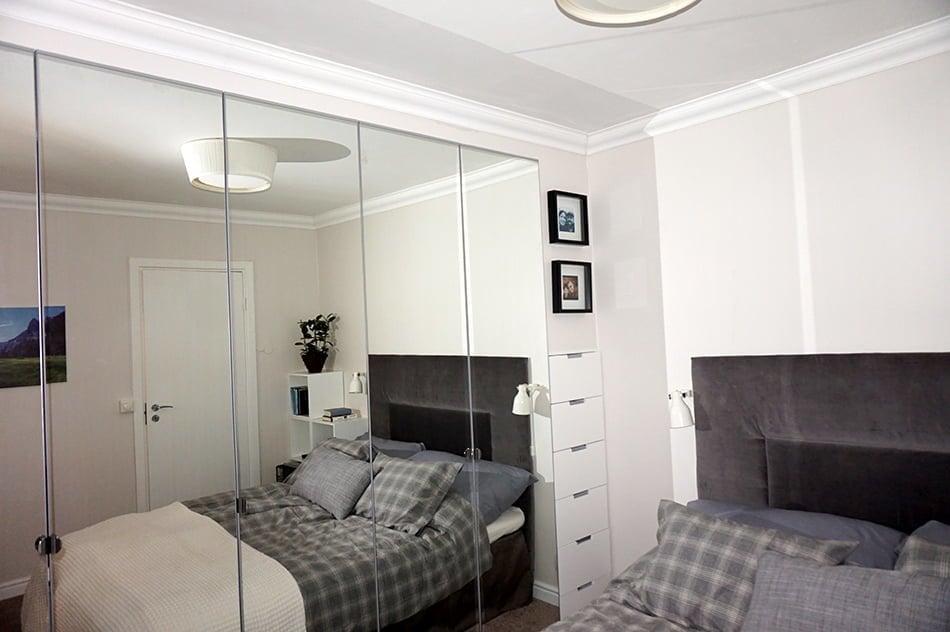
Hackers Help: DIY sliding mirror wardrobe doors?
I’m looking for a sliding mirror wardrobe doors hack.
I would be interested in adding a custom fit mirror to SVORKMO or HASVIK sliding doors, on the PAX cabinets. The mirrors should cover the whole front of the door.

PAX SVORKMO | IKEA.com

PAX HASVIK | IKEA.com
The thing is, I don’t like the sliding mirror wardrobe doors offered by IKEA, with four frames around the mirror tiles. See AULI mirror door below.

PAX AULI sliding mirror wardrobe doors | IKEA.com
Does anyone happen to know if there would be enough space between the doors for a mirror, or would the extra weight of the glass cause a problem?
~ by Jarno
***
Hi Jarno
I’ve not seen a successful hack on this. Perhaps IH readers know of one? Please do let us know.
I have an idea though – a concept – and it’s a long shot. Totally untested. But let’s just brainstorm this possibility for a second.
Frame up a mirror with the sliding door frame
Instead of fixing mirrors onto the SVORKMO or HASVIK and worry about weight or clearance, why not use IKEA’s sliding door frame and get your mirror fabricator to cut a large mirror to fit the outer frame?
This way, you’ll only have a thin frame all around the mirror and not the 3 inner dividers. (Unless you totally loathe the sight of any frame!) You’ll need to find a way to reinforce the back of the mirror and secure the frame together, which was the job of the inner dividers. Perhaps modify the dividers into a kind of brace?

PAX sliding door frame | IKEA.com
If you’re not set on sliding mirror wardrobe doors, the FORSAND VIKEDAL hinged door is a great option. Unless you don’t have the space to swing open a door, they work as well as sliding doors, if not better. And they are cheaper too. See this built in mirror closet.
Let us know how it turns out.
Happy hacking,
Jules
You may also be interested in these Hackers Help questions
- What’s the thickness of the sliding door panels?
- Is there an alternative to the IKEA sliding door rails?
- How to make sliding closet doors for PAX?
Join us on IKEAhackers Community Facebook Group

This is where we share our IKEA hacks, news, style and spaces. Also we get to help one another with our IKEA “problems”. Let’s do this! And have fun. View Group.
The post Hackers Help: DIY sliding mirror wardrobe doors? appeared first on IKEA Hackers.
Hackers Help: DIY sliding mirror wardrobe doors? published first on www.ikeahackers.net
Tuesday, March 26, 2019
Height adjustable kid’s desk: A desk that grows with you
Joy hacked a height adjustable kid’s desk using the IKEA HEJNE system. Besides the desk, it also has plenty of shelves for toys and books.
This is a simple desk set up that will grow with your kid. The HEJNE is also perfect for this project because it already has holes all pre-drilled for you. If you wish you can add extra holes for smaller height increments.

Related: Need a study table for kids? Here are 10 of the brightest ideas
Materials:
- HEJNE posts x 8
- HEJNE shelves x 8
- Wooden board
- Nuts and bolts (to fit HEJNE hole size)
Instructions for height adjustable kid’s desk
Assemble the IKEA HEJNE system following IKEA instructions. Combine the posts and shelves as you wish.
Joy decided to have the desk in the middle. But you can certainly have it on the right or left section too.
Now, onto the kid’s desk
First, decide how deep you want the desk to be. Joy made it a little deeper than the HEJNE, resulting in a larger desk top. But don’t make the desk too deep to prevent a tip over accident.
Then, get a wooden board and cut it to size according to the size you want. The width should span the length of 2 HEJNE posts. Curve the corners for a safety.
Use a router or jigsaw to cut notches at all 4 corners of the board. The notch should be wide enough for the board to slide into the posts.
Sand down all cut edges and surfaces till smooth.
As the HEJNE comes untreated, paint or stain it to fit your kid’s room decor. Joy stained the HEJNE posts and shelves.
Fasten nuts and bolts into the holes on the HEJNE posts, at the height you wish to rest the wooden desk on. (You could also use a fitting wooden dowel for this.)
Slot the wooden desk into place to complete your height adjustable kid’s desk.
One last but very important step, secure the entire HEJNE set up onto the wall.
As your little one grows, unscrew the nut and bold to raise the desk one step higher.
~ by Joy
The post Height adjustable kid’s desk: A desk that grows with you appeared first on IKEA Hackers.
Height adjustable kid’s desk: A desk that grows with you published first on www.ikeahackers.net
Monday, March 25, 2019
This popular IKEA tray table is now double the fun
This simple hack but I thought you guys may appreciate it. At its base it’s a simple tray swap for the IKEA tray table (GLADOM) to give it a midcentury vibe.
I bought the GLADOM as a nightstand, but replaced it a year later with an IKEA SELJE so I could have a drawer to stash things in. So, I thought the IKEA tray table could look great in the living room if I upgraded it just a little bit!
I designed a simple clip that can be 3D-printed that lets you reuse the original tray on the bottom of the frame, turning the GLADOM into a two-tier side table.
IKEA items used:
- GLADOM tray table
- SKALA tray (optional)

GLADOM tray table | IKEA.com

SKALA tray | IKEA.com
Other materials and tools:
- Wood serving tray
- 3d-printed clips (design files available here)
- Dremel (if needed to modify wood tray)
IKEA tray table upgrade:
The IKEA GLADOM’s metal serving tray is not attached to the frame. You can easily replaced it with any other tray of an appropriate size of 44cm in diameter.
A wood tray is an easy upgrade to make the GLADOM design look midcentury chic. For example, the IKEA SKALA is a drop-in replacement that’s already a lot nicer than the standard metal tray.

IKEA tray table done!
(For my own version of this hack I bought a wood serving tray at a local kitchen supply store that was slightly larger at 45cm. To make it fit, I scored notches into the tray at the 4 corners with a Dremel, allowing the tray to fit into the GLADOM’s frame).
With a wood tray the IKEA tray table looks pretty great already. But to really finish it off you can add these 3D-printed clips I designed to mount the original tray to the GLADOM’s bottom frame.

If you have a 3D printer you can simply print 4 clips using the file on Thingiverse yourself.
If you do not have one, you can use an online service like 3DHubs to custom order the parts online.
Or you can look for a 3D printer near you. Many cities have MakerSpaces or FabLabs that have 3D printers which can be used for a small fee. Even public institutions like libraries are extending their services to include such machines. They’re a great resource for IKEA hackers to experiment with.
Either way, once you have the 4 clips you can mount them on the bottom cross of the frame, put the metal tray in place, and done!
Your standard IKEA tray table is now a glamorous midcentury-style table.
What was the hardest part of this hack?
Mustering up the courage to build the clip! It turned out to be very easy, about 15 minutes worth of measuring and designing. But I didn’t get around to it for weeks because I expected it to be really complicated. Turns out, it wasn’t.
I like using 3D-printed parts for IKEA hacking, it perfectly combines two of my hobbies. Until this hack I’d been using other people’s designs for my hacks, but this was the first part I designed myself.
What to pay special attention to?
If you need to Dremel your tray, don’t just freehand it like I did, but set it up properly. I half-assed it by hand and got lucky that most damage is hidden behind the frame.
Lots of people are surprised that they hadn’t thought about swapping out the tray on the GLADOM themselves. It seems so obvious in hindsight, but I haven’t seen anyone else do this yet.
Link to the 3D-printed clips are here.
~ by Guy Sie
Related: See more 3D-printed IKEA Hacks
The post This popular IKEA tray table is now double the fun appeared first on IKEA Hackers.
This popular IKEA tray table is now double the fun published first on www.ikeahackers.net
Sunday, March 24, 2019
Friday, March 22, 2019
Screen with greens: Make an Indoor Plant Room Divider
This is our hack of the PINNIG coat rack and shoe bench into an indoor plant room divider. Which we now call “The Pinnig Sprout Screen”.
Backstory
We have always wanted a room divider to have clear demarcation between the living room and dining area.
And we’ve looked through countless number of dividers, which are beautiful, but somehow lacking in character and individualisation.
After months of trawling through countless furniture stores, we finally decided to make our own. Instead of asking a contractor to erect a feature divider or buying a ready-made divider, I wanted to challenge myself to create a one of a kind indoor plant room divider. It will also serve as a mini garden.
After scouring the net for inspiration, I finally sketched out a draft room divider that consists of mostly items from IKEA. Then, we embarked on this DIY trip, full of enthusiasm and a prayer that it’ll turn out like what we’ve always wanted.

IKEA items used and other materials:
-
- PINNIG coat rack with shoe storage bench x 1
- HEKTAR wall clamp spotlight x 2
- FEJKA artificial plant x 1
- OBSERVATÖR clip on basket x 2
- BITTERGURKA plant pot x 2
- TJENA storage boxes with lid x 2
- Metal hanging pendant x 3
- Wire mesh frame x 3
- Velcro strips
- Cable ties
How we put together our indoor plant room divider:
1. First and foremost, we ran through a long list of items on the IKEA Singapore website. The goal was to find a tall and wide enough structure that can provide the function of a divider.
Instead of settling for ready made dividers such as from the VEBERÖD and KALLAX series, I decided to think out of the box. Be brave and go for the PINNIG coat rack!

PINNIG coat rack shoe bench | IKEA.com
My wife wasn’t totally convinced of my choice. But after looking at my tireless enthusiasm, she relented and agreed! Yeeeay! With the hardest part over, I began the process.
Adding lights to our indoor plant room divider
2. To make it an indoor plant friendly room divider, I purchased 2 HEKTAR wall/ clamp lights to provide just enough lighting for the indoor plants to thrive.

Related: A freestanding room divider using STUVA cabinets
As I envisioned it to be a room divider and mini garden, I purchased a couple of BITTERGURKA plant pots to house the potted plants.
3. Last to go from my IKEA shopping list are a couple of OBSERVATÖR clip on baskets and black TJENA storage boxes with lids for storage purposes. I bought them to provide ample storage space for miscellaneous items such as fertilizer, spade, newspaper etc.

Related: A plant stand to plant screen
4. Now, on to the construction process.
To enable lights to be fixed onto the PINNIG coat rack, I decided to do without the upper hook fixtures. In their place, I secured the 2 HEKTAR wall clamp lights instead. The aesthetics of these lights blend in perfectly with the PINNIG rack to give the whole structure a seamless look!
“Wow! I must be lucky”, I whispered to myself!
To keep the divider lines “clean”, I tidied up the wires by securing them with Velcro strips and run them along the side of the rack to make it look neat.
5. To realise the vision of an indoor plant room divider, we got ourselves some indoor potted and air plants. The potted plants were placed in the beautiful BITTERGURKA plant pots whereas the air plants go to the hanging pendants.

We used fishing lines to hold up the hanging pendants so that they won’t be visible. On the other hand, the FEJKA artificial plants were draped over the wire mesh boards to create a “vine” effect around them.
Storage boxes and baskets to keep things tidy
6. With the mini garden concept slowly coming to a fruition, we added both the TJENA storage boxes with lids and OBSERVATÖR clip on baskets to provide ample storage space to make the whole structure look clean and uncluttered.
Pheeew …! Definitely an awesome and handsome solution to store away those gardening tools!
Related: A gorgeous IKEA room divider hack for a studio
Personalisation as the final touch
7. With the project almost 90% completed, it was time for personalisation. We decided to inject a little character to the newly christened “The Pinnig Sprout Screen” FKA (formerly known as) coat rack. 
Using black cable ties, we secured three black wire mesh boards to the divider to allow us to add our family photos and also favourite quotes!

8. Tadaa! We’re extremely proud and happy how this project had turned out! On top of being a one of a kind indoor plant room divider for our place, it snugs nicely into our home concept! The mini garden is looking great and it gives me the opportunity to work on my hobby!

9. The whole process, from research, drafting, shopping (the wife’s favourite part!) and execution took about a week to complete.
Upon reflection, the hardest part of this project was … convincing the wife to improvise the PINNIG coat rack into a room divider instead of just getting a ready made one!
However, after all is done and dusted, she and a bunch of our guests adore the one of a kind product! Happy wife, happy life!
~ by Mohamad Zahrin Omar
The post Screen with greens: Make an Indoor Plant Room Divider appeared first on IKEA Hackers.
Screen with greens: Make an Indoor Plant Room Divider published first on www.ikeahackers.net
Thursday, March 21, 2019
IKEA releases furniture add ons for people with disabilities
This is the kind of hacks from IKEA that got me cheering. Just simple add-ons that make their furniture so much more accessible.
Couch leg extenders, extra large light switches, easy grab handles may not appear like jaw-dropping hacks but they make IKEA products more usable by people with disabilities.
“Accessibility can mean many things for companies,” said Yuval Wagner, president and founder of Access Israel, one of the nonprofits in this collaboration with IKEA. (The other partner is Milbat.)
In an interview with The Washington Post, he said, “That can include designing websites that are navigable for people who can’t see or phone lines for those who can’t hear. For a furniture retailer like IKEA, that means designing products that work for all shoppers.”
This initiative definitely reflects the brand’s mantra to ‘create a better everyday for the many people’.
The project started with a hackathon at their Tel Aviv store. It brought together engineers and people with disabilities to brainstorm and work on ideas.
This was an essential step for IKEA to gather insight into how people with disabilities interact with furniture. From there, they developed 13 products in the ThisAbles project.
The add-on products are designed to fit at least one popular IKEA product. IKEA Israel has offered them as free downloads, accessible from anywhere in the world. With the files, you can then 3D-print them at home or at a local 3D printing hub.
Let’s take a closer look at ThisAbles furniture add-ons
Sofa lift with leg extenders

A sofa leg extender for the KARLSTAD sofa. Slip them over the regular KARLSTAD legs and they raise the sofa height making it easier to get up from.
Mega Switch to turn on or off

Slip a larger printed switch over the existing push button to make it easier to hit the on-off button.
Easy grip for shower curtain

Curtain Gripper makes it easier to grab and draw wet slippery shower curtains.
Large handles for PAX wardrobes

Easy Handle allows PAX wardrobe doors to be opened with the forearm, instead of fingers.
Bedside hooks for cane

Cane By Me are genius hooks that can be fastened on the bed frame and allow a walking stick to be kept close to the user.
A few others in the ThisAbles accessibility designs are:
- Friendly Zipper — Attach the extra large ring to any zipper to make it easier to zip and unzip
- Glass Bumper — Fix onto glass doors at the height where they might be hit by a wheelchair
- Insider — Insert this angled mirror into high shelves so that their contents can be seen from below
Watch the entire ThisAbles product playlist here and visit ThisAbles website for the full list of accessibility furniture add-ons.
Well done, IKEA Israel. May I suggest, in time to come, these furniture add ons be added as actual products (or a print-on-demand service) in all IKEA stores? 3D printing is still not as easy or affordable in many countries. Let’s go all the way to create a better everyday for the many people.
The post IKEA releases furniture add ons for people with disabilities appeared first on IKEA Hackers.
IKEA releases furniture add ons for people with disabilities published first on www.ikeahackers.net
Wednesday, March 20, 2019
Hackers Help: Need ideas for an IKEA storage unit
Hi! I need ideas for an IKEA storage unit.
I currently lodge with a friend who is a pretty chilled out landlady and has let me decorate my room how I please.
In the master bedroom of a small two up two down terrace, I’ve already managed to fit in a double bed, a workspace and a “living room” with seating area/ tv. So it’s more like a studio apartment in layout.
My problem is that I just need a bit more storage to keep everything as tidy as possible. My idea is a horizontal side board style unit that will fit behind a small futon and behind the door.

I can’t go vertical because I also move the futon around to workout. (Yes, I am a total recluse and do demand a lot from a small space) lol. So this IKEA storage unit would be on wheels as well.

Anyways. It seems straight forward enough, find two units and bridge them together at the top and bottom? But I can’t find anything on the IKEA website that would do the trick.

It needs to about 100 cm wide and up to 50 cm deep. I’ve done some rough sketches
Can you help?
Kind regards
~ by Marcus
***
Hi Marcus
Great job in making the most out of your space.
I doubt that I can suggest the exact storage configuration of shelves and drawers so, I’ll just go by size.
Ideas for IKEA storage unit
#1 STUVA bench with storage
My thought would be to use the STUVA range.
The frame of the STUVA bench measures 90 x 50 x 50 cm. You didn’t mention height, but these measurements are pretty close. Complete it with a FRITIDS box and you’ll have quite a bit of storage and the box comes with castors. Win! (But you’ll need to move the frame separately.) Add padding on top and you’ll have extra seating for guests too.

STUVA bench | IKEA.com
#2 STUVA chest and LILLÅNGEN end units
I have another idea which will take a bit of work. You can use the STUVA / FRITIDS chest of 3 drawers. It’s 60 cm wide, 50 cm deep and 64 cm high. Then add to its side 2 LILLÅNGEN end units, which measure 19 x 19 x 64 cm each.

Attach them, like so, to the STUVA unit.

That will give you almost 80 cm wide. If you want it to span to 100 cm, add another 2 on the other end of the STUVA.
Secure a piece of board under the STUVA and LILLÅNGEN combo and then fasten castor wheels under that.
#3 TV benches and frames
Or if you’re willing to go a little longer, some TV benches like the BRIMNES (120 x 41 x 53 cm) is also a good choice.

BRIMNES tv bench | IKEA.com
The TROFAST toy storage unit is also pretty close in terms of the size you want. This one is 94 x 44 x 53 cm. Paint it, add wheels, slot in shelves, bins and you’re good to go.

TROFAST toy storage | IKEA.com
Alternatively, do you have the PLATSA range where you live? If you do, you can also explore that.
Finally, there’s a website, ikeabysize.com. The name says it all. Key in the dimensions of your ideal IKEA storage unit. Click submit and it will list all IKEA items according to the size. Give it a whirl.
Good luck and your search for the perfect IKEA storage unit.
Jules
Join us on IKEAhackers Community Facebook Group

This is where we share our IKEA hacks, news, style and spaces. Also we get to help one another with our IKEA “problems”. Let’s do this! And have fun. View Group.
The post Hackers Help: Need ideas for an IKEA storage unit appeared first on IKEA Hackers.
Hackers Help: Need ideas for an IKEA storage unit published first on www.ikeahackers.net
Tuesday, March 19, 2019
Charging station organizer to line up your devices
The USB charging station organizer originally came with plastic separators to hold each device. But they were flimsy and broke off. Furthermore, the gap spacing was too narrow to fit my devices.
I was also looking for a headphone stand, so this charging station organizer hack killed two birds with one stone.
It took me about 30 minutes to get it done. And my new charging station organizer costs me $AUD9.99.
IKEA items used:
- IMMELN shower basket

IMMELN shower caddy | IKEA.com
Other materials and tools:
- Hacksaw and file
- Hot-glue gun
- Dremel (optional)
- Electrical USB charger base-station
Instructions for USB charging station organizer:
1. Cut off basket arms with hacksaw.
Related: Multi-device charging station built into an IKEA bench
2. File rough edges on basket where arms were attached. (Optional, use a grinding wheel on a Dremel to do this step more quickly).
3. Use hot-glue gun to stick the holder onto the charger base.

As a bonus, one can stick the 2 suction cups, which come in the IMMELN packet, to the wall and use as stands for rechargable wireless headphones, as shown in photo.

Related: One charging station to rule them all
I like that it’s tough and shiny stainless steel, which I think will last a long while.
The hardest part of this hack was filing the surface to remove the sharp edges.
It took some work but it worked out great.
~ by Yingwee
You may also like these charging station hacks
#1 Wireless charging station in BESTÅ bench

The finished result looks great, a wireless charger which sits seamlessly in my unit underneath my wall-mounted TV. The MORIK also has an in built USB port underneath it which is still accessible from within the BESTÅ unit – I complimented this with a GLIS box full of USB cables for charging devices that currently don’t have wireless charging. See more of the wireless charging station.
#2 LACK table with built-in USB charger

Our extended family has grown quite a bit over the years to include Cousin iPad, Auntie iPhone, Grannie Kindle, and that crazy Uncle Android. It’s a full house, and they’re hanging out on the kitchen counter, in the home office, and especially in the living room. Our wall plugs are always at their limit, jammed up with our smart “relatives”. We want more space for ourselves yet don’t want to be without our beloved family of devices. See more of the built-in LACK coffee table USB charging station.
The post Charging station organizer to line up your devices appeared first on IKEA Hackers.
Charging station organizer to line up your devices published first on www.ikeahackers.net