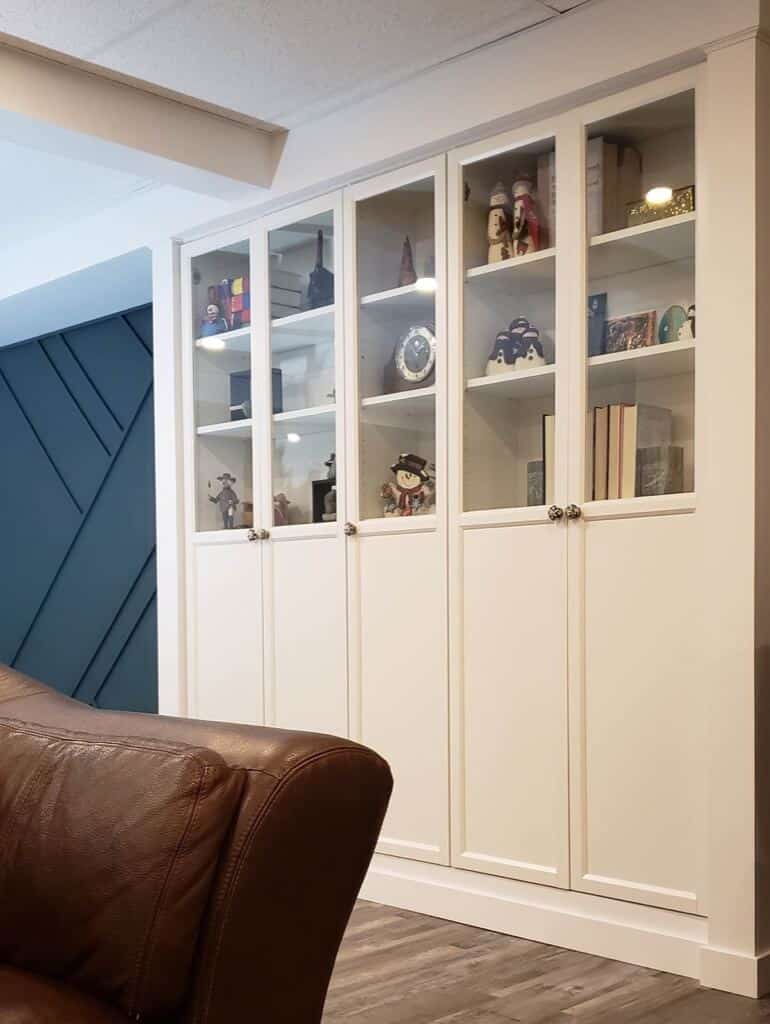
The goal behind the IKEA hack was to create a useful division in the basement.
We had a really long wall that needed something to separate the games area from the media area.
What better way than to introduce more storage and some built-in bookshelves.

Items used for BILLY built-in bookshelves
- BILLY bookcases + half glass doors
Other materials:
- Hardware from Amazon
- 2×4’s
- MDF
- Decorative trim
Tools:
- Miter saw
- Table saw
- Brad nailer
- Circular saw
- Ramset
- Clamps
- Drills
Steps I took to build the BILLY built-in bookshelves
1. I started out by framing out the two walls that flanked either side of the bookshelves using 2×4’s. I wanted these to act like walls framing in the built-in BILLY bookshelves, thus I needed the walls deep enough to recess the BILLY’s in about 1 ½ inches from the finished front.

2. After the framing was complete, I assembled the IKEA BILLY bookshelves for a rough fit. It is absolutely essential that everything fits snug. At this stage, you can still easily make changes.

3. Next is to secure the BILLY bookshelves to each other. Use screws of the right length, so it won’t poke through the other side of the BILLY unit.

Once all of the BILLY bookshelves are joined, go ahead and secure them to the framed walls with 2 1/2″ screws.
4. It is time to start closing in the framed walls. I used MDF for this project because I wanted them to look like trimmed out walls and not just a drywall wall. Remember to check for plumb-ness.

Then, fill any of the joints and nail holes with drywall putty. Let it dry, and then give everything a good sanding.
5. Prime all of the MDF and then paint.

6. Now is time to install the finishing trim. For my project, I went with an inside quarter round along the top. This covers the joint between the drywall bulkhead and MDF, as well as the small gap above the built-in bookshelves.

For the bottom, I used the same baseboards as the rest of the basement (standard 1×4″ MDF baseboards). Again, this helps provide continuity to the entire space, tying the built-in BILLY’s with the rest of the renovation.
Fill the gaps and nail holes with drywall mud, give it a light sand, and then finish off the new trim with a final coat of paint.
7. The last step is to install the BILLY doors and hardware. We replaced the regular BILLY knobs with white and grey ceramic pumpkin knobs.

I made a YouTube video instruction to go along with this build. It can really help explain some of the more finicky steps about how I settled on specific measurements.
Total cost was around $500.00 CAD.
The best part of the hack is it completely changes the look of basic BILLY bookcases into a custom built-in and functional piece of furniture.
The hardest part of the build is the planning. Taking the extra time to really understand the dimensions and how it would all fit together is highly encouraged.
It led to some rather specific measurements to get the intended look. In particular having the final inside quarter round fit perfectly under the bulkhead when finishing the top of the built-in.

See the full tutorial of the IKEA BILLY built-in bookshelves.
~ Jeff from The Homestud
See Jeff’s other hack, which is one of 2018’s top 10 hacks — KALLAX corner home office furniture.
The post No doubt about it. BILLY is made for built-in bookshelves appeared first on IKEA Hackers.
No doubt about it. BILLY is made for built-in bookshelves published first on www.ikeahackers.net
No comments:
Post a Comment