We’ve done so few upper cabinets in our recent kitchens that we actually haven’t installed under cabinet lighting in ANY of them. But we did install it under the cabinets in our laundry room and – surprise! – I just came across a bunch of pictures of the installation process that I took waaaaaay back in 2014 but never shared. It’s a remarkably straightforward process, so it could be an easy upgrade if you needed more task lighting in your kitchen, laundry room, or any other space with upper cabinets.

The cabinets in here are from Ikea, so we also used one of their stock under-cabinet lighting options called GRUNDTAL Spotlights. These don’t appear to be sold anymore, but the current OMLOPP spotlight seems to be a similar (even improved!) version. The OMLOPP ones are now LED and are lower profile, plus some cord management covers are included, which is nice. Based on the downloadable instruction sheet, the new ones install almost exactly the same way, so the same basic steps I’m about to outline for you here still apply.

Most people do one spotlight per cabinet but we wanted to give the appearance of one continuous bar of light, rather than distinct spotlights under each cabinet, so we decided to do more. The GRUNDTALs were sold as 3 packs, so we did 6, but 4 or 5 probably would’ve done the job just fine.
The first step, once everything is unpackaged, is to pop the actual lightbulb portion of each spotlight out of its casing, leaving the wiring in place.
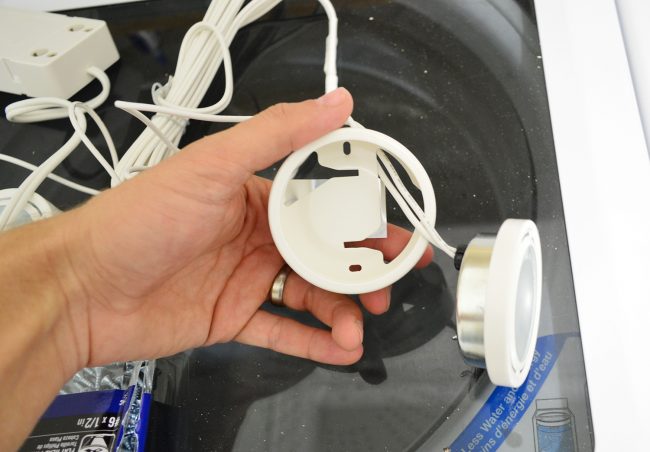
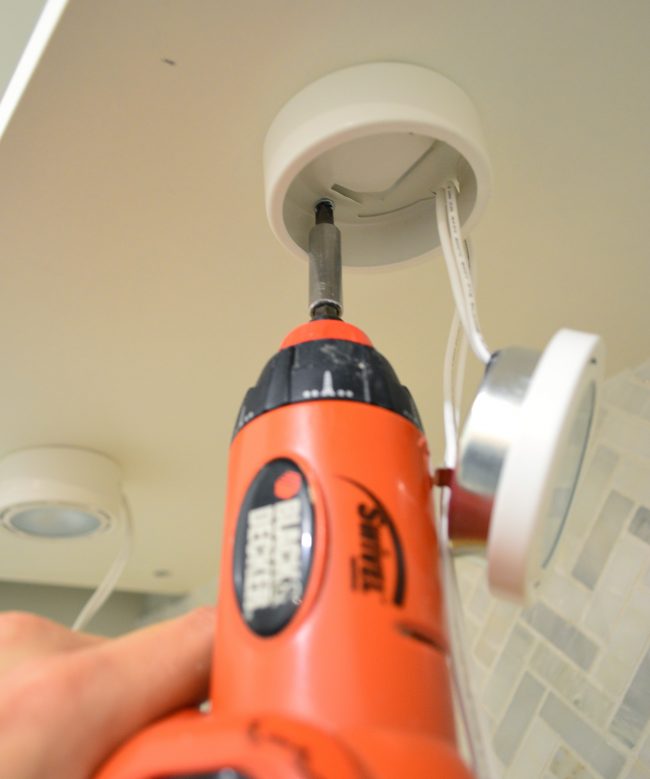
This exposes the holes that you’re supposed to screw through to secure the light to the underside of your cabinet. Just be sure to measure and mark your placement before you start doing this. We centered each spotlight front-to-back on the cabinet and spaced them equally apart side-to-side (around 10″ away from the next one). We secured ours using 1/2″ screws so that they wouldn’t poke through the inside of the cabinet. Then the light just snaps back into place.
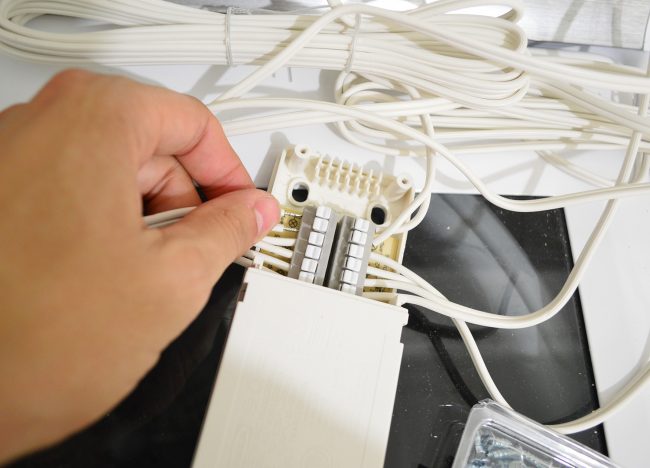
Once all of your spotlights are secured, you need to connect everything to the transformer box. This is sold separately from the new OMLOPP spotlights, as is the power cord. I know that sounds kinda crazy, but they sell things a la carte like that because the number of transformers and power cords you need depends on how many spotlights you’re installing (you can add up to 9 spotlights per box, and up to 10 boxes per power cord). The photo below is how I wired my spotlights to the transformer box, but the new stuff is even easier – it’s basically like plugging in a phone charger.
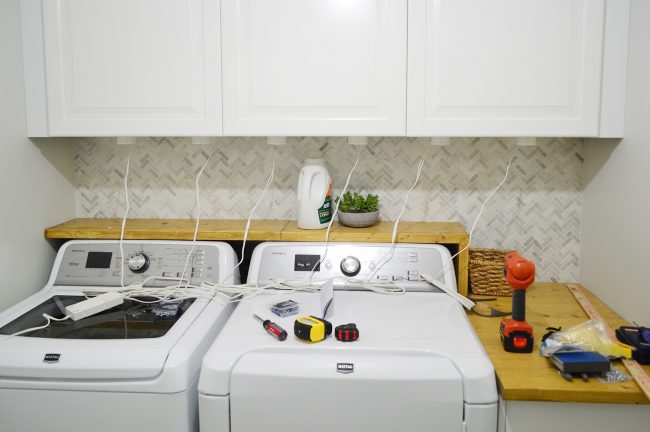
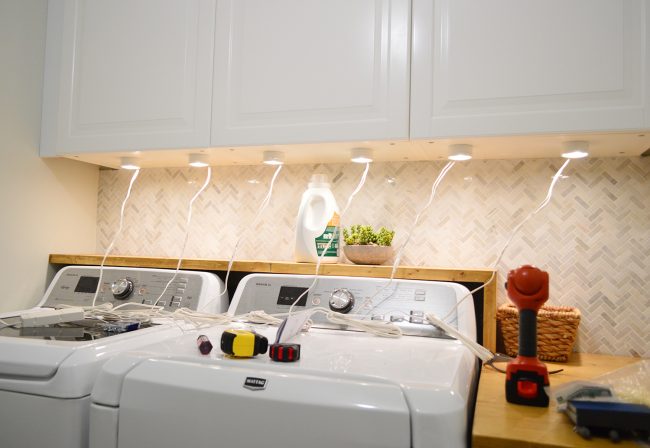
At this point your installation may look something like this. The cord situation is not very pretty, but before dealing with that it’s always a good idea to check that all of your connections work.
The transformer just plugs into any regular outlet and it has a toggle switch on the cord, so you can get everything powered up without the help of an electrician. So it was super easy to get ours working within minutes.
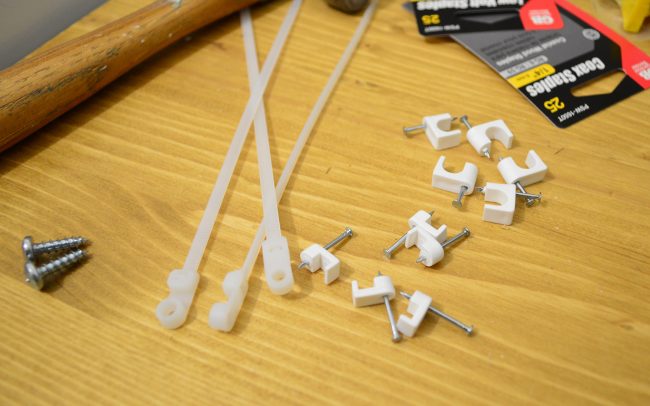
The newer spotlights come with some cord covers to help hide the wires against the bottom of the cabinet, but you still might have to get creative with all the extra wire between the cabinet and the transformer. I picked up a variety of cord management options from the store and the most helpful items ended up being these mounting ties (basically a zip tie with a screw hole) and some wire staples (you may need to swap in different nails or screws if the provided ones are long enough to poke through your cabinet bottom).
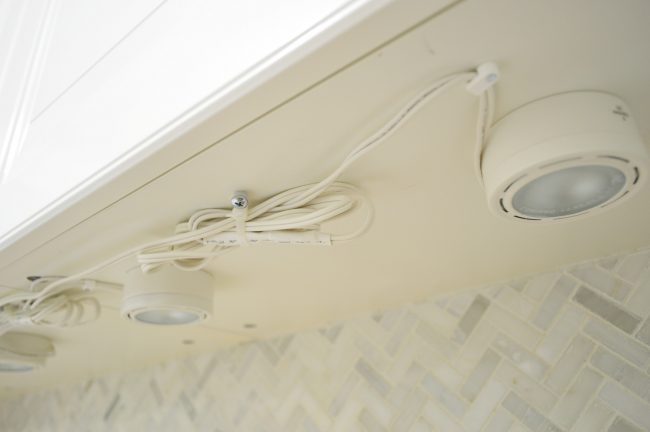
Yours probably won’t look quite this messy with the newer system, but you can see what I did with ours. I wrapped up most of the excess wire in a zip tie (screwed in place) and then kept everything else tight to bottom with the wire staples.
You see zero of this chaos thanks to a cover piece that you add later. You’d pretty much have to lean over the washer and dryer and put your head under the cabinet to get a good look at it once it’s boxed in with that cover piece, but I’ll get to that in a minute.
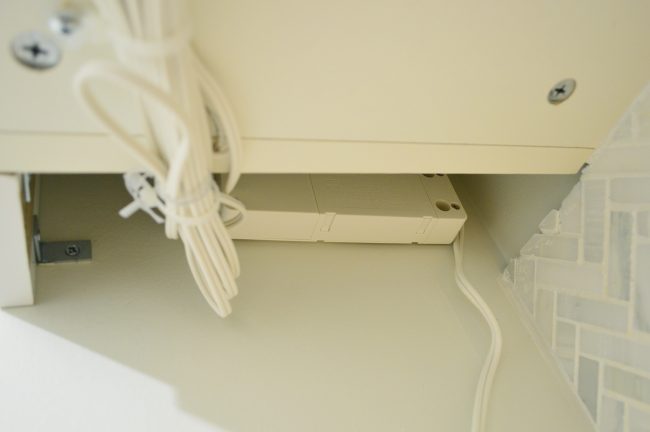
Back to the whole “wire management” thing. You also have to find a place to hide your transformer box. Ours got mounted behind a gap on the side of one cabinet that’s hidden with a filler piece in front of it (the transformer box comes with holes for mounting it with screws). That placement also allowed the power cord to hug the corner as it snakes down to the outlet.
A couple of years after our initial installation we had an electrician hardwire the power cord to a switch on the wall, and that makes it even easier to flip on and off. But when there was a wire tucked along that left corner, it wasn’t really that bad. You can hardly see it in this photo:
One more word about the transformer box: I actually think a more popular location for that is ON TOP of your cabinets, but you may need to install an outlet up there. Ikea sells a remote so you can turn everything on and off without needing to have access to the power cord switch. Pretty smart.
The last thing we did was to install that cover strip I mentioned across the bottom of the cabinetry to hide the lights and their wiring. It’s just a spare filler piece that Ikea sells, mounted in place using small L-brackets and caulked at the seams.

We don’t really mind the cover piece on the bottom, but I do feel like it’s one shortcoming of the Ikea system. Their cabinets are totally flat on the bottom, as opposed to lots of other cabinets that have a slightly recessed area that’s great for tucking lighting into. That’s probably why they’ve improved this new system by giving it a slimmer profile and including cord covers.
I don’t have my receipts saved from this project, but the same set up with the new system would be about $75 ($90 if you include the remote). And you could cut the cost down to about $45 if you just did three lights and used this smaller transformer.
Here’s an updated photo taken this month of the switch we had installed that turns ours on easily. We probably only use these lights around 50% of the time, just because the ceiling light is pretty adequate for such a small room, but we still think they’re a great “nice to have” upgrade. Especially if you have an area that could use a little extra light.
So if you’ve been dying to add them somewhere or have just wondered how hard they are to install, hopefully this project illuminates (har-har) the fact that it’s not a very daunting or expensive task to take on. Any beginner can do this one for sure.
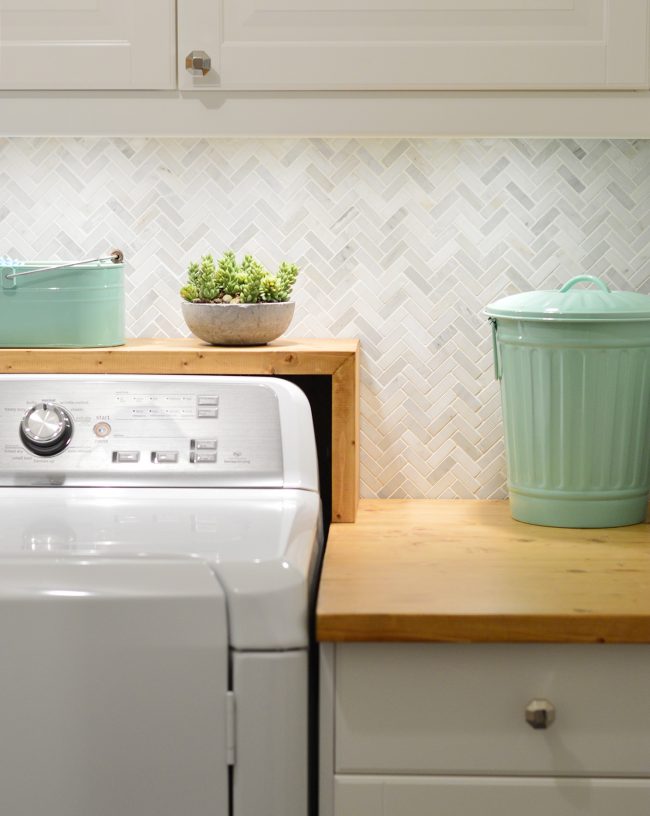
P.S. You can check out a summary of our entire laundry room makeover (including a full budget breakdown here). And if you’re looking for a source list (paint colors, where you can find the green tins, etc) that’s right here.
*This post contains affiliate links*
The post Installing Your Own Under-Cabinet Lighting appeared first on Young House Love.
Installing Your Own Under-Cabinet Lighting published first on www.younghouselove.com
No comments:
Post a Comment