Monday, December 31, 2018

10 best of the best IKEA hacks of 2018

Hey, hey. It’s the last day of the year and it’s time to wrap it up with the most important post of all … the most awesome, best IKEA hacks of 2018 on IKEAhackers.

Well, this year has been an interesting one. One that includes IKEA hacking itself. Though, not for the first time.

Truly gone are the days where we, IKEA hackers, lurked in the fringes. It’s fascinating to see how this obscure DIY trend has grown leaps and bounds in the last few years. Folks, we’re mainstream now. 😆

What holds for 2019? More IKEA hacks, of course.

But before we go there, let’s take a look at the best IKEA hacks of 2018 and give these hard-working, brilliant hackers a thumbs up.

10 best IKEA hacks of 2018 – The A-list

Presenting my top 10 favorite IKEA hacks of 2018, in no particular order.

#1 Jessica’s mudroom redo

10 best IKEA hacks of 2018 - Jessica's mudroom

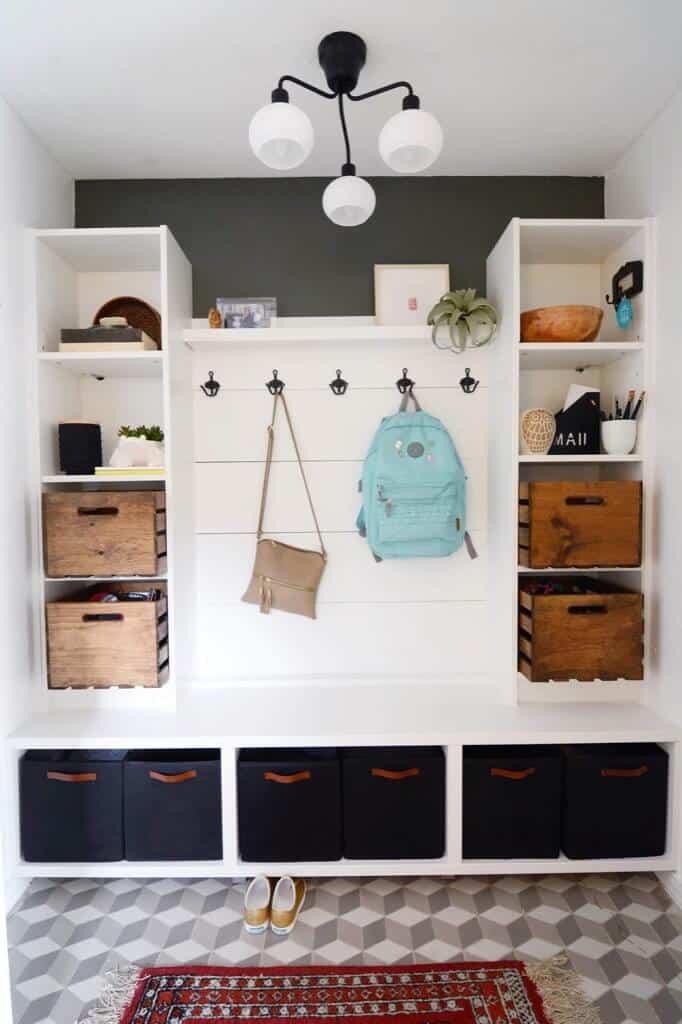
Jessica took an under-utilized closet, added some IKEA pieces (BESTÃ… and BILLY) for storage and made them into beautiful mudroom furniture for her home. Click here to see the wonderful transformation. You got to see it to believe it.

#2 Mat’s extra long dining bench with storage

10 best IKEA hacks of 2018 - Mat's dining bench

Dining benches with storage, especially ones that span entire wall lengths cost an arm and a leg. But Mat put this together for under $200. It looks amazing, fits the nook almost like a built-in (it’s not!), and offers plenty of storage under the seat. See Mat’s dining bench with storage.

#3 Tina’s something blue for her wedding

10 best IKEA hacks of 2018 - Tina's bridal bathroom helper

Tina was getting married and was worried about not being able to handle herself AND keep her mermaid gown clean when she’s in the bathroom. Some stuff like this bridal bathroom helper exists but was expensive. Her bridal bathroom helper hack costs $1.49 and took only 3 minutes. What’s best, it made life easier on her wedding day. So here is Tina’s bridal bathroom helper.

#4 Pauline’s tasteful IVAR built-in bookcase

10 best IKEA hacks of 2018 - Pauline's IVAR built in bookcase

If I didn’t tell you, you wouldn’t have guessed this floor to wall bookcase was made from the IKEA IVAR system. The system itself is typical IKEA bare bones but Pauline fleshed it out with trim, moulding and solid panels. You’ll hardly even notice the infamous IVAR holes. See more of Pauline’s elegant IVAR, reinvented as a full height built-in bookcase.

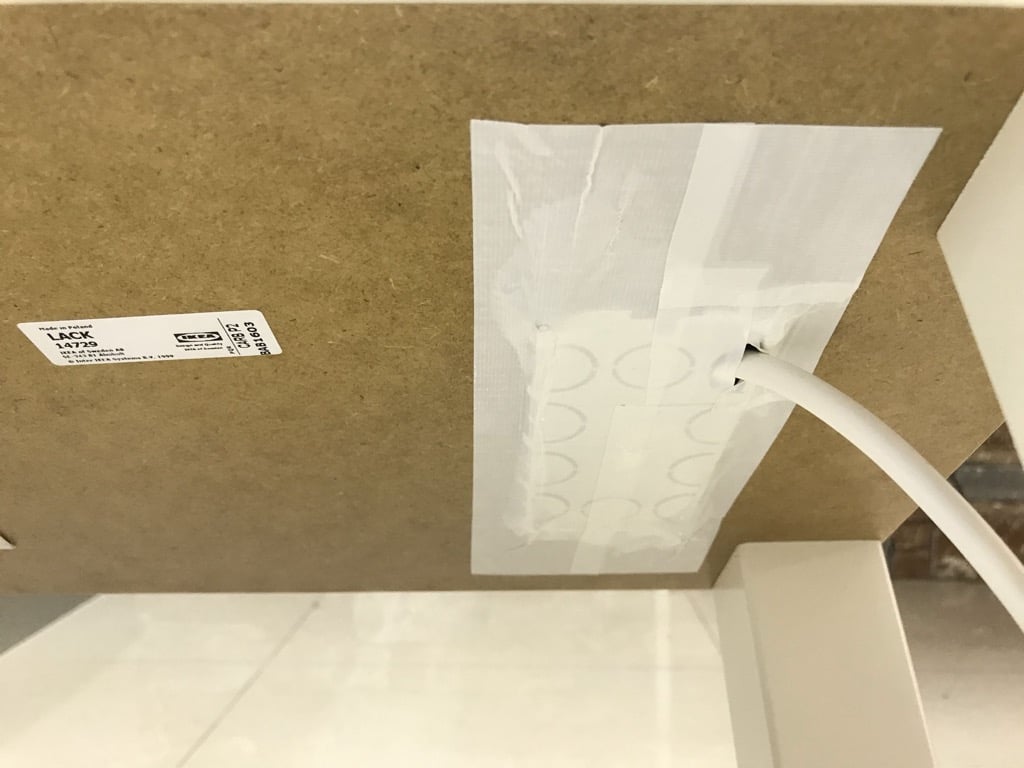
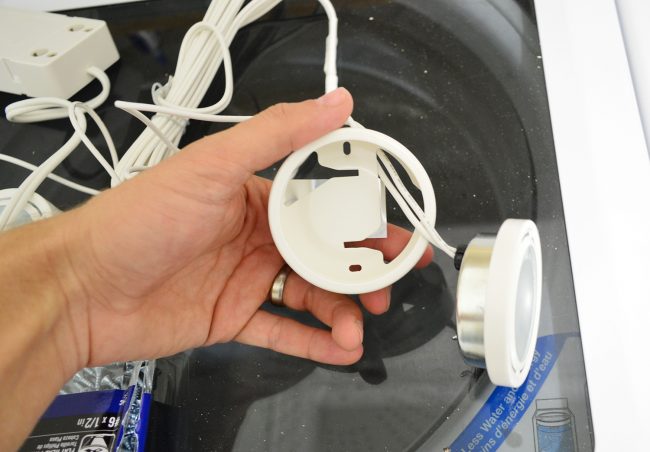
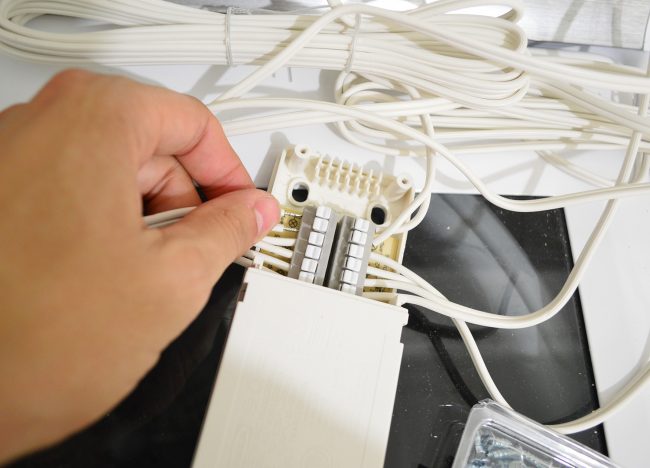
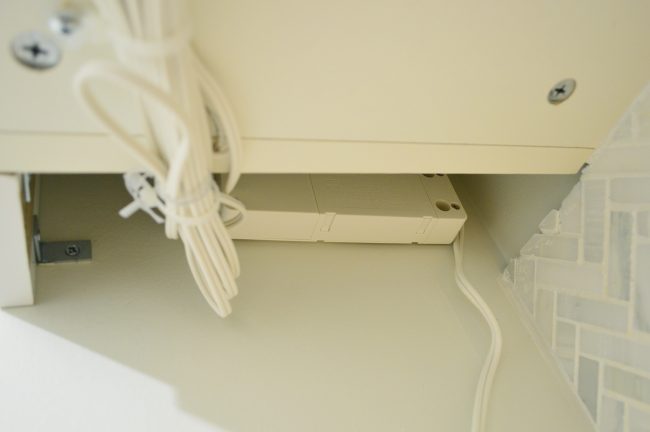
#5 Dylan’s hidden wireless charger

10 best IKEA hacks of 2018 - Dylan's hidden wireless charging pad

Dylan had this idea to embed wireless charging to his nightstand, which I think is brilliant. It keeps the surface clean of chargers and cables a.k.a. things we rather not see. Click to see Dylan’s wireless charging pad in action.

#6 Jeff’s KALLAX for the corner office

10 best IKEA hacks of 2018 - Jeff's home office furniture

Jeff received two KALLAX units for free and wondered whether he could make them unique. Plus, he needed storage in his office and the reconfigured KALLAX units fit perfectly. Take a look at Jeff’s KALLAX corner home office furniture.

#7 Ian’s cat resistant 3-seater POÄNG sofa

10 best IKEA hacks of 2018 - Ian's 3 seater POANG

Ian inherited a cat that shredded their furniture, apart from a 20-year-old IKEA POÄNG armchair. A few readers have attested to this astonishing fact. Ian was dismayed to find that no matching sofas were available in the POÄNG range. So he decided to give hacking a go and made a 3-seater POÄNG sofa.

#8 Cristina’s smart sewing table with a sliding tray

10 best IKEA hacks of 2018 - Cristina's smart sewing table

Cristina’s sewing table has a sliding tray that makes it so easy to store the sewing machine when she doesn’t need it. It’s definitely way easier to clear the table top for other aspects of sewing when you have a dedicated spot for the machine. See more of the smart sewing table.

#9 Courtney’s dog steps for small dogs

10 best IKEA hacks of 2018 - Courtney's DIY dog steps

After watching her puppy struggle up onto the couch, Courtney knew she needed a set of dog steps. The options online didn’t suit her decor so she made one from IKEA KNAGGLIG crates. And as you can see, the pup is beaming. See Courtney’s DIY dog steps.

#10 Game on with Adam’s expanding board game table

10 best IKEA hacks of 2018 - Adam's expanding board game table

What to do when you live in a small apartment but want to host board game nights without a space-hogging games table? This hack took around 2 hours total, and cost around $180. This expanding board game table provides flexibility in using the limited amount of space in the apartment. See the expanding board game table.

And that’s my list of favorites.

The 10 best IKEA hacks of 2018 on IKEAhackers. Which is your favorite?

Let us know in the comments below.

And now to look forward to more exciting hacks in 2019. See you over on the other side!

xoxo,

Jules

Want more? Take a look at the best IKEA hacks from previous years:

To see all posts on our annual best IKEA hacks list, please click here.

The post 10 best of the best IKEA hacks of 2018 appeared first on IKEA Hackers.


10 best of the best IKEA hacks of 2018 published first on www.ikeahackers.net

Monday, December 24, 2018

5 most popular IKEA hacks of 2018 and Merry Christmas

Hey there!

I’m taking a short hiatus from posting this holiday season to be with family and friends. It’ll do my soul good to hit pause on the daily schedule of posts, social media and all the “connectedness” required to keep IKEAhackers going.

So I’ll be absent for a few days. But before I take off, let me thank you for continuing to visit IKEAhackers, though I know there are so many new channels for IKEA hacks.

Your every visit, submission and comment, counts.

I appreciate all of it.

During this intermission, let’s revisit some of the most popular IKEA hacks of 2018. These are the most social-ed posts — most pins, most comments, most shared. Hope you like these fan favorites.

5 most popular IKEA hacks of 2018

#1 Kid’s art display box

kids art display box

This kids art display box allows Merav to save her kids’ paintings, show them, easily change the piece on display and, in general, give them the right attention. See the kids’ art display box.

#2 Bridal bathroom helper in an IKEA blue bagikea blue bag bathroom helper

Tina was getting married and was really worried about going to the bathroom and not being able to handle herself. Someone helping or watching her using the bathroom on her wedding day? Not being able to have free hands to use the toilet paper? Or even worse if her period decides to show? NO WAY! Some stuff like a bridal bathroom helper exists but are expensive just because it is wedding related. So she decides to hack a bridal bathroom helper. It costs about 0.80 euro and she did it the day before the wedding. What she likes best is it’s almost free and make her life easier on her wedding day. So here’s the bridal bathroom helper hack.

#3 The FADO Moon lamp

moon lamp

This was really an unexpected one. I didn’t realize so many people loved having a moon lamp. When it was posted, it quickly rose to become one of the most pinned images on our IKEA hacks board. This one is made out of the IKEA FADO lamp, which sells for $24.99. After a lot of delicate painting, voilà, I give you the moon. See the moon lamp hack.

#4 TROFAST children’s storage and seat

Jennifer needed storage for their new family room which serves as both playroom and home office. But she didn’t want to go down the bright IKEA colors route which really wouldn’t go with her current color scheme! So she made the TROFAST storage units and seat to match her color scheme. See the tutorial.

#5 Smart sewing table with sliding tray for sewing machine

sewing table with sliding tray

This is Cristina’s sewing table project. It’s smart because it has a sliding tray that makes it easy to store the sewing machine when she doesn’t need it. Makes it super easy to store and access the sewing machine. See the hack.

These are the 5 most popular IKEA hacks of 2018. Which is your favorite? Let us know in the comments below.

And before I sign off, here’s wishing you a very Merry Christmas and a Happy New Year.

I’ll be back in no time.

Jules

The post 5 most popular IKEA hacks of 2018 and Merry Christmas appeared first on IKEA Hackers.


5 most popular IKEA hacks of 2018 and Merry Christmas published first on www.ikeahackers.net

Friday, December 21, 2018

Probably the most beautiful IKEA farmhouse kitchen

I did not find my dream kitchen so I need to DIY it. The result is a modern farmhouse kitchen that does not look like a regular IKEA kitchen with many features being installed.

The building process was very time-consuming and installing all of the items have taken some weeks.

Since IKEA Kitchens have fair pricing the cost for the kitchen is still reasonable. The most expensive additional things are the kitchen electricals including the LED-Lighting, the stucco mouldings and the solid worktop.

IKEA items, material and tools:
  • IKEA METOD cabinets, drawers and doors
  • BODBYN fronts
  • Hob
  • Integrated fridge
  • Dish-washer and other smaller IKEA items.
  • 40 mm solid worktops
  • LED Strips and LED Drivers
  • Tons of stuff for the kitchen electricals
  • Stucco mouldings
  • Putty and more
  • You need proper tools like an electric drill (or two), laser, spirit level, jigsaw, soldering iron, spacers and others.

The hack is too enormous to list all steps. So, I created a website where the steps are shown in detail. You can follow the building process from the beginning to the end.

The IKEA farmhouse sink Domsjö. Installation is quite simple.

The IKEA farmhouse sink Domsjö. Installation is quite simple.

Installing an IKEA farmhouse kitchen

Basically, the steps are as follows. Click on the links to read more:

I like the tiled splashback the most, especially when it is set in the scene with the right lighting.

Beautiful IKEA farmhouse kitchen

Besides that, I love the lighting of the base of the kitchen cabinets. The base lighting makes the kitchen look like it’s floating.

Beautiful IKEA farmhouse kitchen

Beautiful IKEA farmhouse kitchen

Full details of the kitchen project are here.

Watch a video of the IKEA Farmhouse Kitchen build process.

~ by Benjamin

While you’re here, check out my other hack (pic below): A BILLY Library like no other.

Billy library

The post Probably the most beautiful IKEA farmhouse kitchen appeared first on IKEA Hackers.


Probably the most beautiful IKEA farmhouse kitchen published first on www.ikeahackers.net

Thursday, December 20, 2018

Multi-device charging station built into an IKEA bench

We made a multi-device charging station dock for our laptop and tablet.

For our project, we used the very inexpensive IKEA LACK TV bench, which costs only $15.99.

It was also our object of choice because:

You can cut holes into it.

Easily.

The docking station tucks neatly away beside our sofa and is easily accessible.

IKEA items used:
LACK TV bench

LACK TV bench | IKEA.com

Materials and tools:
  • Electrical socket outlet (I used the “Gewiss Chorus” Flush Socket Outlet)
  • Electrical cable
  • Drill
  • Electric saw
  • Plastic wall corner guards/protectors
  • Glue
  • Foam or another soft sheet material

Hack instructions for DIY multi-device charging station:

Outline the slots for the socket outlet, and for the electronic devices (Tablet/Laptop).

DIY multi-device charging station - IKEA hack

Drill a hole in each of the corners of the outlined slots (these holes will be used as an entry point for the electric saw).

DIY multi-device charging station - IKEA hack

Cut out the outlined slots using the electric saw.

Wire the electrical cable to the socket outlet.

DIY multi-device charging station - IKEA hack

DIY multi-device charging station - IKEA hack

Cover the rough sides of the cut-out slots using the plastic corner guards; Cut out a frame (similar to the shape of a picture frame) from the plastic corner guards; Use glue to attach them to the TV bench.

Measure the height of your electric devices, allow the shortest device to extend about 6-8cm (3 inches) from the top of the table.

Remove the bottom shelf of the TV bench; measure and mark the new height and reinstall the shelf.

DIY multi-device charging station - IKEA hack

Cover the shelf using the foam (the electric devices will rest on this foam).

Multi-device charging station done!

DIY multi-device charging station - IKEA hack

DIY multi-device charging station - IKEA hack

The station is not visible from the main areas of our living room.

DIY multi-device charging station - IKEA hack

Quietly filling up our devices with juice in the corner.

DIY multi-device charging station - IKEA hack

DIY multi-device charging station - IKEA hack

More info:

If you have access to a 3d printer – then you should print the cover frame for the slots – this will save you tons of time cutting them accurately from plastic corner guards.

DIY multi-device charging station - IKEA hack

Since this project involves electricity, please make sure you know what you are doing; if in doubt – use a professional to wire the outlet socket.

~ by Alon

The post Multi-device charging station built into an IKEA bench appeared first on IKEA Hackers.


Multi-device charging station built into an IKEA bench published first on www.ikeahackers.net

Wednesday, December 19, 2018

Installing Your Own Under-Cabinet Lighting

We’ve done so few upper cabinets in our recent kitchens that we actually haven’t installed under cabinet lighting in ANY of them. But we did install it under the cabinets in our laundry room and – surprise! – I just came across a bunch of pictures of the installation process that I took waaaaaay back in 2014 but never shared. It’s a remarkably straightforward process, so it could be an easy upgrade if you needed more task lighting in your kitchen, laundry room, or any other space with upper cabinets.

The cabinets in here are from Ikea, so we also used one of their stock under-cabinet lighting options called GRUNDTAL Spotlights. These don’t appear to be sold anymore, but the current OMLOPP spotlight seems to be a similar (even improved!) version. The OMLOPP ones are now LED and are lower profile, plus some cord management covers are included, which is nice. Based on the downloadable instruction sheet, the new ones install almost exactly the same way, so the same basic steps I’m about to outline for you here still apply.

Most people do one spotlight per cabinet but we wanted to give the appearance of one continuous bar of light, rather than distinct spotlights under each cabinet, so we decided to do more. The GRUNDTALs were sold as 3 packs, so we did 6, but 4 or 5 probably would’ve done the job just fine.

The first step, once everything is unpackaged, is to pop the actual lightbulb portion of each spotlight out of its casing, leaving the wiring in place.

This exposes the holes that you’re supposed to screw through to secure the light to the underside of your cabinet. Just be sure to measure and mark your placement before you start doing this. We centered each spotlight front-to-back on the cabinet and spaced them equally apart side-to-side (around 10″ away from the next one). We secured ours using 1/2″ screws so that they wouldn’t poke through the inside of the cabinet. Then the light just snaps back into place.

Once all of your spotlights are secured, you need to connect everything to the transformer box. This is sold separately from the new OMLOPP spotlights, as is the power cord. I know that sounds kinda crazy, but they sell things a la carte like that because the number of transformers and power cords you need depends on how many spotlights you’re installing (you can add up to 9 spotlights per box, and up to 10 boxes per power cord). The photo below is how I wired my spotlights to the transformer box, but the new stuff is even easier – it’s basically like plugging in a phone charger.

At this point your installation may look something like this. The cord situation is not very pretty, but before dealing with that it’s always a good idea to check that all of your connections work.

The transformer just plugs into any regular outlet and it has a toggle switch on the cord, so you can get everything powered up without the help of an electrician. So it was super easy to get ours working within minutes.

The newer spotlights come with some cord covers to help hide the wires against the bottom of the cabinet, but you still might have to get creative with all the extra wire between the cabinet and the transformer. I picked up a variety of cord management options from the store and the most helpful items ended up being these mounting ties (basically a zip tie with a screw hole) and some wire staples (you may need to swap in different nails or screws if the provided ones are long enough to poke through your cabinet bottom).

Yours probably won’t look quite this messy with the newer system, but you can see what I did with ours. I wrapped up most of the excess wire in a zip tie (screwed in place) and then kept everything else tight to bottom with the wire staples.

You see zero of this chaos thanks to a cover piece that you add later. You’d pretty much have to lean over the washer and dryer and put your head under the cabinet to get a good look at it once it’s boxed in with that cover piece, but I’ll get to that in a minute.

Back to the whole “wire management” thing. You also have to find a place to hide your transformer box. Ours got mounted behind a gap on the side of one cabinet that’s hidden with a filler piece in front of it (the transformer box comes with holes for mounting it with screws). That placement also allowed the power cord to hug the corner as it snakes down to the outlet.

A couple of years after our initial installation we had an electrician hardwire the power cord to a switch on the wall, and that makes it even easier to flip on and off. But when there was a wire tucked along that left corner, it wasn’t really that bad. You can hardly see it in this photo:

One more word about the transformer box: I actually think a more popular location for that is ON TOP of your cabinets, but you may need to install an outlet up there. Ikea sells a remote so you can turn everything on and off without needing to have access to the power cord switch. Pretty smart.

The last thing we did was to install that cover strip I mentioned across the bottom of the cabinetry to hide the lights and their wiring. It’s just a spare filler piece that Ikea sells, mounted in place using small L-brackets and caulked at the seams.

We don’t really mind the cover piece on the bottom, but I do feel like it’s one shortcoming of the Ikea system. Their cabinets are totally flat on the bottom, as opposed to lots of other cabinets that have a slightly recessed area that’s great for tucking lighting into. That’s probably why they’ve improved this new system by giving it a slimmer profile and including cord covers.

I don’t have my receipts saved from this project, but the same set up with the new system would be about $75 ($90 if you include the remote). And you could cut the cost down to about $45 if you just did three lights and used this smaller transformer.

Here’s an updated photo taken this month of the switch we had installed that turns ours on easily. We probably only use these lights around 50% of the time, just because the ceiling light is pretty adequate for such a small room, but we still think they’re a great “nice to have” upgrade. Especially if you have an area that could use a little extra light.

So if you’ve been dying to add them somewhere or have just wondered how hard they are to install, hopefully this project illuminates (har-har) the fact that it’s not a very daunting or expensive task to take on. Any beginner can do this one for sure.

P.S. You can check out a summary of our entire laundry room makeover (including a full budget breakdown here). And if you’re looking for a source list (paint colors, where you can find the green tins, etc) that’s right here

*This post contains affiliate links*

The post Installing Your Own Under-Cabinet Lighting appeared first on Young House Love.


Installing Your Own Under-Cabinet Lighting published first on www.younghouselove.com

Hackers Help: Make IKEA dresser into laundry hamper cabinet?

I have this IKEA HEMNES 8-drawer dresser.

IKEA HEMNES 8-drawer dresser

HEMNES 8-drawer dresser | IKEA.com

And due to downsizing to a house with 1,000 less square feet, a much smaller master bedroom and no walk-in closet, our laundry game is out of control.

I’m wondering if there is a way to convert this dresser to a laundry sorter.

One thought I had was to use the KOMPLEMENT pull out laundry sorter, but I’m not quite sure how to go about that. I’d be grateful for any ideas!

KOMPLEMENT pull-out storage bag | IKEA.com

KOMPLEMENT pull-out storage bag | IKEA.com

Thanks,

~ by Meghan

***

Hi Meghan

A new house will always present new challenges, but take heart, you’ll adapt as you get used to the new space. Soon, you’ll find ingenious ways to maximize your square footage. And as they say, necessity is the mother of invention and we’re happy you’re considering IKEA hacking your HEMNES.

#1 Hidden laundry hamper cabinet

I’ve seen a smart conversion of the MALM dresser into a hidden laundry hamper cabinet.

laundry basket in ikea malm dresser

Close the lid and no one would guess it hides dirty laundry.

laundry basket in malm dresserThe key is to join the drawers together to form a box. I figure the same hack can be applied to the 2 wide drawers on one or both sides.

Check out the post here for information on the disguised MALM laundry basket hack. A more detailed step-by-step instruction for the disguised clothes hamper hack is published in the IKEAhackers book.

#2 Pull out laundry hamper cabinet

Another way to skin the HEMNES into a laundry hamper cabinet is to create a taller drawer front for the bottom drawer.

Like so:

Source: Amazon

The front should be large enough to span both drawer spaces. Attach the front to the bottom drawer and place laundry baskets in the bottom drawer. Pull out to use the laundry hamper. You could reuse the HEMNES drawer fronts to create a seamless look.

#3 Hanging pull out laundry basket

This is another way to hack it is to get rid of the drawers entirely. Use drawer runners and a wood frame to hold up the laundry basket and drawer front. In this case, you may be able to use the KOMPLEMENT pull-out laundry sorter. Do check whether the size fits.

Source: Amazon

It works but I don’t think it is as secure as the former, especially when the load gets heavy.

Hope you get some ideas to sort out your laundry game.

Good luck and let us know how it goes.

Happy hacking,

Jules

The post Hackers Help: Make IKEA dresser into laundry hamper cabinet? appeared first on IKEA Hackers.


Hackers Help: Make IKEA dresser into laundry hamper cabinet? published first on www.ikeahackers.net