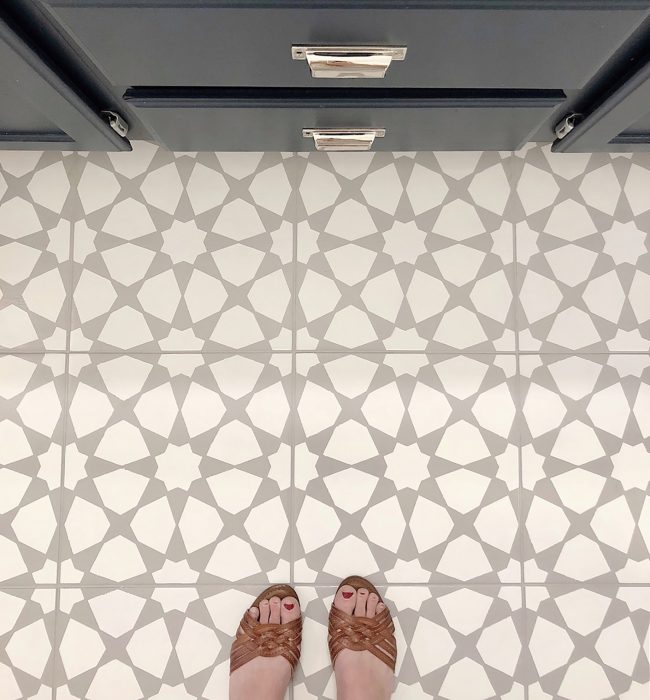
I hear everyone who’s asking for our annual Black Friday deals post and I’m putting it together as we speak! But in the meantime, you guys have to see this awesome tile transformation that a reader named Angela sent over. She not only COMPLETELY transformed her old blotchy beige bathroom floor, but it was super wallet-friendly (UNDER $75! HOLLA!), and it has already held up for well over half a year without any issues. In a wet bathroom that gets everyday use, no less!

I know this is probably going to be hard to believe, but that beautiful bathroom above used to look like this. Again, she did not put down new tile – she just painted it!
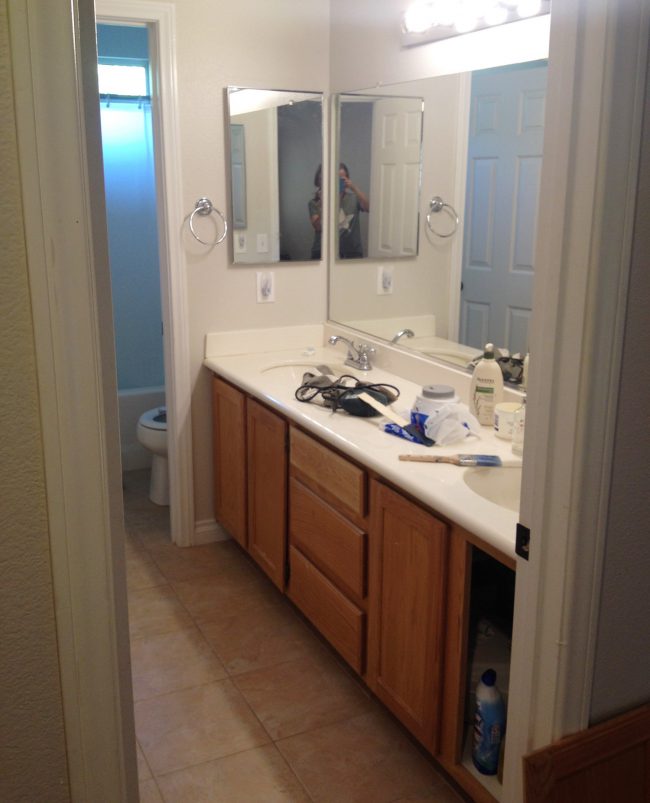
Even I was a little skeptical of the idea (painting a tile floor?! in a bathroom?!!) but Angela reports that it still looks mint after seven months of shower-dripping, toothpaste-splattering, and all that good stuff. So if you’ve got some tile you’re not crazy about, but a full-blown gut job isn’t in the cards right now, this could be a great solution to tide you over for a while.
So here’s how Angela got it done:
Ordering The Stencil
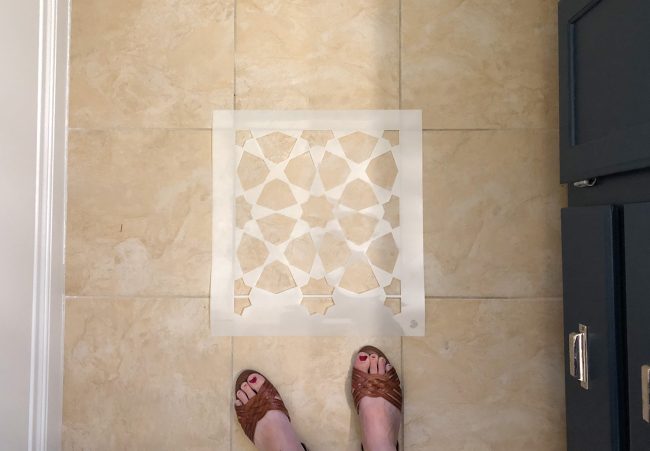
First, she measured her tile size exactly, within 1/16th of an inch (erring slightly on the smaller side so the stencil wouldn’t bleed into the grout lines), and found this stencil on Etsy and special-requested that the seller make her stencil exactly that size.
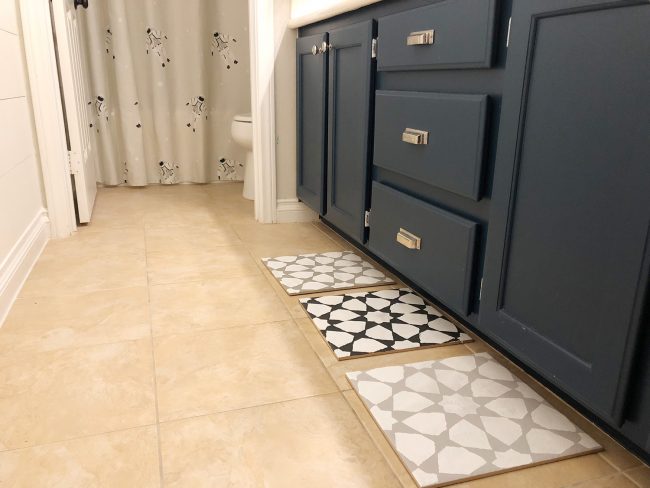
In order to visualize what color combo she’d like best for her stencil, she tested out a few different ones on spare tiles and laid them on the bathroom floor (you could also do this with cardboard if you don’t have spare tiles around).
Prepping The Floor
Ok, so Angela warned me that this part isn’t fun, but don’t skip it!
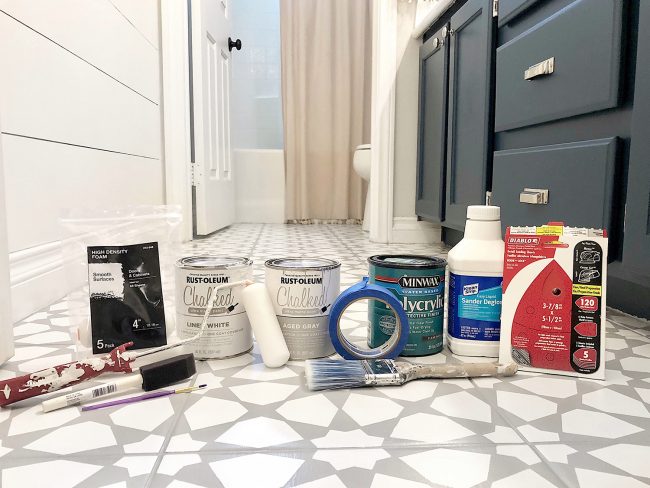
Floor preparation is super important in order for the paint to stick. First she thoroughly cleaned the bathroom floor, then she sanded the floor with 120 grit sandpaper to take off the sheen and rough it up a bit (here’s our favorite palm sander for jobs like this), and then she wiped it all down with a liquid deglosser (like this one). She was sure to remove all dust and debris so it was perfectly clean.
To help keep the floor clean throughout the process, she even had a pair of clean socks that she would ONLY put on when she went into the bathroom so she wouldn’t track in dirt and crumbs. She even used a blow dryer like a mini leaf blower and blew out the remaining dusty stuff after sweeping AND she put caution tape across the doorway to block it off from any adorable little children who might accidentally wander in. YOU KNOW I LOVE HOW THOROUGH ANGELA IS ;)
Lastly, she took blue painters tape and taped off the base of the cabinet, walls, toilet, and tub – so she didn’t have to worry about getting paint on those items when she was stenciling
Painting The Floor
She started by painting her floor the base color, using some leftover Rustoleum Chalk Paint in Aged Gray. Angela made sure to start at the furthest point from the doorway (you don’t want to trap yourself in!) and used a high-quality paint brush (so it wouldn’t shed bristles as she went). She painted all the grout lines around each tile first and then filled in the tile with the brush. Her entire floor only needed one coat, but you can do up to three coats if needed.
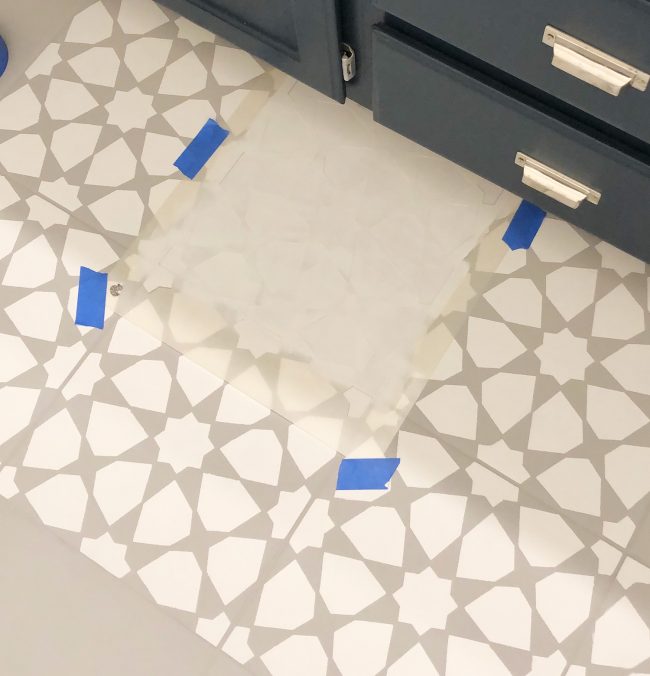
After the base color dried, she again started at the furthest point from the door, taping down her stencil with painter’s tape over each tile and using a high-quality foam roller to roll on super thin coats. Thin is the operative word, here! A thick application will bleed under the stencil, whereas thin coats make for much crisper lines – so you may want to even grab a paper towel and roll any excess paint off the roller. She applied two coats of Rustoleum Chalked Paint in White Linen for the stenciled parts.

Move the stencil to different tiles making sure to not overlap with any wet parts. In between coats she also used a blow dryer on the cool setting to speed up the drying process (she said in hindsight that purchasing two stencils so she could switch back and forth as one was drying would have sped up the process).
Once she completed all the full square tiles, Angela moved on to the edges. She had to get a little creative and find various awkward body positions that worked to reach those spots (I remember this fondly from this project of yore). You’ll want to bend the stencil up against walls to fill in any edges. Angela also used painters tape in places where she couldn’t fit the stencil (taping off a little triangle or sliver that needed to be painted to make the pattern look complete).
Finally, she took a small paint brush and touched up all the edges and places where it didn’t look perfect. This part isn’t difficult, but it takes patience. Angela also mentioned that she was glad she thoroughly cleaned her toilet before embarking on this project because she was so up close and personal with it. Ha!
SEALING THE FLOOR
Here’s the easy part: sealing the floor. Angela used some Minwax Polycrylic in satin that she already had on hand (note: water-based sealers like this won’t yellow like something oil-based, which is important if you’re doing a lighter colored stencil). Using a high-quality brush she brushed on four coats of Polycrylic (with two hours of drying time for each one, and a light sanding between each coat).

And that was it! An awesome $75 solution for her bathroom and an affordable way to get that cement tile look without a full bathroom gut job. Angela has been so happy with how it has held up so far. She’s not sure it’s a permanent fix, but it’s been such a great way to live with tile that you don’t love until you can replace it. And she thinks that adding a coat of Polycrylic every year could help maintain the floor and keep it nicely protected.
One thing to note is that Angela knew this was for a bathroom, and not a main area in her house that got a ton of foot traffic. So another step she could have added was to prime her floors with this Zinsser Primer. She also could have used Porch & Patio Floor Paint, but she had chalk paint on hand and wanted a low fume option since she didn’t have much ventilation and was working around her kids’ bedrooms.
So thanks so much to Angela for sharing her project! I love following her on Instagram, so you can see what she’s up to right here. And feel free to drop back in on the blog this Friday when I share the best Black Friday deals I can find on furniture, accessories, and all that other fun house stuff. The sales are already starting and I don’t want to jinx anything, but they’re looking GOOOOOD.
PS: If you want to see another floor stenciling project, we stenciled our closet & bathroom’s basic old subfloor after ripping up the carpet. That lasted for FIVE WHOLE YEARS and still looked pristine except for one small seam in the subfloor that rubbed when we walked on it.
*This post contains affiliates*
The post How To Paint A Bathroom Floor To Look Like Cement Tile (For Under $75)! appeared first on Young House Love.
How To Paint A Bathroom Floor To Look Like Cement Tile (For Under $75)! published first on www.younghouselove.com
No comments:
Post a Comment