Some say gallery walls are trending out in favor of larger scale art. Maybe. It makes sense that gallery walls on every wall (especially the ones with a ton of tiny frames) might feel a little less “new and fresh” these days. But I’d argue that a collection of frames hung together on the wall feels pretty classic if you stop and think about it. Watch Home Alone. They totally have a gallery wall going up their formal staircase in the foyer where Kevin sleds and hurls paint cans. But one spot I love for a gallery wall these days is actually around a TV. Why? Well, that big black box isn’t exactly gorgeous.
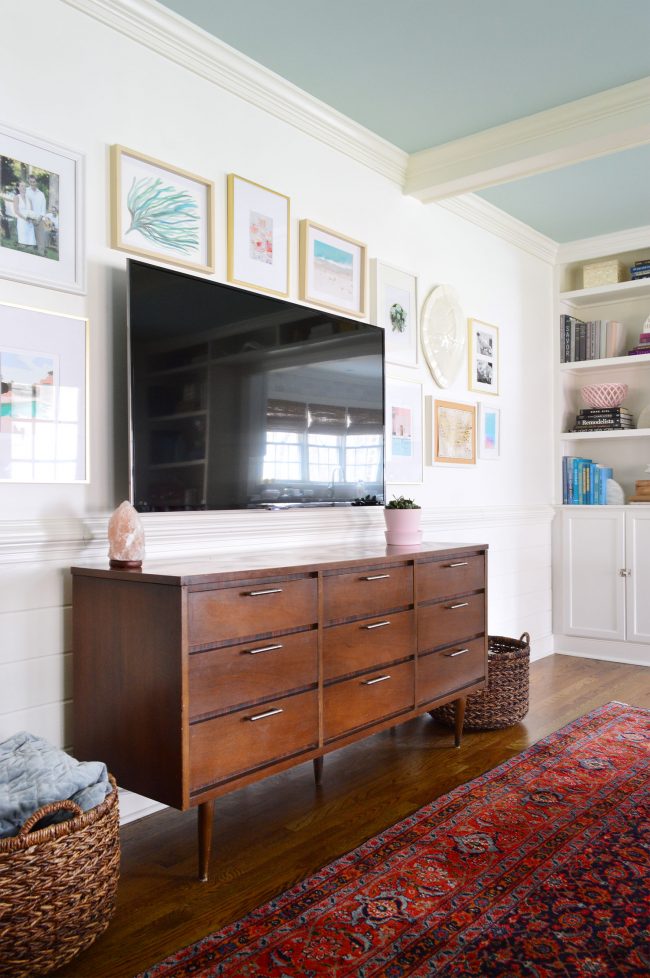
It’s often this hulking dark thing on an otherwise bare wall, so why not break things up and add a few other rectangular things to deemphasize it. It’s not like the TV disappears when you add a gallery – but at least you have a few other (prettier) spots to rest your eyes. And you can always turn on Planet Earth, since that makes any TV look like art in a nanosecond.
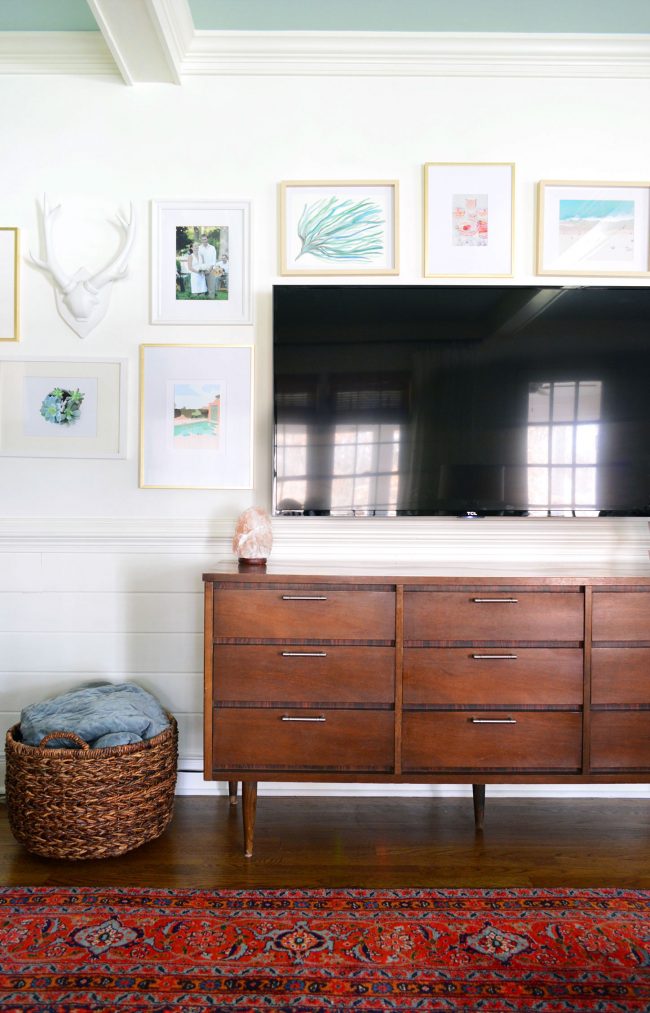
We first blogged about adding a frame gallery around our living room television, oh, FOUR AND A HALF YEARS AGO (evidence: here – also how funny is the “What Does the Fox Say?” reference – ah, 2013). Things have evolved A LOT in that room since then (hello paint!) and the gallery got a few tweaks (some new art there, some frame switches there) but it has pretty much stood the test of time. And since I get a bunch of questions every time we show a smidge of it on social media, this post is for everyone asking about framing arrangements, what to frame, how to hang them, and where we get our art. So let’s dive in, Planet Earth Style. I’ll be the whale if you’re that big school of tiny reflective fish.
Dealing With The TV
First, if you listened to last week’s podcast you heard that we got a new TV (the old and very faithful one now lives at the beach house, reunited with our old couch and it feels so good). We also decided to mount our new TV on the wall and used one of those in-wall power cord systems to hide the wire. That whole process only takes an hour or so and is SO WORTH IT. We’ve got an entire post dedicated to creating a cord-free TV wall if you’re interested in a step-by-step tutorial on that. That post also shows you how to hide a cable box if you have one. And if you’re looking to cut the cord, here’s how we did that.
But it’s not absolutely necessary to mount your TV to create a good-looking frame gallery around it. As you can see in the old photo below, we had ours resting on the media cabinet for years. But mounting it has definitely made the room feel more spacious and less cluttered. Also, we are BIG FANS of secondhand dressers as TV cabinets – this one is from a thrift store and we have a similar one in our bonus room from Craigslist.
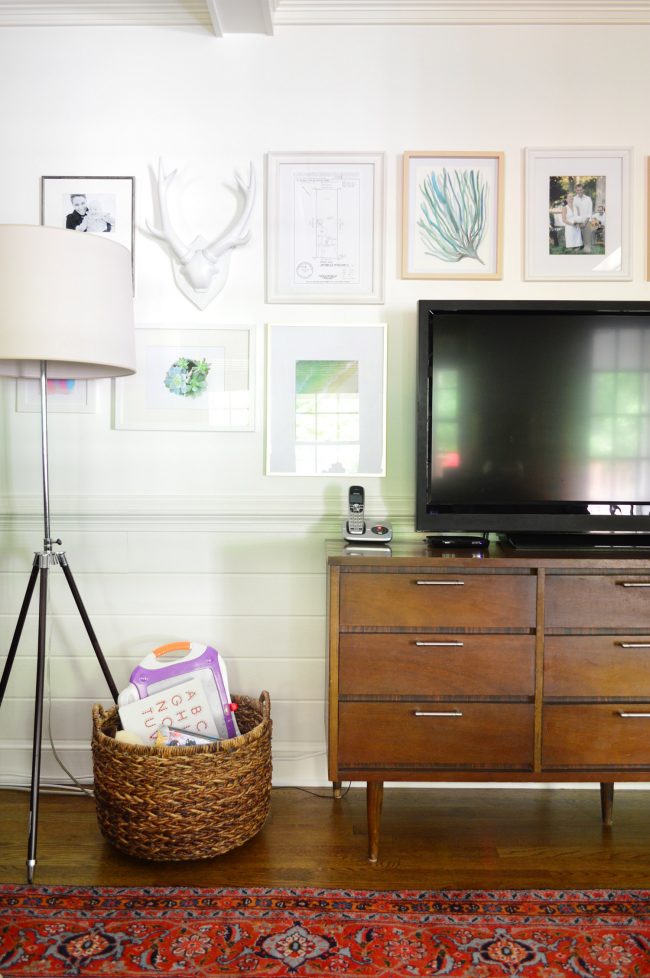
Getting Your Frame Arrangement Right
Ok, now onto actually hanging your frames around the TV. There are a few methods you can use…
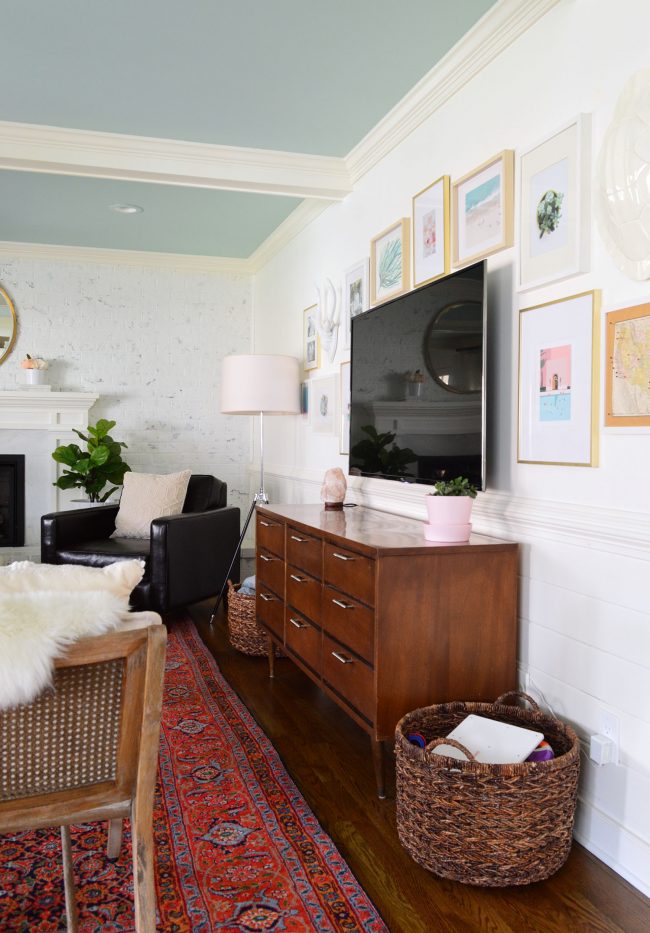
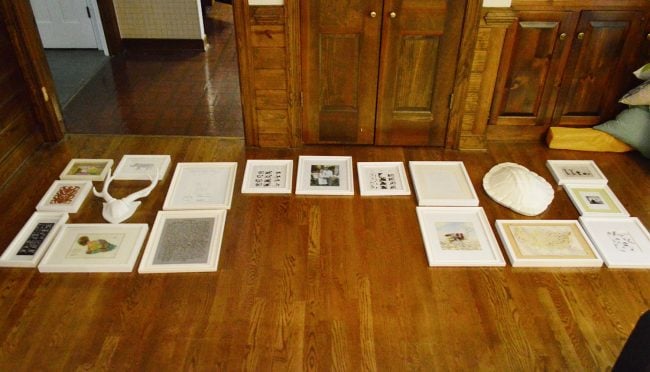
1. The Floor Method
Grab whatever frames you have on hand and want to use (or pick up new ones that you love) and lay them out on the floor, with a gap on the floor in the shape of your TV (measure it to get the correct amount of space). Then just move them around on the floor to see what layout you like. That’s how we created this very frame wall in our original post… back when our living room was overwhelmingly, mind-numbingly brown.
2. The Paper Method
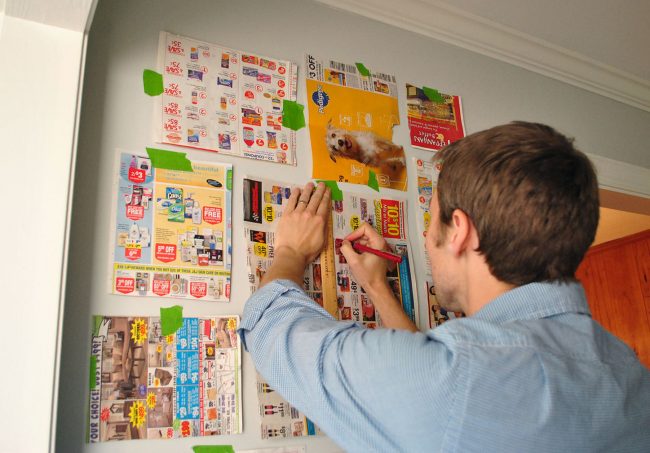
This one is really easy too, and if you are worried you won’t like things once they’re up on the wall, it’s the one to try. Because it helps you visualize things right on the wall before you actually hang the frames. How? Use newspaper, brown paper bags, or even printer paper (taped together if you need to make a larger piece of paper) and cut them to the size of each frame you want to hang. Then you just tape them up on the wall using masking or painter’s tape, and move them around until you like the arrangement and are ready to put the actual frames up in place of the paper templates. You can see that method in use here in our last house where we created a frame gallery in the hallway. Less busy paper would be easier on the ol’ eyeballs, but you get the idea.
3. The Sheet Method
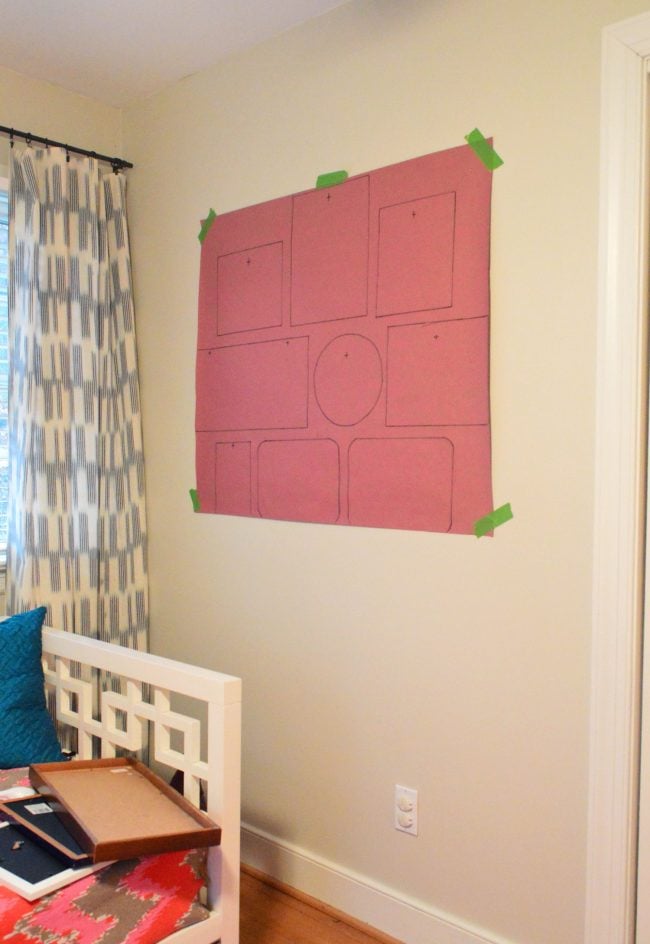
This is kind of a combo move of the two above. SHAROOOKEN! You arrange your frames on the floor, but on top of a large sheet of paper (like brown craft paper, red rosin paper, or even wrapping paper if that’s all you have). Once you reach the arrangement you like, trace each frame onto the paper – even marking the spot where each one hangs on the back – creating an oversized template that you can transfer right onto your wall. It’s best on small to medium sized frame groupings (like this one we hung in our last house) because you’re somewhat limited by the size of your paper roll, but this would totally work on either side of the TV (you’d make two in that case).
4. The Figure-It-Out-As-You-Go Method
You also can be a rebel and JUST HANG STUFF ON THE WALLS! I wouldn’t recommend going totally rogue and just making holes willy-nilly (although I’ve done that and spackling takes like three minutes so it’s not the biggest deal if you end up there). But if you break things down into sections it’ll help you stay on track. For example: start by getting the centering and spacing of the frames above your TV to your liking first. Then that’ll help guide the height and spacing of the frames to the left of the TV. Once those are set, you can match them on the right side.
How To Tie Frame Groupings Together
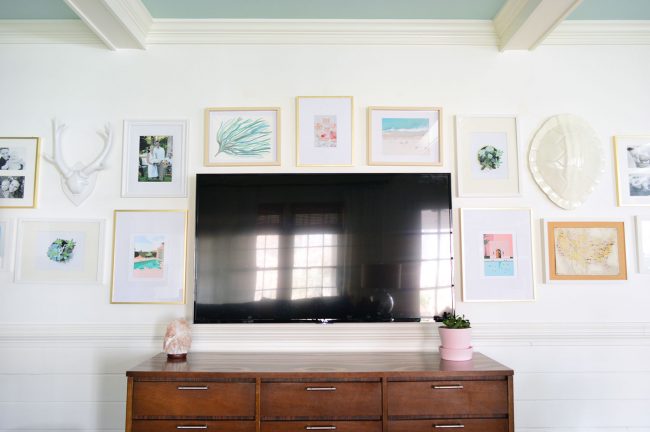
“Should I use all the same frames?” “Is there’s some sort of formula for mixing them?” “Should all of the art be black & white or all the same type of thing (all sketches, all photos, all paintings?)” Questions like this abound. So I’ll try to explain what works for us and why we typically end up there – although this is definitely one of those “we’ve seen it done so many different ways, there are probably a million ways to skin this cat” kind of things. Personally, we started with all white frames in here, and I slowly found myself craving a little more variety, so over time if I found nice light wood frames (like the two over the TV) or some pretty thin gold ones (like the five of those you see below) I slowly brought those in to mix things up.
But despite having different frames up there, these are three factors that help tie the arrangement together:
- Mats! See how most of the frames above have white mats? That ties them together and helps your eye take them all in as one big “family”
- Color palette! It might not be what you notice right away, but a lot of the art has similar tones – there’s a lot of green, blue, and pink. And again lots of white in the art and the mats too. Even the objects on the wall (the antlers and the faux turtle shell) are white, so nothing is too jarring and it all looks related, yet not super cloned and repetitive.
- Spacing! A lot of times this is the thing that makes a wall feel off. If the frames are hung too far apart, they read more like a smattering of islands, too far away from each other to be viewed as a grouping. The ideal spacing for me is usually 2-3″ (any closer and they can feel clumped and crowded). Also remember to treat the TV like just another frame and try to mimic the same spacing around it. This can be tricky because the TV sits off the wall a bit and that depth can change the spacing depending on your vantage point. I try to step back and view things from the couch across the room, since that’s where everyone will be viewing it most frequently.
What Should I Frame?
Since our arrangement is a mix of frame types and sizes, we wanted the items that we framed to be a bit of a mix as well. Had this been a more gridded frame gallery using identical frames – like this one we did above the couch in our last house or down our old hallway – we probably would’ve kept the art more consistent too. But to give you a sense of the random mix we’ve hung here, I added some numbers to the next two photos so you can see we have up there, where we got things, and why we love ’em.
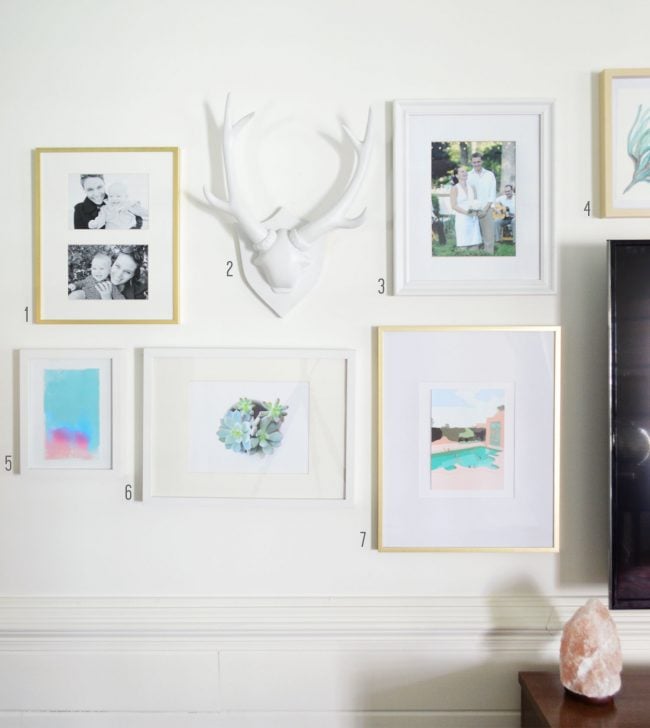
- 1. Family photos (one of me with our daughter and a similar shot with our son around the same age – the mat didn’t come with that frame, it came from another frame and I switched it out)
- 2. White faux antlers (these were black and I painted them white years ago, but now they sell them in white all the time – here are some similar ones and this set of three is awesome too)
- 3. Another family photo (this is one of our favorite wedding pics because it looks like we’re standing in a bush)
- 4. A little algae/anemone thing I painted (this one is cut off, as is the middle one above the TV, but you can see it if you scroll up to the photo before it. I just wanted something in those colors and did it quickly to throw it up “just for now” and it has been there for years – ha!)
- 5. A postcard from a local art exhibit (I loved the colors and the artist, so why not frame the postcard?!)
- 6. Photo of a succulent (this is a photo we took while shooting our second book – love the soothing colors and all that white space – here’s a link to it in our Society6 shop)
- 7. Original painting (this is one of my favorite Etsy artists who sells tiny original paintings & prints and I LOVE THEM!)
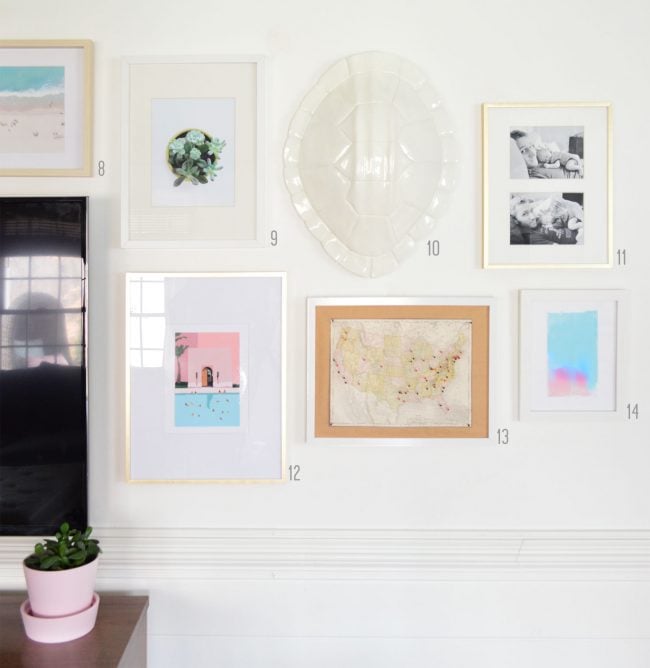
- 8. A book page (yup, this is from one of my favorite photography books by Gray Malin, who shoots beaches from above)
- 9. Another succulent photo we took and got printed (here’s the link to it on our Society6 shop)
- 10. A faux turtle shell by Nate Berkus for Target (this was from his very first collection there, memories) – here’s something similar
- 11. More family photos (on this side it’s John with our daughter and our son in basically the same exact pose – I switched a mat from a different frame into this one)
- 12. Another original painting (from the same woman on Etsy who did the one on the other side – so in love with her stuff)
- 13. Map with pins where we’ve gone (got the map on eBay, took out the glass of the frame and backed it with cork so the pins would stick) – here are some similar maps
- 14. Another postcard (from the very same art exhibit – gives the wall balance and it’s more of those blue/pink tones that reoccur, so it ties things together)
I talked more about my process for finding frameable “art” recently on Instagram too (on one of our trips to the beach house) so check out the video below for more examples of how we fill our frames without breaking the bank:
Also! Frame PSA! The gold frames you saw in that video are my very favorite, and they don’t hail from a fancy and expensive frame store – they’re from Target! They come with the mats, are extremely pretty, and come in a bunch of sizes (I have all three of these sizes all over our house and the beach house). And the artist from Etsy that I shouted out in that last video is Emily Jeffords, who recently got picked up by Minted! Love her stuff so much.
As for how we hang them, here’s a quick video that I made for InstaStories a little while ago (sometimes videos help more than a static pic):
So there it is, a full succulent-riddled detail-riddled rundown of our TV frame wall. If you’re still feeling like you don’t know where to start or how to approach this, my loving encouragement would be: JUST START! You can see from the video above that holes in the walls behind frames don’t even get seen! So if you hang something too low and have to move it up, it IS NO BIG DEAL. Even if you have to spackle a few holes, that is as easy as spreading butter on bread, and you know you can do that. I believe in you. May your walls be happy and your holes be hidden behind frames like mine, ha!
Oh and if you have a lower TV/media cabinet situation and are left with a big bare spot on the wall above it all, here’s what we did to fill that space in our last house. So easy and so cheap! And for more framing/art ideas, we have a whole archive full of ’em, so have at it!
*This post contains affiliate links*
The post How To Create A TV Gallery Wall appeared first on Young House Love.
How To Create A TV Gallery Wall published first on
www.younghouselove.com


